| Author | Message | ||
Mike Thompson Experienced User Username: vroomrr Post Number: 12 Registered: 4-2019 |
I bought a 1975 Silver Shadow SRD-21318 (Saloon, Rolls, North America) for only $2500 USD. You know that can't be good right off the bat. The brakes don't work, not even the emergency brakes. And I have not a clue about the height control. The whole concept gives me the hebee gebee. It's sort of like air brakes with hydraulics. Anyway, I don't have the time or money to figure out the original system. So what I want to do is trash the whole system and only use the original calipers and nothing more. Then buy a booster and master cylinder and adapt them to supply the pressure to stop the RR. Here are the questions I don't know. It has accumulators on the engine, can they just be supplied with Castrol RR363 and they would stay happy? Does anyone know the psi to the calipers on this RR? What will happen to the ride (excluding the height control bit) if I use the whatever is there in the back as a shock? Will it just bounce like mad or be like a truck without shocks? Do you know of any examples where they have converted the brakes? | ||
Steve Emmott Prolific User Username: steve_e Post Number: 198 Registered: 11-2018 |
Mike I suspect if you tried any of that here in the UK you may be lucky to even get the car insured. Sorry this sort of work is way above my experience  | ||
h_kelly Prolific User Username: h_kelly Post Number: 279 Registered: 3-2012 |
https://m.youtube.com/watch?v=KMX8yJoLPUQ Type in "rollsroycenut" into youtube and Ronnie from California goes through shadow brakes. If you exclude the rear height control and if the springs and shocks are fine then you should be grand. The rear height control when working, only comes into play when weight is placed in rear of car ie luggage /person when the load is applied the height control rams lift the car to balance out this new load/weight. Mike if you are considering changing the brake system, you might consider a similar system to the old citroen ds, where a brake pump is worked on the engine pully which charges the accumulator. You might consider looking at hot rod cars to get ideas?. Keep us updated. | ||
Brian Vogel Grand Master Username: guyslp Post Number: 2813 Registered: 6-2009 |
Mike, I am aware of someone who has done this on two different cars, and asked him to share with me how he did it. Here are the "cleaned-up" version of his notes, along with the original. The warning at the end of the cleaned-up version should go without saying, but it's there to make it explicit. I received these notes over 8 years ago, and have not been in touch with Mr. Zaffiro since. I believe he was on the US forums, but might have been on rollsroyceforums.com. I do not think he posted this information on this forum way back when. Replacing SY Brakes - J Zaffiro Notes Cleaned Up Replacing SY Brakes with Conventional Brakes - J. Zaffiro Notes I have zero, zilch, nada experience with what he proposes, and am offering it for informational purposes for those who can understand what's being discussed better than I could at the time (or can now, even). This is an entirely AYOR (At Your Own Risk) proposition. At least the laws here in the US are not quite so stringent as they are in the MOT countries and conversions such as this can be done without running afoul of the law or safety inspectors. It sounds like you'd like to jettison anything related to the accumulator-type system, and that's what the above instructions actually do. Brian | ||
h_kelly Prolific User Username: h_kelly Post Number: 280 Registered: 3-2012 |
http://hotrodparts.com/rollsbentleyparts/ | ||
h_kelly Prolific User Username: h_kelly Post Number: 281 Registered: 3-2012 |
Mike this might be of interest http://www.code504.com/complete-brake-pedal-assembly-for-s-10-frame-swap-kit/ | ||
Mike Thompson Experienced User Username: vroomrr Post Number: 14 Registered: 4-2019 |
Brian Vogel I briefly looked at the information and liked what it was saying. But one guy said someone tried the underneath way, and tried to transport the RR, and the master cylinder caught on the ramp a tore the crud out of it. And here in Texas for inspections if it stops it passes. h_kelly That brake pedal is interesting, but it is an underneath type. I'll keep it in mind. | ||
Mike Thompson Experienced User Username: vroomrr Post Number: 15 Registered: 4-2019 |
h_kelly I looked at that site before .../rollsbentleyparts/ I could not find before where it says how, only we do it. We can't afford that.  | ||
Brian Vogel Grand Master Username: guyslp Post Number: 2815 Registered: 6-2009 |
Well, nothing should be mounted such that it could catch on a ramp. Even the bottom of the rat trap area, which is the lowest I'd go, is below the level of the calipers but well above where anything could normally grab anything. Brian | ||
Mike Thompson Experienced User Username: vroomrr Post Number: 16 Registered: 4-2019 |
h_kelly That number 1 video "rollsroycenut" is enough to scare the crud out of me. I first wanted to do an LS swap with a 6.0L LS GM truck motor (cheap motors) and if it would fit just keep the hulking throttle body. I bet it would/could fit the GM 400 transmission. I think that is more HP than a Corvette. That would get that boat down the road. Boy this is weird looking. https://www.youtube.com/watch?v=lT4R3hyB1oM . | ||
Mike Thompson Experienced User Username: vroomrr Post Number: 28 Registered: 4-2019 |
In the pdf of Brian Vogel is says: "You need to remove the entire original pressure generating system and �fluid routing� valves: pumps and accumulators." The pumps are cam driven and under the intake manifold. Can I leave the pumps and accumulators in place with a dummy supply of Castrol RR363 to keep them lubricated and functioning? (Less work.) | ||
Mike Thompson Experienced User Username: vroomrr Post Number: 29 Registered: 4-2019 |
I fully restored a 1964 Chrysler Imperial Crown the only vehicle in competition with the Rolls Royce. It is a massive car with two air conditioners, (you could get) a phone, record player, came with AM/FM stereo with reverb, in 1964 . I rebuild the entire brake system, it was entirely clogged with rust and old break fluid. So this is not my first brake rebuild. See my video: https://youtu.be/NYPwPVyGamo | ||
Brian Vogel Grand Master Username: guyslp Post Number: 2818 Registered: 6-2009 |
Mike, I see no reason why you could not allow the brake pumps, accumulator control valves, and accumulators to remain in place with a dummy reservoir of RR363 or YAK363. That being said, while the pumps would end up being "worked as usual" the ACVs certainly would not, as once pressure is reached and they go into bypass mode, with nothing drawing down the pressure (and nowhere for the accumulator pressure to be used [or leak a bit]) they'll be staying in bypass mode semi-perpetually. And that means that the accumulators would remain at full RR363 volume, too. I'd be far more inclined to do a pump loop alone if I were doing this, while removing the ACVs and accumulators and putting the ACVs into ziplock or other container storage, probably submersed in DOT3 fluid, but maybe not. Brian | ||
Mike Thompson Experienced User Username: vroomrr Post Number: 30 Registered: 4-2019 |
Brian Vogel How do I make a pump loop? I saw today that the two pumps have a 1/4 inch tube from them and I assume they go to the accumulators and on. What is behind the accumulators? Thanks | ||
h_kelly Prolific User Username: h_kelly Post Number: 282 Registered: 3-2012 |
Mike, just remembered I owned a 1966 Austin princess limousine, it was about 2 tone, a big lump of a car. Anyway it had a small enough master cylinder with the servo under the passenger seat side. The servo was connected to a vacumn tank which was filled by vacumn of exhaust manifold, sounds complicated but it was easy system to maintain. The reason I mention this is, the fact the Austin had its servo approx a meter away from the master cylinder just thought a similar idea may suit your setup? . | ||
Mike Thompson Experienced User Username: vroomrr Post Number: 32 Registered: 4-2019 |
h_kelly So does the servo act as a booster in some way? I know next to nothing about european cars, except I hated my BMW and could not get rid of it fast enough. https://www.youtube.com/channel/UClxX39MBTTz6Gw0bhPDM0LQ | ||
h_kelly Prolific User Username: h_kelly Post Number: 283 Registered: 3-2012 |
https://techtalk.mpbrakes.com/boosters/remote-mounted-brake-boosters-vacuum-booster Hi mike, servo/booster from this Web are remote so may be useful for your idea/plan ie. You may be able to use exist master cylinder with line to remote booster?. | ||
Geoff Wootton Grand Master Username: dounraey Post Number: 2073 Registered: 5-2012 |
I guess we would all have our own approaches to this project. Mine would be to remove all of the hydraulic parts - brakes and height control. A weekend's work for someone who is unfamiliar with the system. The most labor intensive would be the pumps - remove the carbs, inlet manifold and valley cover - make up some small aluminum plates as covers for the pump apertures. Not half as bad as it sounds. Cost = a few dollars for gaskets - against about a $ grand for selling all the parts on ebay. I would use a remote servo/booster unless an inline servo would fit within the rat trap, which I doubt. Having the servo protruding below the rat trap is just asking for a high manhole cover to forcibly remove it from the car, with complete loss of brakes. Just my tuppence worth. | ||
Mike Thompson Experienced User Username: vroomrr Post Number: 33 Registered: 4-2019 |
You know, I betting that when you open up the Brake Fluid Reservoir and see worm like things in there, that's not good. 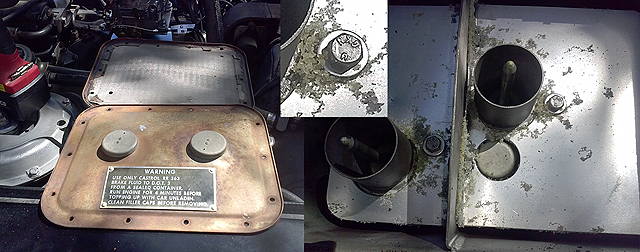 | ||
Mike Thompson Experienced User Username: vroomrr Post Number: 34 Registered: 4-2019 |
h_kelly and Geoff Wootton I am always excited in getting new knowledge and in the future (and h I really thank you for the tech info web page) on some custom builds I have planed, I can use this idea. But you act as if there is no room. I'm seeing lots of room. Just get rid of the Brake Fluid Reservoir and the left hand fan and duct and there is lots of room for an 11 inch booster with a dual master cylinder. What do you think? | ||
h_kelly Prolific User Username: h_kelly Post Number: 284 Registered: 3-2012 |
Hey Mike, looks like no brake fluid in same, remove the aluminium divider and clean same. Now easy on wire mesh as very fragile. Mike a good clean , some correct brake fluid ie rr363 ya might actually have brakes. You will need to bleed brakes correctly. Brian has posted a quick and easy way on how to bleed the brakes. | ||
Geoff Wootton Grand Master Username: dounraey Post Number: 2074 Registered: 5-2012 |
Hi Mike The problem is the brake pedal pivots from below the car. It enters through a hole in the floor. It is part of the rat trap, underneath(ish) the drivers seat. In your proposed scheme I would guess you would have to strengthen the bulkhead to take the new pedal, which would have to pivot from above. | ||
Brian Vogel Grand Master Username: guyslp Post Number: 2821 Registered: 6-2009 |
Mike, I strongly suggest you look at the Workshop Manual diagram that gives the schematic representation of the entire braking system. You can get a very good idea of how it works (basically) from that alone, and the color coding is quite helpful in terms of knowing what goes where. The system is not nearly so incomprehensible as many seem to think (and I had to learn it myself [with help here, of course] in my early days of DIY-ing, so it's far from impossible. The reservoir gravity feeds to both pumps, each one of which charges a single accumulator. The accumulator control valve is what flip flops between charge mode for the accumulator and straight return back to the reservoir when charging is not occurring. So when charge is not occurring you have, essentially, a reservoir to pump to reservoir loop, since the ACV is acting as nothing but a pass-through when not charging. The accumulator is what feeds all of the calipers and the height control rams (only one accumulator services both height control rams). Fluid is released to the calipers from the accumulator when the brake pedal is depressed and the distribution valves open to allow it. The brake system in these cars is incredibly easy to bleed because it's a positive pressure system with the pressure coming from the accumulators once they're charged, even if the car is not running. If a bleed screw is opened, and the brake pedal depressed, fluid will keep being pushed out to the caliper until the accumulator is depleted of brake fluid (and if you read the instructions previously mentioned, Flush and Bleed Your Silver Shadow/Bentley T Hydraulics/Brakes the Easy Way, you'll see that you restart the car if you see the pressure light illuminate, and it illuminates long before the accumulator is completely depleted of the RR363 pressurized by the nitrogen charge). The baffles in the reservoir are just sheet aluminum, and it is not any shock that there will be some surface corrosion (those worm tracks and blotchy patches) that occurs over the course of decades. They're easy enough to clean up with a bit of steel wool and elbow grease after being removed from the reservoir. What's really concerning, and all too common, is that if the fluid was not changed often enough the original filters tend to collapse as "gunk" builds up, and then the fine metal mesh develops holes. This was not a good design, and there are plenty of posts regarding alternatives. I thought Kelly Opfar had started offering improved filters for the reservoir as part of his parts line, but I don't see those on the parts webpage for British Tool Works. His is definitely a site worth visiting if you're working on a RR or Bentley and need special tools, and he rents a number of these as well as sells them at *reasonable* prices. And his work is beautiful. I had my last set machined by a local machine shop and applied the stainless steel mesh myself. The design I use will never collapse. (There are photos on this forum and rollsroyceforums.com.) Brian | ||
Mike Thompson Experienced User Username: vroomrr Post Number: 36 Registered: 4-2019 |
Well that worm like stuff is about a half inch high, it is not just surface corrosion it's like growth. And the Reservoir is dry, all signs, from my experience, of not good things. The emergency brakes don't even work. It more than likely needs a full plumbing job. Now I need to ask myself which am I going to choose in that case, the old complex system or a more modern safer and easier system to do? I'm going for the easy (cheaper) one. It comes down to, do you want a mechanical system easy to do and really nothing can go wrong, or a complex system that many things could go wrong and get you killed. I'm going with KISS Keep It Simple Stupid. I'm not going to trust that system without going through every part of it now. And it is just easier to replace it. A few adaptions a few lines and your done. If they had after market calipers I would not even keep them. But Thanks for the info. | ||
David Gore Moderator Username: david_gore Post Number: 3203 Registered: 4-2003 |
The scunge that was present in your reservoir confirms the fluid had not been changed for many years - had this problem when I acquired DRH14434 as my late father-in-law was too nervous to drive the car on the road in his later years for fear of being in an accident as the car was not insured. When I became responsible for looking after the car, my first job was to overhaul the hydraulic system so the car could be road-tested in safety. The reservoir was filled with a lime-green jelly that I named "Flubber" after the product of the same name featured in the Disney film "The Absent-minded Professor" [hold the jokes in reference to me as I have heard them all  ]. ]. Your discovery is exactly what I encountered and had to be solved by a complete tear-down and cleaning of the hydraulic system with acetone, reassembly with new clean RR363 [YAK363 was yet to be revealed]. A major job that could be done with the necesary tools however, as it was early days for me, I had the accumulators overhauled by a R-R/B specialist. The rest I did myself. Whilst a conventional braking system can be retro-fitted to a Shadow/Spirit, the rear self-levelling system is another problem entirely due to its role in keeping the rear drive shafts level regardless of the load in the car. If the shafts are not kept parallel to the underside of the car body, wear on the detroit trunnion assemblies will be increased by the misalignment. If the car is a "keeper" and not intended for passing on to an unsuspecting buyer, I suggest attention should be paid to inclusion of an appropriate self-levelling system to the rear drive train for this reason. As far as costs go, remember the creed of the restoration community, "the first cost is not always the end cost". | ||
Mike Thompson Experienced User Username: vroomrr Post Number: 37 Registered: 4-2019 |
Geoff Wootton Yeah I looked at that and it is a slight worry. It is like the old old cars in the USA. But they make brake pedals to go from the top not the bottom. I just now jacked it up and got under there to see the pedal and I guess the rat trap. (I'm guessing from all the lines coming out?) I looked and looked for a picture of a RR without the dash and could not find one. But I'm sure there is a way to convert the pedal. David Gore "detroit trunnion assemblies" Great, another something to worry about, I bought it to drive it, I hope. I planed before I bought it to get a chevy truck chassis and scrap the undercarriage as a LS Swap. If all else fails I could do that. At $2500 for the RR original is only an option. I could just scrap the rear end. Cadillacs have the same type of rear end. | ||
h_kelly Prolific User Username: h_kelly Post Number: 285 Registered: 3-2012 |
Mike, you may very well have room for the booster when you remove brake reservoir, in my mind I'm thinking RHD but your car is Left Hand Drive I guess?. The reservoir is in the same location on both lhd and RHD cars. In relation to the height control re rear of car, this can be fixed at a later date, if you choose?. The emergency brake even on a perfect example is pretty useless so don't be fooled by this. | ||
Mike Thompson Experienced User Username: vroomrr Post Number: 41 Registered: 4-2019 |
Thanks, But I still need some Info, like the PSI to the calipers? What is behind the accumulators, as does it need to be closed off with a plate so oil does not leak out etc.? And how do I make a pump loop that Brian Vogel talked about? | ||
h_kelly Prolific User Username: h_kelly Post Number: 286 Registered: 3-2012 |
When charged then accumulator pressure I think is about 2500psi some one will correct me. Mike look for the accumulators either side of engine http://www.scottsrolls-bentley.com/wp-content/uploads/brake-sphere-crop.jpg See photo open the bleed valve (safety warrantied as this might very well be 2500 psi gushing out) by opening bleed screw you are discharging the brake pressurised system, you need to do this to both accumulators. Once done this should be good just remember if you start engine this may well charge system or indeed damage same without brake fluid present. | ||
Brian Vogel Grand Master Username: guyslp Post Number: 2823 Registered: 6-2009 |
I would not even consider starting the engine in these cars with a dry brake/hydraulic reservoir. At the very least having fluid feeding to the pumps will give them the lubrication and cooling they must have to avoid overheating damage. It will also almost certainly trigger a partial (nowhere to total) "gunk flush" out of the ACVs and accumulators. I don't know why the concept of the pump loop is so difficult. The simplest version, avoiding the ACVs and accumulators entirely, is to run the output from the pumps straight back into the reservoir. That's what happens when the ACVs go in to return mode, but they don't have to be a part of the process. The reservoir would do the usual gravity feed to the pumps and the output from the pumps would just be pumped straight back to the reservoir. If one wanted the ACVs and accumulators to be involved then one would blank off the output from the accumulators to the brake/hydraulic system and the loop already exists. Once the accumulator charge pressure is reached the ACV switches to return mode and the fluid just goes from the pump through the ACV and back to the reservoir through the return piping/hosing. Personally, given the state of the car, I would not involve the ACVs at all until I had removed them and done a clean and rebuild, and the same for the accumulators. Heaven only knows what's developed inside of these that could "gum up the system" even further if dislodged. (Sort of like an embolism can cause a stroke in a human being). Contrary to much myth, I did not find the ACVs to be difficult to disassemble and rebuild at all. While the accumulator is dirt simple conceptually, it's a *%$#* to get apart in most cases and a far more trying experience than the ACVs have been, at least for me. Brian | ||
Mike Thompson Experienced User Username: vroomrr Post Number: 43 Registered: 4-2019 |
What I did for my 1964 Chrysler Imperial Crown, to rebuild the brake system, was to buy 25 feet of 3/16 inch brake steel tubing (Rhinohide p/n 3300PVF) and run it from the distribution block and master cylinder to all the brakes and rubber hoses. Not that fun but got it done. I need to clean the whole RR brake system and remember where everything goes, not good for me. (Speaking of Absent-minded Professors.) On my LHD RR I see lots of room on top to put the booster and master cylinder where the Brake Fluid Reservoir is and concerns are the air con lines and rerouting the blower motor for flow on the driver's side and where to put mounting brackets for the top pushing brake pedal. Any thoughts? h_kelly (and all) thanks again for the info. | ||
Mike Thompson Experienced User Username: vroomrr Post Number: 44 Registered: 4-2019 |
Brian Vogel When you're 63 somethings take awhile to sink in, I now get the concept, but the reservoir is going bye bye. I have yet to find diagrams that show where the fluid comes from and where it goes to, to dummy up the system (the loop) nor do I know what happens inside the reservoir. So it might seem straight forward to you knowing the system it is all but for me. I did not even know where the pumps were until (I think h_kelly posted) there was a link to a youtube video. I'm going from zero here. There has to be enough info to form a complete picture of what you are talking about. Which I can't find. Be a bit patient with me. I'm not stupid but very ignorant at this time. My landlady walked up to my RR and looked in and said I think this is the first time I have ever even touched a Rolls Royce, the same for me. I have only seen them in pictures before I bought one. (Seen a few old ones in LA CA. 1961 types) | ||
h_kelly Prolific User Username: h_kelly Post Number: 287 Registered: 3-2012 |
Check this Web site out http://www.rrsilvershadow.com/ETechn/Hydr/Algleiding.htm | ||
Robert J. Sprauer Prolific User Username: wraithman Post Number: 214 Registered: 11-2017 |
Mike ..If you are doing away with the RR system, remove the 2 hydraulic pumps at the top of the engine. You will need a special socket to do so. Then pull out the small push rods under the pumps and make blank off plates for the openings. You can then remove the reservoir tank, accumulators with valves and any plumbing. I would recommend Cunifer line since it is much easier to bend FYI. I would be interested in buying your old parts. I'm in NY | ||
Mike Thompson Experienced User Username: vroomrr Post Number: 46 Registered: 4-2019 |
Robert J. Sprauer Well I want to avoid taking off the intake manifold for now. I got enough work to do, so that is why I wanted to do the loop thing. But I have boxes of crap already. The shop owner who owned the car before was going to put a 4 barrel quadrajet on it, and took all the California emission stuff off. Leaving vacuum hoses coming and going to nowhere, a nightmare for me to figure out. IMHO the quadrajet faces the wrong direction and the reason I went with the Edelbrock (see my post). Send me a private message, your address and (text) phone number. I have the original hub caps (I'm not going to use) and soon all the brake parts (I don't think anyone would want the lines) etc. I was going to sell them on ebay a box full etc. but one full deal would work too. | ||
Robert J. Sprauer Prolific User Username: wraithman Post Number: 215 Registered: 11-2017 |
You can remove the pumps on top of the intake manifold without removing the manifold. I have sent you a PM | ||
Brian Vogel Grand Master Username: guyslp Post Number: 2824 Registered: 6-2009 |
I second the recommendation of CuNiFer (also marketed under one brand name of EZ-Bend) brake line. It is so much easier to work with, and it is about as close to corrosion resistant as anything can be. A much better option than mild steel. By the way, Mike, I'm not all that much younger than you are, nor am I trying to be snarky toward you. That being said, there are a number of resources that have already been mentioned that allow someone to get a quick snapshot of the function of the RR/Bentley braking/hydraulic system. Even if you intend to rip it out, it helps to have this knowledge so you know what you're ripping out and what can remain (e.g., the calipers). Here is a link to my "brakes/hydraulics collection" that is posted on rollsroyceforums.com (and some of it here, but it's collected there): SY Brakes & Hydraulics - Diagnostics and Maintenance Paul Yorke has a great video of an actual SY1 series rat trap in action: https://www.facebook.com/Paul.J.Yorke/videos/10155832453464371/ Tord Samdal has done absolutely great animations of the Hydraulic system and the AC system, and you can find the installers for those on my Google Drive: Tord Samdal Animations The English version of Marinus Rijker's Silver Shadow hydraulics page is here: http://www.rrsilvershadow.com/Emenu/hydr.htm All of these resources are worth taking a look at, but for the best "quick and dirty" yet thorough look at the SY brakes and hydraulics system I say look at the Samdal animation. Brian, who will warn you that no matter what you intend to do with these cars, you really are well served by doing your homework by looking in the appropriate section of the Workshop Manual (available in the SY Motorcars Section of the RROC-Australia Post-War Technical Library. It lets you wrap your head around things better, even before asking questions, and can help you formulate your questions better | ||
Mike Thompson Experienced User Username: vroomrr Post Number: 47 Registered: 4-2019 |
Brian Vogel Yeah would be nice to process all this information but I live in a town that anything not licensed is likely to be towed away. All my bays are full. So I am working all day trying to get it at least running so I can swap out the Cadillac for the RR. Right now I am downloading rrtechnical.info 04-1 Silver Shadow, Bentley T-Series and Derivatives Workshop Manual. I just downloaded your "Rolls-Royce and Bentley Parts, Repair, Restoration & Other Resources" from the google drive, but again I am under time constraints and have little time for processing. To completely form the concept of what you are talking about without reading reams of paper that I don't have time for. If you want to be like a physics professor and expect me to go to class for 8 years when I only need a little information to publish my papers, fine. I only need what I asked. But then again I thank you very much for your help. | ||
h_kelly Prolific User Username: h_kelly Post Number: 288 Registered: 3-2012 |
Mike just to say all the calipers will most definitely need resealing if not new pistons. So whatever system you go with, it's something you can probably start working on. When resealing you can decide on rr363 dot 3 or mineral brake fluid as both types can be purchased from memory?. | ||
Vladimir Ivanovich Kirillov Grand Master Username: soviet Post Number: 1338 Registered: 2-2013 |
Mike, welcome to the forum and especially welcome to the black hole of Rolls Royce braking and hydraulic systems upon which is an invisible SOVIET sign "abandon all hope, those who enter here". A $2,500 USD Shadow is indeed your irrevocable ticket into hyper light speed travel of the quark. Stay and be with your buddies and pals as we venture into the infinite world of 1970s English engineering. Do not be fearful of eternal custodianship of which there is no escape from continual study and diabolical wallet trembling cash oblivion. Restoring your braking system to original Rolls Royce standard will give you much more submissive pleasure than hacking the car up by modifying its intense crack smoking complexity to make it brake like my beloved 1976 Cadillac Fleetwood. The evil Lady of Ecstacy beckons you....there is no mistake. Specialist tools are available from Kelly in Utah to remove the two hydraulic pumps from the engine and you can be certain that when you pull them out and inspect them that gear driven aviation standard camshaft will greet you with a cheery English smile. | ||
Mike Thompson Experienced User Username: vroomrr Post Number: 48 Registered: 4-2019 |
h_kelly Somewhere I read, once you get rid of the old system you can use dot 3, because rr363 has lubricants for the pumps. Flying Spares have them for sure. Thanks https://www.flyingspares.com/shop/rolls-royce-bentley-shadow-t1-t2-corniche-mpw/silver-shadow-t-1-2-brakes-pads-discs-fluid/front-brakes-pads-discs-calipers/cars-with-solid-front-brake-discs-rotors/front-brake-calipers-for-solid-brake-discs/front-brake-caliper-seal-kit-cd5339p.html | ||
Mike Thompson Experienced User Username: vroomrr Post Number: 49 Registered: 4-2019 |
Vladimir Ivanovich Kirillov Ok you might be more scary than the one that said I bastardiszed and victimized my RR. But I do often use the Riemann and Ricci Curvature Tensor of the Einstein's Field Equations for the boltzmann hydrodynamics in a 4 dimensional quantum chromodynamics simulation of the self generating gravitational field of the hydraulic system of a Silver Shadow in a timelike loop into the past. | ||
Vladimir Ivanovich Kirillov Grand Master Username: soviet Post Number: 1339 Registered: 2-2013 |
Ahem, Mike, and precisely. A 1975 Shadow is an automotive creation built to last hundreds of years just like Marx's gift to humanity give or take millions of " the enemy of the people ". Yes sir ree Bob, and the great man said, the quality will be appreciated long after the price is forgotten. Lenin, as did Brezhnev, owned a Rolls Royce. For your sake and the sake of other Texans remove all flexible brake hoses from the car and have them refabricated by your local pipe specialist as they are croaked. Remember the Lady on the grill is watching you! | ||
Mike Thompson Frequent User Username: vroomrr Post Number: 51 Registered: 4-2019 |
If you take out the LHD Brake Fluid Reservoir and get rid of the squiggly bits, along with the duct and fan. There is (I think) lots of room for the Booster and Master Cylinder. What do you think? 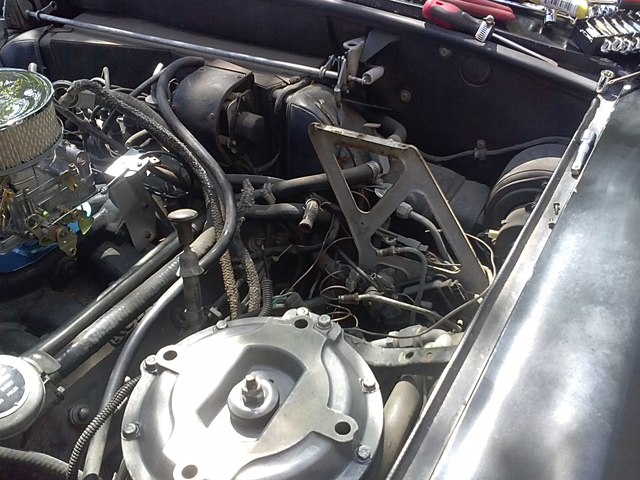 | ||
Brian Vogel Grand Master Username: guyslp Post Number: 2825 Registered: 6-2009 |
Mike, I'm out. I'll join back in once things slow down. It is impossible to maintain these cars "as is" without taking the time to digest what's what and that also applies to modifying them. Just given the picture you've posted you will not have a vehicle that is independently mobile (or at least not able to stop) anytime soon. Rushing this, regardless of the direction you choose to go, is, very simply, a grave mistake. Brian | ||
h_kelly Prolific User Username: h_kelly Post Number: 289 Registered: 3-2012 |
https://engineswapdepot.com/?p=28212 Mike, check out the second photo it may be helpful re master cylinder location | ||
Mike Thompson Frequent User Username: vroomrr Post Number: 53 Registered: 4-2019 |
Brian Vogel Well sorry to hear that, but I figured instead of answering the questions that you started by saying make a loop, you would tuck and run. I don't need it to stop to get it into the garage, I do need to get it running. If this need offends you, so be it. I live in the real world not in theory. | ||
h_kelly Prolific User Username: h_kelly Post Number: 290 Registered: 3-2012 |
http://www.bentleyspotting.com/2015/01/just-add-another-quarter-of-litre.html Picture 5 master cylinder, though rhd | ||
David Gore Moderator Username: david_gore Post Number: 3211 Registered: 4-2003 |
I have a simulation of the Shadow hydraulic system that shows how the entire system works including fluid flows. My problem is getting a email-capable version to post and I have not found the original installation file so far. Will see what I can do tonight - in the meantime, if anyone has an accessible copy of Tord Samdal's simulator installation file, please post it in this topic. | ||
Mike Thompson Frequent User Username: vroomrr Post Number: 54 Registered: 4-2019 |
h_kelly I like the booster master cyl. and really nice paint job on the RR, I don't like it bumperless. I have the rubber bumpers I like (I think) the older chrome ones. My landlord keeps coming by to see if I am alive. I've never understood why? 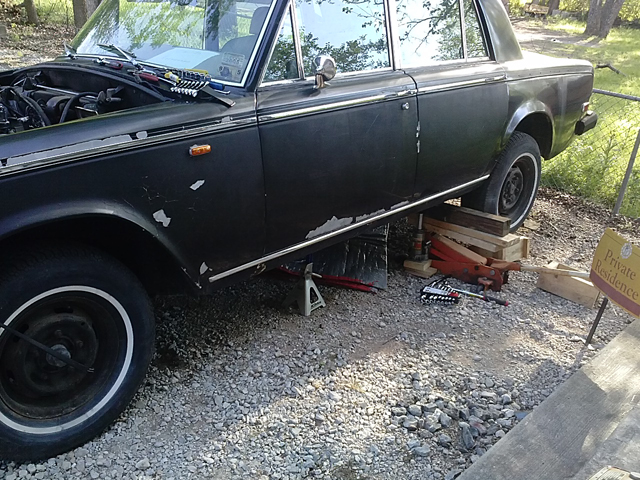 | ||
David Gore Moderator Username: david_gore Post Number: 3213 Registered: 4-2003 |
Mike (and anyone else that is not aware of this simulator) , After some difficulty, I have found an active download site for Tord Samdal's Hydraulic Simulator plus a PDF file that shows you what the simulator looks like and what it does...... Description: http://www.rrsilvershadow.com/ETechn/Hydr/Alganim.htm Download Page: http://www.samag.no/silvershadow/ Hope you find this interesting............... | ||
Mike Thompson Frequent User Username: vroomrr Post Number: 59 Registered: 4-2019 |
Today I went to my local Pick N Pull and pick and pulled the below items off of a Dodge Mark III SE Van, big honking van. I got the booster master cylinder, brake pedal and big bolt it rides on, and 2 sun visors that are trashed on the RR. All for only $40 USD, not bad! David Gore: Interesting. h_kelly: I did not see any master cylinder, now that is bastardiszing that Rolls, I do have my limits. Engine and brake swap is one thing just ripping it up is another. I think.  | ||
Mike Thompson Frequent User Username: vroomrr Post Number: 60 Registered: 4-2019 |
Oh and if you are wondering the paint plan for this RR.  | ||
h_kelly Prolific User Username: h_kelly Post Number: 291 Registered: 3-2012 |
Happy days Mike, is that from a auto trans or stick?. Not that it really matters just appears to have a lot of lines?. Question the front wheels have 2 calipers per wheel, is it you intention of join both calipers and take each side/line from the master cylinder ie each wheel having its own line per wheel Like wise will you join both pistons in rear caliper in sequence ie both pistons operational sequentially(they are plumbed on separate lines currently ie one on high pressure one on low pressure) | ||
Mike Thompson Frequent User Username: vroomrr Post Number: 61 Registered: 4-2019 |
h_kelly Most all vehicles made in the USA are automatic, this one is as well (the van). OK maybe Brian Vogel had a point. I did not know "they are plumbed on separate lines currently ie one on high pressure one on low pressure". What is the point of the high and low, and could they just both be high? And did try to ask what is the PSI to the calipers and yours was the only answer. I would have hoped someone else would have pointed that out. Maybe they don't like me doing this in the first place.  | ||
h_kelly Prolific User Username: h_kelly Post Number: 292 Registered: 3-2012 |
High pressure is like having the booster 2500 psi, both front brakes are high pressure, both from different accumulators ie lets say system 1 high pressure one set front calipers and one set of pistons (of dual caliper) rear. System 2 ie accumulator 2 high pressure operates second set of front calipers and the height control rams System 3 if accumulators fail ie no engine power, the second set of pistons on the dual caliper are operated on low pressure (just master) cylinder. System is like an emergency back up, back up . | ||
David Gore Moderator Username: david_gore Post Number: 3214 Registered: 4-2003 |
The low pressure circuit was purely to give a "normal" brake pedal feel to R-R/B owners who were only used to normal hydraulic brakes. The system was licensed to RRMC by Citroen however Citreon vehicles using the system did not have any form of pedal feedback through back pressure - there was just a round brake button on the floor and drivers had to learn how to use the brakes by experience [and for new drivers, flat-spotted tyres from over-braking ]. The low-pressure circuit was deleted on the Shadow II and replaced by a rubber cushion in the "rat-trap" to provide some feedback to new drivers. As a matter of interest, you could not rely on the low-pressure circuit being able to stop the car in the very rare instance of complete loss of the high-pressure system which is configured as a conventional dual braking system for this reason. As far as mentioning the presence of the high-pressure hydraulic systems in the Shadow, we all would have assumed you would have researched the mechanical aspects fof the car before planning any modifications. British engineering and practice is different from the USA, also Europe and Japan/Korea. Here in the Land of Mad Max when we had a car industry, we utilised technology and innovations from all parts of the world until accountants started to think they could design and manufacture cars and the outcome is now part of our history. Cars designed and manufactured elsewhere in the world have a sad and sorry history of failing to provide reliable and appropriate cars to suit our climate and conditions. It took Ford 4 models to get their Falcon first released in 1960 right for Australia and gain a reputation to match the competing GM Holden which was first released in 1948. Chrysler had the same experience with their US Valiant however this never sold as well as the Falcon for a number of reasons. | ||
h_kelly Prolific User Username: h_kelly Post Number: 293 Registered: 3-2012 |
This joint might prove invaluable for rear brakes?.https://www.ebay.ie/b/Car-Brake-Pipe-Fittings/63279/bn_60793730 ie the 3 way port | ||
Mike Thompson Frequent User Username: vroomrr Post Number: 64 Registered: 4-2019 |
Ok I am trying to get my head around this brake system (as weird and over complicated as it is.)(Rub Goldberg:intentionally designed to perform a simple task in an indirect and overcomplicated fashion.) The Silver Shadow has six brake calipers. The front wheel brake discs are provided with two calipers each that contain one set of pistons. The rear wheel brake discs have one caliper containing two separated sets of pistons. In the beginning the two rear sets of pistons were of different sizes. Later cars have pistons of the same size. The pistons in the piston chambers in the calipers are protected from dirt by a dust seal. The hydraulic fluid flows to all calipers through internal channels drilled in the caliper houses. When the brakes are activated the hydraulic pressure will increase causing the pistons to move in the direction of the brake disc. The braking pads between the pistons and the disc will be forced against the disc surface. This will cause friction on to the disc causing the car to slow down. Brake pistons are made of cast iron. The surface is covered with chrome. These materials are used in order to prevent the pistons from overheating. The pistons are activated by two different brake distribution valves. These valves are connected to the brake pedal. If the brake pedal is operated the valves will open, allowing the high pressure fluid to activate the pistons. Because there is no feedback from this action, a master cylinder is connected to the brake pedal in order to get some feedback. In later cars, when the master cylinder was omitted, a rubber stopper provided the feedback in the braking pedal. The brake distribution valves and the master cylinder are mounted in the brake actuation box. This box is fitted under the car right beneath the driver's seat. http://www.rrsilvershadow.com/ETechn/Hydr/Compbrcal.htm Please explain just one caliper on the front. I think in pictures, so I need enough information to make that picture, sorry. | ||
Mike Thompson Frequent User Username: vroomrr Post Number: 65 Registered: 4-2019 |
David Gore Well ignorance is an evil bitch (female dog). I assumed a caliper was a caliper. In my wildest imaginings did I think Andr�-Gustave Citro�n would come up with such a Rube Goldberg design. I apologize for thinking like an American. All our systems are more or less the same and logically simple. Having said that, yes, I should have invested some research on this alien planet called England (engineering). And thanks for saying Holden is GM I wondered about that. When I was in England the first time, I saw these odd cars going around with Ford on them and wondered what the heck is that. Now I have to backtrack. | ||
Mike Thompson Frequent User Username: vroomrr Post Number: 66 Registered: 4-2019 |
h_kelly Thanks for you info and continued help. | ||
Mike Thompson Frequent User Username: vroomrr Post Number: 67 Registered: 4-2019 |
On the Silver Shadow II are the brakes calipers different, as only one high pressure going to the pistons? And if so, are they compatible with the Silver Shadow I (they will fit)? | ||
Mike Thompson Frequent User Username: vroomrr Post Number: 68 Registered: 4-2019 |
On The link I gave above, I looked at this system before I decided to trash it, so I did some research. But I do not see anything about a low pressure part of it. From this I concluded a caliper is a caliper. I see this Citreon system as an unsafe system ("you could not rely on the low-pressure circuit being able to stop the car in the very rare instance of complete loss of the high-pressure" David Gore). So why can't you just use the high pressure system to stop with? | ||
Robert J. Sprauer Prolific User Username: wraithman Post Number: 220 Registered: 11-2017 |
David explained a few things. The front calipers are Girling and have metric fittings. The actual brake master cylinder system is lo pressure compared to the 2250 generated by the hydraulic pumps and hence stored in the accumuators. The reason the systems are split: 2 calipers on each fron wheel for example is in case of failure of a brake circuit system and you will still have stopping power with the other circuit. You could bridge both front calipers once the master is in place and you may have to figure a proportioning valve to balance the braking between front and rear. | ||
Steve Emmott Prolific User Username: steve_e Post Number: 208 Registered: 11-2018 |
Mike.......just a couple of points as I can see you are quite experienced and doing a fantastic job keeping an old gal alive.... Calliper pistons can also be stainless steel as well as cast and chromed. Indeed all my cars have been updated to stainless steel calliper pistons albeit the Ferrari I had to have these made at work as they were not available off shelf. Regarding the low pressure hydraulics I believe possibly due to the fact it stopped the old 'nodding dog' problem as most of these cars were chauffer driven so allowed for much softer braking. We used to look after many 'Royals' and a lot of training was done keeping a mug of water on the dash and driving/braking without spilling it. Of course we are British and you would find it hard to understand  | ||
Mike Thompson Frequent User Username: vroomrr Post Number: 69 Registered: 4-2019 |
Robert J. Sprauer I didn't know what a Girling was see https://www.hemmings.com/blog/article/girling/ "You could bridge both front calipers once the master is in place and you may have to figure a proportioning valve to balance the braking between front and rear." That is useful information, thank you very much. (Oh and metric on this car, it seems some bolts are some not, and some it seems they just made it up as they went along, nothing fits not SAE nor metric.) | ||
Steve Emmott Prolific User Username: steve_e Post Number: 209 Registered: 11-2018 |
Mike there should be NO metric. They would be UNF and the smaller BA. There is a close similarity though to metric in some cases regards thread pitch albeit slightly different regarding thread angle and the metric can in some cases be used OK. With respect to any UNC then the metric is not a good resemblance. I over saw the complete scrap out of UNF, UNC and BA at Jaguar/AM when we decided to go Metric throughout. | ||
Brian Vogel Grand Master Username: guyslp Post Number: 2826 Registered: 6-2009 |
I haven't yet encountered a single metric item on either of my SY2 cars, and I definitely believe there would be none even further back on the SY1s. I don't think that metric began creeping in until the very late SY2s (if then, and partial) or the SZs. These things were tooled before metric became the world standard (except in the US, which has definitely given in as far as manufacturing goes, but not otherwise). I'd have to go check, but I can say that one of the metric flares does work just fine at the end of the brake lines. It's close enough to seal and stay sealed. But it's been several years since I did those flares so I can't recall the specifics. I'm sure I discussed them here, though. Brian | ||
Steve Emmott Prolific User Username: steve_e Post Number: 210 Registered: 11-2018 |
As usual Brian you are absolutely correct. Another point to also bear in mind is bolts are graded re tensile properties and this is usually identified typically as being 8:8 10:8 and so on. Many times I have seen the wrong bolt fitted just because the thread matched. | ||
Robert J. Sprauer Prolific User Username: wraithman Post Number: 221 Registered: 11-2017 |
All of my fuel injection components are metric due to it being Bosch. The front calipers in my car have metric bleeders. My car was manufactured in 1981 alongside the Spirits and Spurs at the time. Even though it is classified as a 1980 it did not arrive in Beverly Hills until 1981. All of the RR hardware is indeed UNF and the smaller bits are BA | ||
Vladimir Ivanovich Kirillov Grand Master Username: soviet Post Number: 1343 Registered: 2-2013 |
Now I must be Camargueish just out of total confusion created not in Crewe but Texas. Somewhere I read that the Camargue was the first Rolls Royce ever "designed" in metric. What does designed mean???? Could it be that the tea drinkers in Crewe designed the Camargue in metric and built the bugger with a combination of imperial and metric parts? Could that really mean that the most expensive car on the planet in 1977 has metric and imperial nuts and bolts holding it together? Or is it simply the case that the journalists got it wrong again? The angle of the tilt forward of the radiator has in a number of books been recorded in different angles. What is BA??? I have one BA spanner? Its the only BA spanner I have ever seen. Obviously, my new digital vernier calipers are going to get a work out when I return to my country lair. I am envisioning three charts: imperial, metric and BA whatever that is and then measuring each bolt/but with the verniers to work out what spanner to use. Also, did RR fabricate a completely different intake manifold for a run of less than 600 Camargues ever made? The build sheets from Hunt House state it was built with a Solex but now it has a massive 4 barrel Holley on it. | ||
Robert J. Sprauer Prolific User Username: wraithman Post Number: 222 Registered: 11-2017 |
British Association screw threads, or BA screw threads, are a largely obsolete set of small screw threads, the largest being 0BA at 6 mm diameter. They were, and to some extent still are, used for miniature instruments and modelling. They are unusual in that they were probably the most "scientific" design of screw, starting with 0BA at 6.0-mm diameter and 1.0-mm pitch and progressing in a geometric sequence where each larger number was 0.9 times the pitch of the last size. They then spoiled this by rounding to 2 significant figures in metric and then converting to inches and rounding to the thousandth of an inch. This anticipated worldwide metrication by about a century. The design was first proposed by the British Association in 1884[1][2] with a thread angle and depth based on the Swiss Thury thread,[3] it was adopted by the Association in 1903. The Thury thread was different in that it went both positive and negative all the way up to a size of -20 which was 75.2-mm diameter by 8.23-mm pitch. The Thury numbers were rounded to three significant figures. The Thury thread form had the crests rounded at {\textstyle {\frac {1}{6}}p} {\textstyle {\frac {1}{6}}p} and the roots rounded at {\textstyle {\frac {1}{5}}p} {\textstyle {\frac {1}{5}}p} so the thread angle was close to 47.5� but not exactly. This was simplified in the BA thread definition by defining the thread angle to be 47.5� exactly and the thread form to be symmetrical with a depth of {\textstyle 0.6p} {\textstyle 0.6p}. The British Standards Institution recommends the use of BA sizes in place of the smaller British Standard Whitworth (BSW) and British Standard Fine (BSF) thread screws (those below 1/4 inch).[4]:4 Generally, the 0BA size was dropped in place of 7/32 inch BSF in assemblies that included larger fasteners, however, in smaller equipment that was primarily electronic/electrical the 0BA size would typically be used in place of the BSF or BSW screw where it was the largest size required. BA threads are still used in some precision instruments, such as optics and moving-coil meters, relays etc. A 2BA thread is used to connect the metal barrel of a dart to its shaft � as such, it is one of the few common uses of this thread in North America. | ||
Robert J. Sprauer Prolific User Username: wraithman Post Number: 223 Registered: 11-2017 |
...and finally.. The thread angle is different from that used by Whitworth (55�), US Unified threads (60�) and ISO Metric (60�) so BA fasteners are not properly interchangeable with Whitworth or metric ones even when the pitch and diameter are similar enough that they can be screwed together (e.g., although 0BA appears similar to M6x1mm, the male and female surfaces do not mate properly for bearing a load). Standard BA sizes are defined between 0BA and 22BA. The even sizes are much more common and the very small sizes are not used very often and other standards tend to be used (e.g., NHS). | ||
h_kelly Prolific User Username: h_kelly Post Number: 294 Registered: 3-2012 |
In relation to the brake balance situation, may I ask. Say the front calipers and the two trailing front calipers are connected directly to them master cylinder , would this not surfice?. In other words 1. If the master cylinder has 3 exit ports?. 2. Use two ports(off master cylinder) for the front calipers ie (1,)for both front calipers and (2,) one for both trailing calipers 3. That leaves one exit port for both rear calipers, if you use a T piece union to split fluid from upper to lower piston?. Have you thought how you might generate the vacuum for the booster, are you considering a 12 volt electric type or mechanical off engine pull? . | ||
Brian Vogel Grand Master Username: guyslp Post Number: 2827 Registered: 6-2009 |
Vladimir, I find it well nigh impossible to believe the Camargue was "designed in metric." It was, for all practical intents and purposes, a re-skinning of the standard issue SY series cars. Its claim to fame was the Pininfarina body (almost certainly designed in metric - but to fit something that wasn't) and depending on the exact vintage it could have other metric bits and bobs here and there, but certainly not everywhere. Even the way the Workshop Manual is configured suggests that there are "certain exceptions" for the Camargue line, but they have far more in common under the skin with their SY brethren. It gets even messier since the Camargue and the Corniche were both skinned on to early SZ chassis as well. I constantly have to ask when dealing with Corniche of a certain vintage whether it's an SY Corniche or an SZ Corniche (wearing SY clothing). Brian | ||
Mike Thompson Frequent User Username: vroomrr Post Number: 70 Registered: 4-2019 |
I didn't know I was going to start a bolt halabaloo. Well I learned stuff. h_kelly Despite the rat nest of lines and blocks at the side of the Master Cylinder, there is only two ports. I would draw the vacuum off the intake manifold. I can do as Robert J. Sprauer said "You could bridge both front calipers once the master is in place and you may have to figure a proportioning valve to balance the braking between front and rear." On my Dodge truck the master cylinder setup is the same, albeit the booster is much larger. One line ultimately goes to the front, the other to the back. May make life easier. | ||
Mike Thompson Frequent User Username: vroomrr Post Number: 71 Registered: 4-2019 |
Steve Emmott Sometimes post don't show up until after the fact. Thanks for the kind words. As far as understanding "mug of water on the dash and driving/braking without spilling it". See the movie "Driving Miss Daisy" with Morgan Freeman. | ||
Mike Thompson Frequent User Username: vroomrr Post Number: 73 Registered: 4-2019 |
I emailed rollsroycenut (youtube) about what master cylinder to use etc. he replied: Hello Michael, Sounds like you bought a parts car that should be dismantled. I have never and will never convert the brake system on a Silver Shadow. I know people have so you will have to seek them out. Sorry to say, you are on your own. Good luck! Ronny Shaver Ronny's Garage 1111 West 1st St. Santa Ana, CA 92703 714-953-0896 ronnysgarage@gmail.com | ||
Mike Thompson Frequent User Username: vroomrr Post Number: 74 Registered: 4-2019 |
On the front do both calipers (per wheel) stop the car or just one? | ||
h_kelly Prolific User Username: h_kelly Post Number: 295 Registered: 3-2012 |
Mike, all of the front calipers on a standard shadow are on the high pressure system ie 2500psi. By standard I mean factory spec.,without modification. Mike is it possible to get the Rolls insured post brake modification?. Here in the Republic I'd say its difficult if not impossible to get a reasonable insurance quote for modified cars in general?. Would you need the work certified by an engineer, just curious?. | ||
Steve Emmott Prolific User Username: steve_e Post Number: 212 Registered: 11-2018 |
This would be same problem in UK re trying to get a car insured when modifications like this are undertaken as I said in my first response. I spent a lot of time in Michigan Detroit with Ford and Roush Engineering. Every Wednesday we used to go to a place called Wooly Bullies. It was a meeting for custom and modified cars and wow when you see what they did to them obviously insurance is not as difficult to get in USA. I declared my MGB as modified wheels as there is a specific question asking if the wheels are original. They stuffed me for a 10% increase on the insurance price. I would have thought new wheels AND supplied through the MG dealers would be safer than any old steel rostyles ones. That's how bad it is in UK. If you don't declare modifications here in UK and have an accident the assessors are quick to refuse any payouts. I hate to think what would happen if someone brought a private law suit in the event of a third part injury. 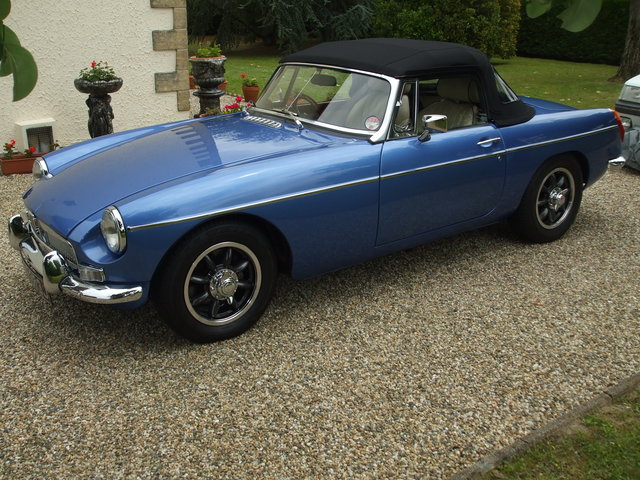 Keep up the good work though Mike we can't wait to see the finished job | ||
h_kelly Prolific User Username: h_kelly Post Number: 296 Registered: 3-2012 |
Like Steve, I'm looking forward to seeing/hearing of end product. P's the body work on your car looks amazingly good ,no sign of the dreaded tin worms. | ||
Vladimir Ivanovich Kirillov Grand Master Username: soviet Post Number: 1344 Registered: 2-2013 |
Insurance companies worldwide are conniving swine. I know their tricks because as a lawyer with a number of very powerful law firms for many years I acted for them. The reason they spend millions on advertising that they can be trusted is that they can't be and they know it. Never trust what they say verbally and demand what they say in writing. Their waffle over modification is a simplistic move to increase their profits. If you truly believe they are nice and can be trusted book a consultation with your psychiatrist immediately. | ||
Mike Thompson Frequent User Username: vroomrr Post Number: 75 Registered: 4-2019 |
I have never even heard of an insurance company ask have you modified your car. Of course we modify our cars, isn't much use in having one if you can't make yours. The problem is the UK is an old country and they have had lots of time to impose tyranny upon their victims. That why the yanks seceded. The average insurance worker drives a beat up car. I'm betting that is not true in the UK. Once you buy a car and title it you can pretty much so do what you want to it, as long as it will pass inspection. I will take it to a local inspection station they look it over (tires) turn on the lights, blinkers, horn, drive it a block and stomp on the brakes. If it stops you passed. That's it. If you are getting liability insurance it may be as low as $50 a month. I have never had a wreck so I just get liability. I have been driving since I was 10 years old. | ||
Mike Thompson Frequent User Username: vroomrr Post Number: 76 Registered: 4-2019 |
Steve Emmott On the MGB do know what color and brand that is? Nice color, I probably would want a few more drops of black in it to darken it just a touch. | ||
Steve Emmott Prolific User Username: steve_e Post Number: 214 Registered: 11-2018 |
Mike it is BMW M3 Estoril Blue Metallic base coat then clear laquer. The car was built from just a title V5 logbook in 2001...not even a nut or bolt or ignition key... just a bit of paper. Apart from a remanufactured engine gearbox and back axle every other part including a brand new bodyshell was new supply....... Worldwide MG is supported well with aftermarket parts and not at silly prices either. | ||
Mike Thompson Frequent User Username: vroomrr Post Number: 77 Registered: 4-2019 |
These cars might have been modified a bit, and when the are finished they still can get liability insurance. https://www.youtube.com/watch?v=nMBFm0xq0Ac | ||
Steve Emmott Prolific User Username: steve_e Post Number: 215 Registered: 11-2018 |
Mike is that a periscope sticking up from the front of that Corvette monkey  Not sure how else the driver could see very much. That would not pass our UK laws let alone get insured. We have a basic law regarding anything restricting the view of the driver. You could put chariot knives on the side of the wheels but nothing in the view of the driver that restricts vision. Even a chip on the windscreen if it is in the drivers vision is a fail. Impressed with the standards of cleanliness at that workshop not often seen nowadays unless you come to my garage that is.  | ||
Mike Thompson Frequent User Username: vroomrr Post Number: 78 Registered: 4-2019 |
I looked out my window and this was across the street. You can bet it does not have the original brakes. Yet as you can see it has a regular tag on it. (Oh and my truck window is broken and it passed. Chip baaaaahahaha.)  | ||
Steve Emmott Prolific User Username: steve_e Post Number: 216 Registered: 11-2018 |
Mike I know what you guys in the wild west get up to,,,, or should I say get away with on cars. As it got dark at Wooly Bullies and the cars started to leave they would pull the choke on the carbs switch on some glow plugs fitted in the rear silencers tail pipes and drive down the road as rear end flame throwers. Somewhere in the list I suppose it is written in your amendments.......''though shalt have the right to automotive ingenuity'' of course it could have been mis-spelled and should have read ''automotive insanity''  | ||
Mike Thompson Frequent User Username: vroomrr Post Number: 79 Registered: 4-2019 |
Look what joy I just found in the rear floor board. I guess the last owner thought since we don't have brakes let's use the Fred Flintstone method. When the Queen Mother gets in the back, she becomes the designated brakes. Stop sign up ahead, throw down the feet old girl, throw down the feet. Don't spare the leather mum! WE are not amused, what what! https://uploads.tapatalk-cdn.com/20160621/24455ae5abf9b6fc31a210ef2e16ea94.jpg | ||
Mike Thompson Frequent User Username: vroomrr Post Number: 80 Registered: 4-2019 |
Woops no picture. 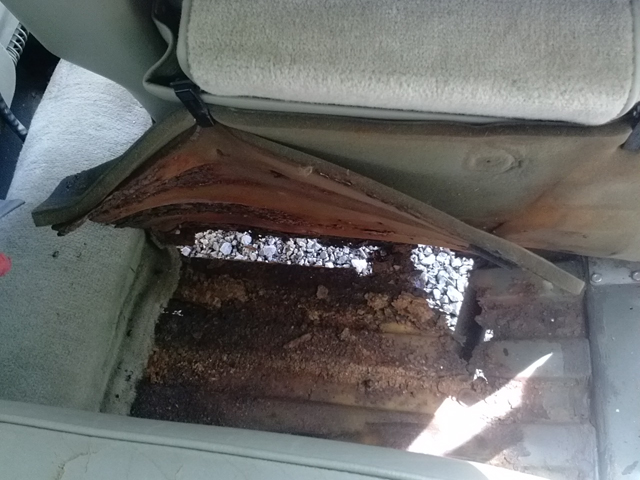 | ||
Steve Emmott Prolific User Username: steve_e Post Number: 217 Registered: 11-2018 |
Mike the Queen Mother passed away a few years back. That is bad news but replacement panels are available but you should be able to fabricate something. | ||
Mike Thompson Frequent User Username: vroomrr Post Number: 81 Registered: 4-2019 |
Oh its a sad day, I thought she would out live us all. I'm betting Prince Charles is thinking the same thing about mum. (I was thinking Elizabeth II was called that too, my bad.) | ||
h_kelly Prolific User Username: h_kelly Post Number: 297 Registered: 3-2012 |
Was the car originally from you home state Mike?. Ya can get new floor pan for 180stg pounds plus delivery. | ||
Robert J. Sprauer Prolific User Username: wraithman Post Number: 224 Registered: 11-2017 |
I have welded several of these and they are available as repo and look exactly the same. They can be obtained for the front only or the whole side.Fortunately they come out along factory seams. I have repaired to concour standards. Make sure you apply seam sealer and epoxy primer then undercoat the bottom side. | ||
Mike Thompson Frequent User Username: vroomrr Post Number: 82 Registered: 4-2019 |
Well as you might have guessed I'm not a rich guy. I made a decent living as a bank information broker until the USA screwed it up and told the Swiss they have to tell on Americans stashing away their money in a Swiss Bank account. And dried up my web site to help open a private bank account. How to move to another country, which countries are the easiest to move to and get citizenship. Which banks are the best, which ones respond to you with good customer service. And offer the best deals as credit cards and debit cards. Which other countries have private accounts as well. Just an all around way to keep as much of your money as you can, and tell Uncle Sam to keep his hand out of your pocket (legally). Que sera sera. So 180 pounds is $235 USD, remember I paid only $2500 USD that's only 1900 pounds. I don't know the history other than it was bought in Dallas at an auction for $10,000 USD, sat at a shop for 11 years until the owner died. The shop owner got it and sold it to me. That's it, but it had California emission on it. Maybe all RRs do in the USA, don't know. | ||
Mike Thompson Frequent User Username: vroomrr Post Number: 83 Registered: 4-2019 |
I just noticed this. Now the question is did the brakes ever work correctly when it was bought at auction. There is a nipple on the front pump. 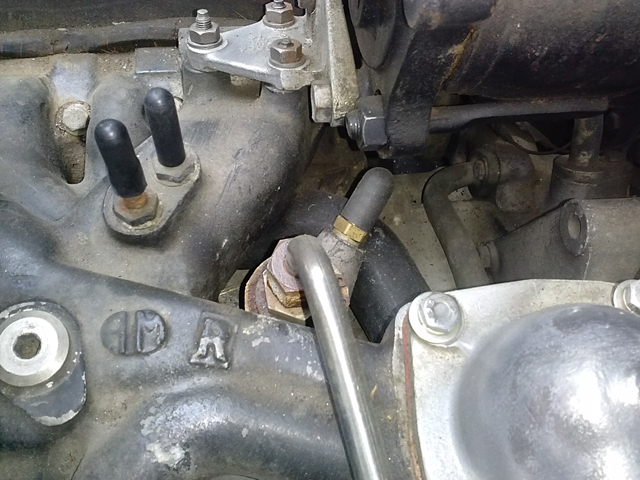 | ||
Robert J. Sprauer Prolific User Username: wraithman Post Number: 225 Registered: 11-2017 |
That is pump #1 and the black cap is where the supply goes in from the reservoir. | ||
Mike Thompson Frequent User Username: vroomrr Post Number: 84 Registered: 4-2019 |
Yeah but how would that effect your brakes? | ||
Robert J. Sprauer Prolific User Username: wraithman Post Number: 226 Registered: 11-2017 |
You are ripping everything out right? This supplies pressure to system 1 of the system to the accumulators and eventually to the calipers on system 1. There is no question this will take alot of your money and time especially when you do not understand what you are working on. | ||
Larry Kavanagh Grand Master Username: shadow_11 Post Number: 395 Registered: 5-2016 |
If finances to restore that are a problem I would personally break it for parts and hope to make a profit by selling the separate components on eBay. Then use the proceeds to buy one in better working order that could be improved as you use it. At least you now know some of the pitfalls to look out for when making the next purchase. The grill alone (if in good condition) would return at least a quarter of your purchase price. The side windows would probably fetch about $100 each, and each of the doors, trunk lid and hood would probably fetch about $200 each if not more. The chrome trim and bumpers would make another few hundred $$$. A new inlet manifold costs approx $2000. Apart from the engine, auto transmission and differential there are many other ancillary items that enthusiasts might want. You could make a tidy profit and start again. Just my tuppence worth, sorry to be negative but I believe that would be the practical thing to do. | ||
Vladimir Ivanovich Kirillov Grand Master Username: soviet Post Number: 1345 Registered: 2-2013 |
Mike rip it out and bin it. Bin the other pump as well. Bin both accumulators and the rat trap. Install the brake booster and master cylinder you bought onto the fire wall after strengthening it with plating. Get a second hand Cadillac, Oldsmobile, Buick, Pontiac or Chevrolet full size car at wreckers and rip all the piping out from Master Cylinder to brake wheel cylinders. There is an valve somewhere along the track to so use that too. So you run an single line to each caliper. You will need a junction box for the front as they are dual calipers. Don't drive yourself nuts over brake line pressure. Basically rip out each and every brake component except the calipers. You are able to get very cheap parts from wreckers in USA. Obviously you will source all this from a car that clearly has not been in your snow and is corroded. | ||
Mike Thompson Frequent User Username: vroomrr Post Number: 85 Registered: 4-2019 |
I thank everyone for their comments but still I did not put that nipple there, nor do I think the shop owner did. So if it was like that from the auction and they drove it to Austin Texas from Dallas Texas some 4 hours away on a very good day. How was it stopping? There is a lot of traffic between there. | ||
Mike Thompson Frequent User Username: vroomrr Post Number: 86 Registered: 4-2019 |
Maybe I am not making myself clear on the question above. It is a hypothetical question, I am only curious how they drove it that way. It is true I don't know this system and a bit reluctant to learn it, because "I am" ripping it out and could get my money back on the car just by those parts. The only real question is the calipers and it seems I can do it the way I planed in the first place. As: "So you run an single line to each caliper. You will need a junction box for the front as they are dual calipers. Don't drive yourself nuts over brake line pressure." Vladimir Ivanovich Kirillov | ||
Larry Kavanagh Grand Master Username: shadow_11 Post Number: 396 Registered: 5-2016 |
It was most likely trailered to the auction. | ||
Robert J. Sprauer Prolific User Username: wraithman Post Number: 227 Registered: 11-2017 |
No way it was driven.. No brake fluid...no braking and no one would risk liability with driving it. Mike ..do you really believe that statement? | ||
Mike Thompson Frequent User Username: vroomrr Post Number: 87 Registered: 4-2019 |
I don't know, I was told it was driven from Dallas to Austin by the shop owner. I can only conclude the shop owner put that nipple on there or he lied. I'm thinking now with pulling all the emission stuff off he pulled that off too and stuck the nipple on there. That now seems the logical conclusion. Oh there is a question that is bothering me on the color code. The car is black right now, it was red it seems. The color code is 9510370, when I looked it up I could only find a god awful green. | ||
Robert J. Sprauer Prolific User Username: wraithman Post Number: 228 Registered: 11-2017 |
Color code for the main body is stamped on a plate affixed under the bonnet left front corner The second space or line is the secondary color if it was factory 2 toned. If your intent were to repaint it would have to be stripped bare. There is simply too much paint on the car already. | ||
Mike Thompson Frequent User Username: vroomrr Post Number: 88 Registered: 4-2019 |
They are the same number one tone, not two. But never green. I thought the car was made of aluminum (by the look of the bare spots without rust) but it seems it is galvanized metal. Everything I have used to strip a car is spotty at best. Any suggestions? | ||
Steve Emmott Prolific User Username: steve_e Post Number: 218 Registered: 11-2018 |
Mike, I was not aware any galvanised panels were used on the main body shell. There are a lot of outer aluminium skins on the closures ie doors bonnet/hood trunk/boot There was a lot of lead loading done by RR on the original body shell panel joints and a lot of bodyshops way back years ago lead loaded in some cases rather than use body filler. If you are seeing a shiny metal area with no rust on the outside then I would think it is aluminium or lead. | ||
Patrick Lockyer. Grand Master Username: pat_lockyer Post Number: 2114 Registered: 9-2004 |
"So if it was like that from the auction and they drove it to Austin Texas from Dallas Texas" Mike, the Shadow has three or four braking systems if the front pump is not in use ie broken push rod, no fluid through disconnected pipe etc the brakes will work on the other 2 or three systems with the rear pump. Did the circuit warning light show on the remaining system on start up and go out after a short running time. Putting more engine power can have its draw backs with the Shadow if metal fatigue is present ie rear cross member mount points! My Shadow is trundeling along hard at work towing three plus tons on a four wheel plant trailer with LPG, no road fund no MOT, tyres about thirty years old and all within the law! BTW, body shells were coated with zinc phosphates, more so in the known rust areas, but rust can still be a problem. Lead loading does have its advantages but after time can crack and lift, remedy is to have an Everflex roof but that can have its problems too. | ||
h_kelly Prolific User Username: h_kelly Post Number: 298 Registered: 3-2012 |
Mike, Vladimir and Geoff, have given you the best advice. The fact insurance ain't a problem, just completely forget about how the old system worked, removed the parts not required , it's pretty basic plumbing after that. Once you fit the master cylinder everything will flow from that The work you did on the carb was amazing/ don't get sidetracked re how the old system worked. It took me over 6 months to figure how the Rolls Royce braking system worked, I had the car for sale several times, as I lost hope. | ||
h_kelly Prolific User Username: h_kelly Post Number: 299 Registered: 3-2012 |
PS flying spares were looking to purchase old brake parts , you might email the re price for what ya don't need,I know carriage might be costly | ||
Robert J. Sprauer Prolific User Username: wraithman Post Number: 229 Registered: 11-2017 |
The doors, bonnet and boot lid are aluminum "skins" The body is by "Pressed Steel" which also stamped metal for early Jaguars. There are leaded areas (4) where the roof panel meets the front cowl and rear panel below the rear windscreen and often display cracks. Adding a vinyl roof would not cover these areas since it is past the roof line and posts. There is no lead on the top of the roof panel for joining purposes. It takes approx 2 gallons of aircraft quality stripper to do the whole car. | ||
Steve Emmott Prolific User Username: steve_e Post Number: 220 Registered: 11-2018 |
Robert after 1968 the company was named 'Pressed Steel Fisher'. It was a merger between Fisher and Ludlow and Pressed Steel. All owned by the Rubery Owen Group of which the RO is what is part of 'ROstyle' wheels as they were also huge wheel pressing manufacturers supplying most of British Leyland cars too. I believe there is possibly a lot more areas lead loading was actually done as there is an absence of feature lines or joints on the whole RR car body. Other areas POSSIBLY are either side of the roof skin/gutters, roof skin down to rear wing again totally absence of any welded joints, above headlamps where they merge with wing panels etc as no way could the front be a one piece pressing either. I have never done a RR/B bare metal respray so can't be sure but the pictures I have of bodies stored in the factory the shiny silver areas of the aluminium skins and leaded areas do seem to show up against the brown surface of the rest of the body. I have no idea from the detail what the brown is in the pictures, whether it is a protective wax on the ferrous metal or just surface rust. I know in the early 70's when RR nearly went bust and bodies were stored up unused that they had gone rusty and RR when got financial backing just chemically washed these bodies and put them back into production. Some unpainted bodies had even been left outside and were quite rusted but still got used. The 4 areas you mention that are also lead loaded do suffer cracking as you say at the base of each screen corner area but I believe this is an area that perhaps suffers more stresses/torsional body twisting than what would other more static areas. Nice to see you back Patrick L you have been absent the last few weeks. I assumed you may be pruning those Somerset apple trees ready for the scrumpy season.s  | ||
Robert J. Sprauer Prolific User Username: wraithman Post Number: 230 Registered: 11-2017 |
The areas I mentioned were in regard to the post about the roof where it meets the main body. The roof gutters are part of the roof stamping and not leaded in. These would certaianly exhibit stress cracks and be noticeable on non-Everflex cars. The front wings are leaded to the cowl on top and also to the front headlamp/radiator surround in front and similar areas for the rear wings. | ||
Patrick Lockyer. Grand Master Username: pat_lockyer Post Number: 2115 Registered: 9-2004 |
Pressed steel Cowley was a division of Leyland Cars who made the bodies for RR and many types of cars. A very unstressed body design if no tin worm is present. Pix of the "A" and rear "D" post cracks, SS1 "A" post SS2 "D" post. 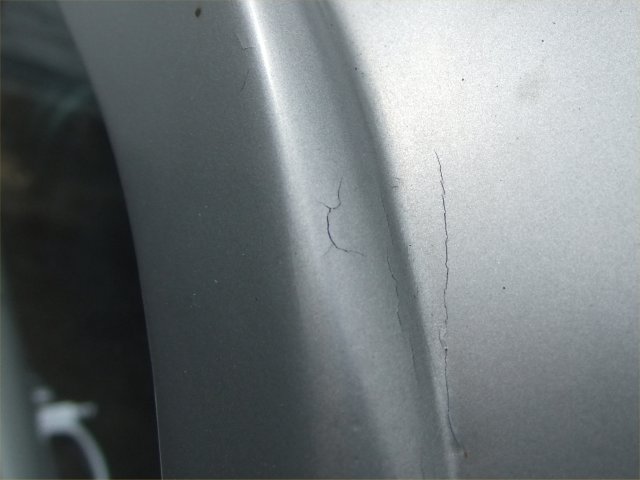 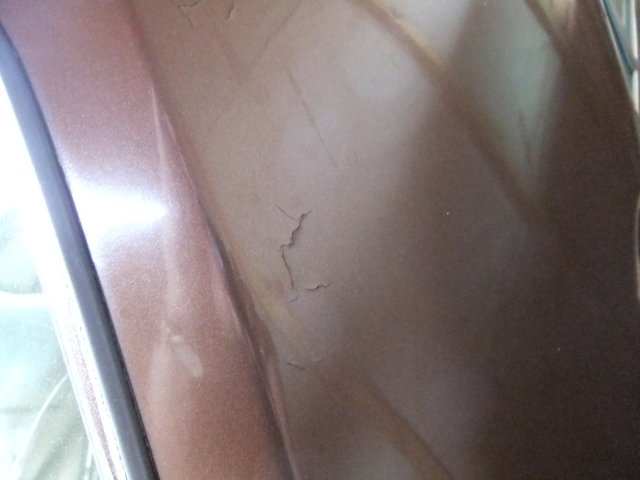 Towing three ton + trailer. 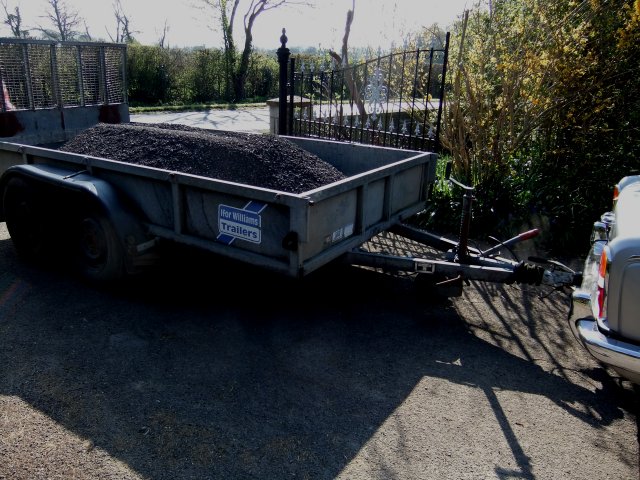 | ||
Steve Emmott Prolific User Username: steve_e Post Number: 221 Registered: 11-2018 |
Robert if you follow the top of roof down to the gutter then down the side (small vertical above doors) then back under into door aperture horizontal and back down to the door rubber sealing edge there is no way that could have been done as a single pressing IMHO. It could I suppose have been done with lots of additional tooling to form all the 'returns' but given when you look at the amount of panel jointing re the inner wheel arch RR used to do to just create that form I am just not sure. Follow the roof skin surface now down to the top of rear 'D' post then down to the top of the rear wing waist rail level there is no visible welded joint to the rear wing. We know the rear wings are joined to the rear 'scuttle' either side with lead loading creating a seamless effect and so must it be somewhere from the roof skin/D pillar and rear wing. Many manufacturers would either create the rear wing and D post as a single pressing and spot weld joint then lead load at the roof/pillar top area or later as lead loading became 'toxic' to the industry the roof and D pillar may be pressed as one then spot weld joined to the rear wing with a chrome feature finisher after paint at waist rail level to hide the spot welded joint. We did it both ways over the years at Jaguar and if you look at early XJ6's you can often just detect the roof joint on the top area of the D post. Later cars we then joined at the lower part of the D pillar with an exterior trim finisher to hide the spot welding and then as robotics and scanners started to transform things, 'pressings' started to improve tolerance consistancy from the hydraulic machines rather than overcentred huge cast iron wheels that were 'stampings' (bone shakers), the joints were so good they could be robotic welded and linished to perfection. | ||
Mike Thompson Frequent User Username: vroomrr Post Number: 89 Registered: 4-2019 |
American cars used lead as well, then laws were passed about protection. I tried to use aircraft quality stripper on my 1964 Chrysler Imperial. It is baked on enamel, no clear coat, and I put it on as thick as possible, let it stand 1 hour and the car looked at me and said is that all you got bitch (female dog). And on my Chevy C10 Truck it sort of worked in areas. America is so overly protective that it might be a substitute for the real thing. If there is a name brand that works let me know. On my RR it had a sun roof (that I welded shut and used fiberglass on) that is the source of all the water damage. It would not close all the way. On the floors was thick lambs wool floor mats that absorbed water and caused rot. The carpets are trash one floor board is trashed, all the wood is pealed. The horn and turn signals don't work, etc. etc. (The clock works though!) | ||
Mike Thompson Frequent User Username: vroomrr Post Number: 90 Registered: 4-2019 |
On the linkage to the booster master cylinder, that, has cause some major engineering thought. Due to the dashboard and room, which I have made room but need a way to get the pedal to the push rod. I may need to put every thing in the trunk where the spare tire is supposed to go. And run a long rod along the drive shaft, maybe, or two pipes with rods to convert the push of the pedal into a lever system that has a rod beside the engine. Then a opposite pipe on top to the booster push rod. See the only picture I could find on the dash. And nowhere for the push rod. 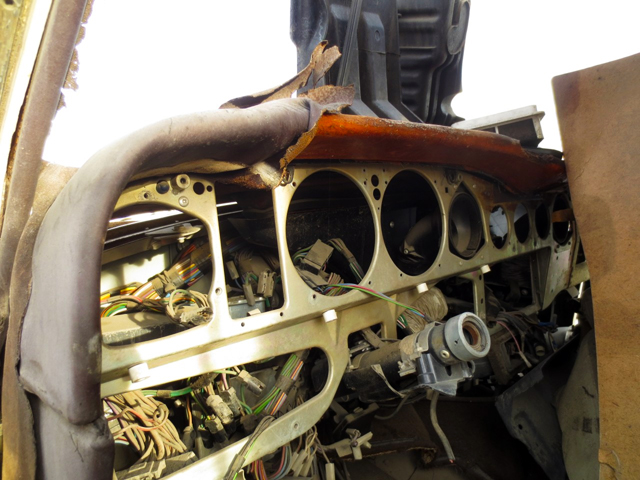 | ||
Robert J. Sprauer Prolific User Username: wraithman Post Number: 231 Registered: 11-2017 |
Why not remote hydraulic and get rid of the rods? Back to the roof, again. The roof panel and "D" pillar are one stamp and welded and leaded below the D panel where it meets the top rear wing. There is also a joint behind the stainless trim between the doors. I have stripped several of these and my 1980 Wraith was a shel when I was finished with it. Everything went back in as good as the factory or better...in essence a re-manufactured RR | ||
Robert J. Sprauer Prolific User Username: wraithman Post Number: 232 Registered: 11-2017 |
I would have the car soda blasted. I use a vendor all the time but you must prime quickly because microscopic corrosion sets in at 50% RH in an hour. Just spray on an epoxy primer. It is good for alum and steel. I use Glasurit and PPG. Once it is primed you can take your time. | ||
Mike Thompson Frequent User Username: vroomrr Post Number: 91 Registered: 4-2019 |
Remote vacuum booster is like an added master cylinder (I take it). But still the master cylinder has to be operated by a rod and to fill it you have to be able to get to it. If it were put where the rat trap is. same problems. But the good thing is once I figure it out there will be a guide for all coming afterword (unlike now where no one has left a record how they did it, that I can find.) 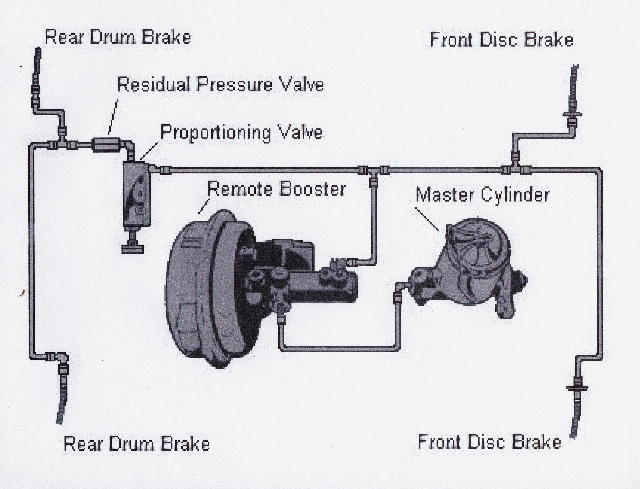 | ||
Mike Thompson Frequent User Username: vroomrr Post Number: 92 Registered: 4-2019 |
Now this guy did it, but at a high price. You notice everything that has to do with heating and air is gone. Clean looking, but everything under the dash must have been modified. 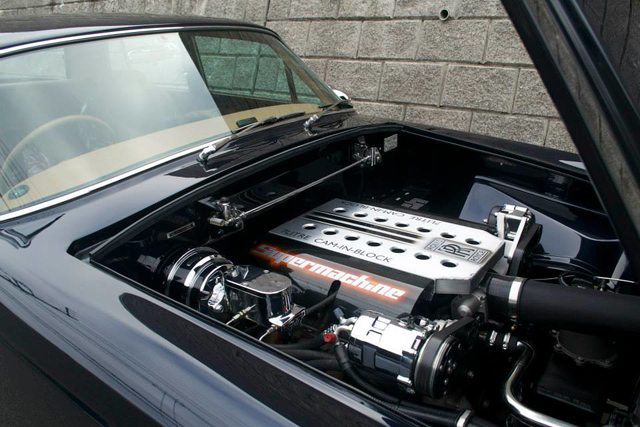 | ||
Steve Emmott Prolific User Username: steve_e Post Number: 222 Registered: 11-2018 |
Robert I am going to have to disagree with you on a couple of points and sorry Mike but threads sometimes do deviate but we all can learn or consider something even if we don't always share the same opinions or act on them. I was actually a Press Tool and Die designer at Motor Panels (Coventry) LTD which was part of the Rubery Owen Group hence I know some of the background of the companies mentioned and a bit about large press tools. We often pressed the panels for Jaguar, Jensen and others. Pressed Steel Fisher being part of the same group Rubery Owen we took on urgent press runs. We had large presses up to 500-600 tons. I admit I never knew or saw any RR work being done and the main business was ERF, Seddon Atkinson. Scammel and other truck/lorry cabs. (doubt any around today) It is inconceivable to me the whole roof panel and D pillars were produced as a single pressing and joined at the lower rear wing. Just the shear amount of wasted metal and the size of the tooling would not have been a sensible undertaking if the body designers consulted the press tool designers. I can only support this with the picture attached showing the rear wing and D pillar as a complete pressing. Looking at Patricks pictures also makes me think the joint and lead loading was also much higher up and into the gutter at the top of the D pillar. The factory pictures I have showing stacked up RR Shadow bodies in the storage, the whole length of the gutter looks shiny as does the other leaded areas I know about and the aluminium panels areas are also looking shiny silver but that may all be just a cause of lighting. Now as for primer painting a car and then leaving then that is the biggest NO NO for any paint shop in the past. Primer paint can absorb moisture and if you leave it too long and then paint top coat over you will experience microblistering in later years. Again my experience is from years back and maybe modern paints don't create the same problem. I do agree though don't leave bare metal exposed to any humidity before painting. 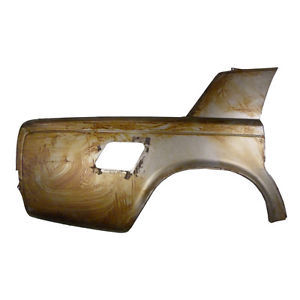 Mike that RR underbonnet is just beautiful. A real credit to whoever did that workmanship.....you guys and customising cars in USA are just incredible. Lets have pictures of yours when it is done....even if you only have a small budget | ||
Mike Thompson Frequent User Username: vroomrr Post Number: 93 Registered: 4-2019 |
And to take out that RR engine and put in that clean engine the manual says you have to take the front end off. 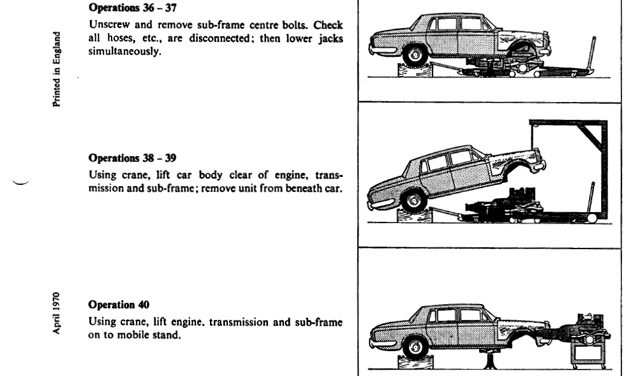 | ||
Patrick Lockyer. Grand Master Username: pat_lockyer Post Number: 2116 Registered: 9-2004 |
"Roof panel and "D" panel are one stamp". Wrong. Steve you are correct, spot on. I can see why the use of lead loading can be for perfection without the use of filler with a RR. The following confirms the imperfections that may occur in that position of panel, the Everflex would cover the panel. 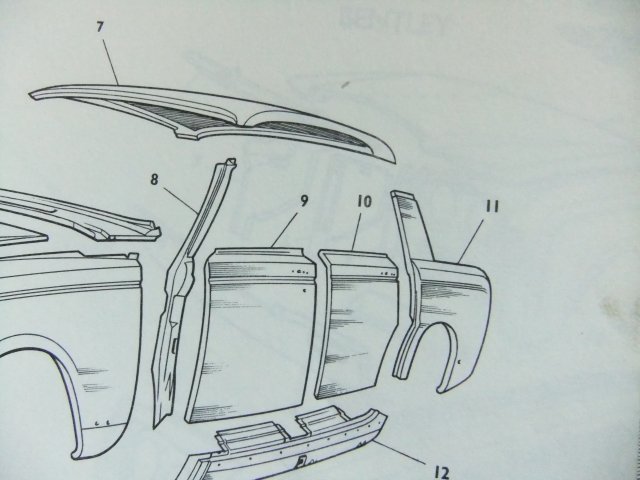 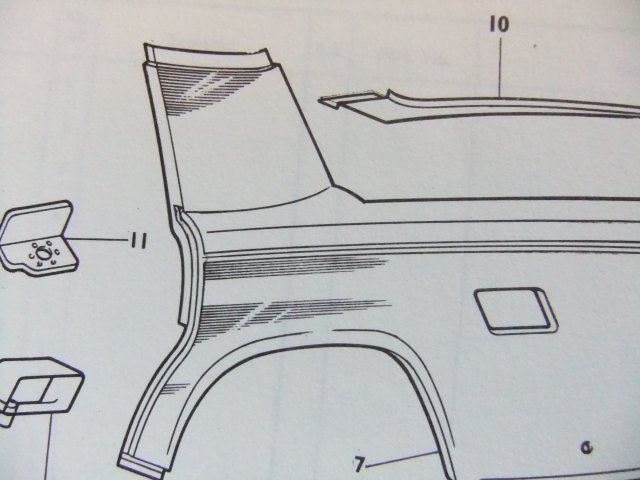 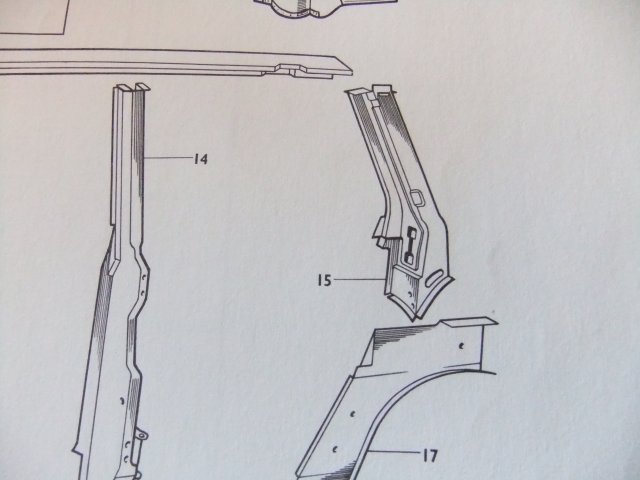 | ||
Patrick Lockyer. Grand Master Username: pat_lockyer Post Number: 2118 Registered: 9-2004 |
And to think I had dealing with Briggs and not Ford, showing my age! Never mind the spring barley is rearing its head.  | ||
Patrick Lockyer. Grand Master Username: pat_lockyer Post Number: 2119 Registered: 9-2004 |
Mike could the use of a master cylinder be used in a position that could be adapted with the use of mobility controls to the foot pedal using a servo to be fitted where ever. | ||
h_kelly Prolific User Username: h_kelly Post Number: 300 Registered: 3-2012 |
Like Pat asked, can you not use the master cylinder in situ at rat trap , if using a remote booster? . Pat, are the tyres genuinely 30 years old?. | ||
Robert J. Sprauer Prolific User Username: wraithman Post Number: 233 Registered: 11-2017 |
Front end does not come off (there is no way it can). Easier to drop the front subframe but you need a lift to raise the body. If you are doing this outside it would come out of the engine bay. You would have to remove the bonnet and radiator, grill etc. Also a heavy duty engine hoist with equalizer. Why are you removing the drive train? did you decide to change it? I would consult the RR workshop manual TSD4200 and they give you step by step instructions. | ||
Patrick Lockyer. Grand Master Username: pat_lockyer Post Number: 2120 Registered: 9-2004 |
And the use of a four post hoist with the rear of the car strapped down for safety. A crap two post for this would be dangerous.  | ||
Steve Emmott Prolific User Username: steve_e Post Number: 223 Registered: 11-2018 |
Patrick L now there is a very interesting few points and a fresh approach. The use of a remote Booster was common practice on many UK cars. my MGB and Lotus Elan +2 are both remote servos. It was sort of done away with as there was a slight 'lag' in brake performance but just think that would overcome the 'nodding dog' scenario and probably simpler to package the whole thing. On the body panel pictures you show the rear wing has the fuel flap on LHS. Was this for LHD cars as I was not aware there was any difference. As for the corn crop.....well I thought you were pruning the old scrumpy trees. Are you producing your own ethanol now or just looking for a whisky crop. I do miss the old Bushmills. | ||
Mike Thompson Frequent User Username: vroomrr Post Number: 95 Registered: 4-2019 |
Pat: I don't know what is a mobility control, please explain? Robert J. Sprauer: "Front end does not come off" it is easier to say front end than front subframe and no I am not removing the drive train I was talking about the black RR with LS swap. h_kelly: The problem with putting a normal master cylinder at the rat trap is how to you check and fill the brake fluid? But then again that might be why I don't see the booster or master cylinder in this picture. (he just has a remote fill somehow. But he swapped out the RR brakes for corvet brakes. 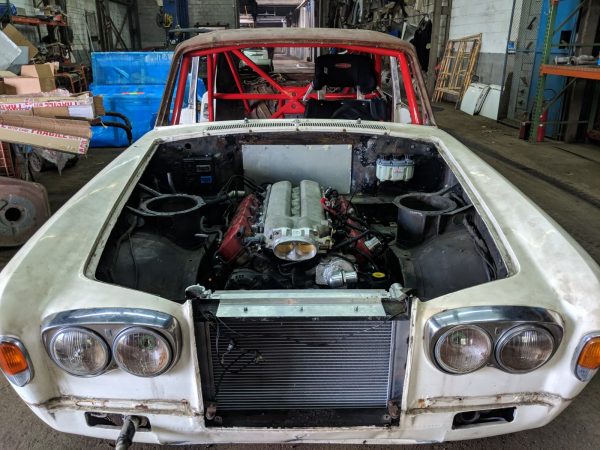 | ||
h_kelly Grand Master Username: h_kelly Post Number: 301 Registered: 3-2012 |
If ya put a master cylinder at rat trap , take a line front same to engine bay with a small fluid vessel like so.. https://www.ebay.ie/itm/OBP-Single-Small-Brake-Fluid-Reservoir-Pot-7-16-Thread-Fitting-OBPCB004-/291704965061 So you can observe fluid, you could probably get one that might light up light on dash if low on fluid?. Is it possible to purchase a second remote booster off a scrap vehicle?. | ||
h_kelly Grand Master Username: h_kelly Post Number: 302 Registered: 3-2012 |
P's Mike if you plan on removing engine look up spring removal as same come with sub frame, looks like a pig of job to remove the springs as you need specialised tools etc etc big job | ||
h_kelly Grand Master Username: h_kelly Post Number: 303 Registered: 3-2012 |
Mike check this out for ideas https://www.thesamba.com/vw/forum/viewtopic.php?t=511636} | ||
Robert J. Sprauer Prolific User Username: wraithman Post Number: 234 Registered: 11-2017 |
a 4 post lift with ramps will not work since the front wheels/tires are part of the subframe which gets dropped. Go figure. Since he won't be doing this it is a non issue. Kelly has the best spring compressor and have used it many times. | ||
Mike Thompson Frequent User Username: vroomrr Post Number: 96 Registered: 4-2019 |
h_kelly your'e a whizz at finding stuff. After seeing what one has to do to get that engine out, if it runs it's done. I wonder where he got the MC with the remote filler container. | ||
Robert J. Sprauer Prolific User Username: wraithman Post Number: 236 Registered: 11-2017 |
here's the subframe  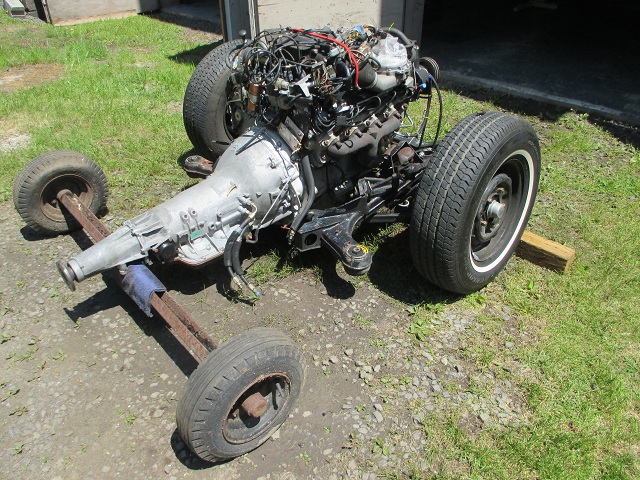 | ||
Mike Thompson Frequent User Username: vroomrr Post Number: 97 Registered: 4-2019 |
What my next one may look like mostly fiberglass. https://www.youtube.com/watch?v=JJax6pqlEoI https://www.youtube.com/watch?v=JIS78CVDrq0  | ||
Robert J. Sprauer Prolific User Username: wraithman Post Number: 237 Registered: 11-2017 |
Nice Daytona Coupe for me starting this fall as a winter project. | ||
Mike Thompson Frequent User Username: vroomrr Post Number: 98 Registered: 4-2019 |
A few people (I think) said you can get the brake pumps out without taking off the intake manifold. Please explain how? 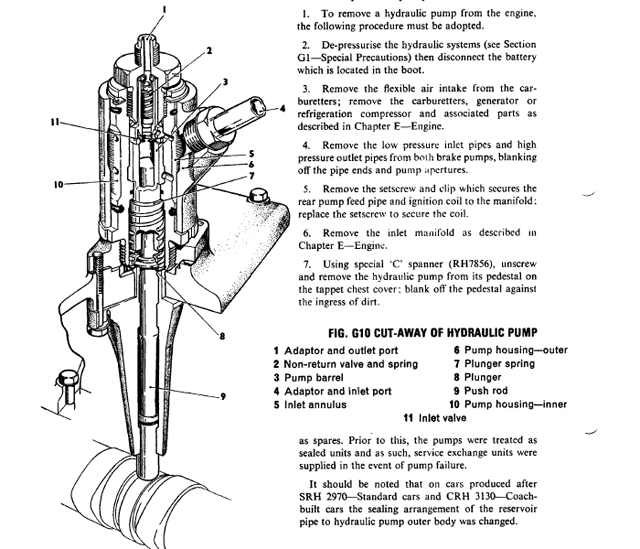 | ||
Robert J. Sprauer Prolific User Username: wraithman Post Number: 238 Registered: 11-2017 |
You need a special spanner or socket. BTW has them. You also remove the pushrod. | ||
h_kelly Grand Master Username: h_kelly Post Number: 304 Registered: 3-2012 |
Ronnie Shaver,runs through the brake pumps in 4 parts https://m.youtube.com/results?search_query=Rolls+royce+silver+shadow+brake+pump | ||
Vladimir Ivanovich Kirillov Grand Master Username: soviet Post Number: 1346 Registered: 2-2013 |
Brake pump removal Soviet method: gas axe followed by hammer and cold chisel AND Pliers - simple as but keep the Vodka up and fire extinguisher handy and don't do it with wifey around or you will be in more trouble than Omar in Dubai with or without THE JACKET. Easier method: buy tool from Kelly in Utah. Mandatory for both methods: Watch a few League of Gentlemen episodes .... | ||
Robert J. Sprauer Prolific User Username: wraithman Post Number: 239 Registered: 11-2017 |
Vlad are you in the US at the moment? | ||
Mike Thompson Frequent User Username: vroomrr Post Number: 99 Registered: 4-2019 |
Here is a rough drawing of how the lever system I'm thinking of would work. 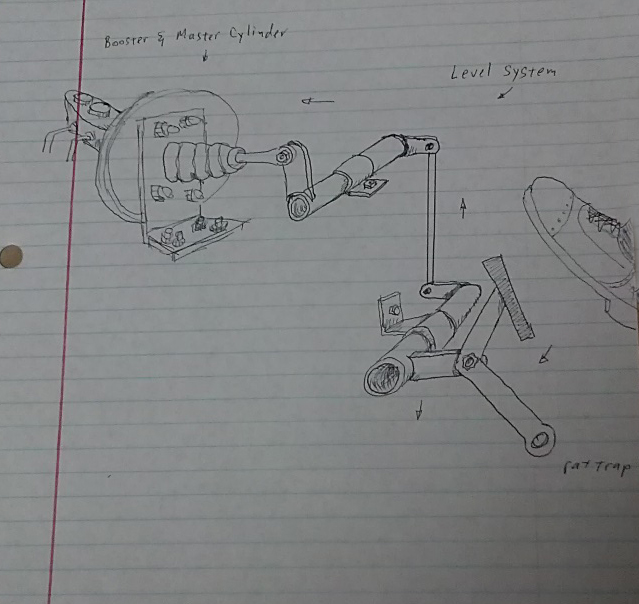 | ||
Vladimir Ivanovich Kirillov Grand Master Username: soviet Post Number: 1347 Registered: 2-2013 |
No Robert actually on the other side of the planet directly. Maybe be in USA sooner than later but will definitely be in Mombassa Kenya within months for nefarious purposes. Why? | ||
Robert J. Sprauer Prolific User Username: wraithman Post Number: 240 Registered: 11-2017 |
Just wondering and I remember you mentioned coming here. | ||
Mike Thompson Frequent User Username: vroomrr Post Number: 100 Registered: 4-2019 |
OK once I get that special little tool how does it help me get the pump out without taking off the inlet manifold? Which one is it? Please https://www.britishtoolworks.com/shop | ||
Robert J. Sprauer Prolific User Username: wraithman Post Number: 241 Registered: 11-2017 |
The $85 socket You have a SY car not SZ | ||
Vladimir Ivanovich Kirillov Grand Master Username: soviet Post Number: 1348 Registered: 2-2013 |
Now Mike, do not discount water leaks from front and rear windshields.Sika fixes all err except the rust. As for the second air conditioner on the floor and given that you are virtually on the other end of the spectrum from Pebble Beach trailer queen capers just deoxidine the rust bits of Fred's foot massage orifice and snip out a flat piece of mild steel sheet and fibreglass it in from the inside. Nobody will know and it is likely to be stronger than the original. If there are mag wheels available from US wreckers and you like the style I would go that way rather than those horrid Lada/Communist plastic wheel trims which will certainly become frisbees the second you feed it to the LS1. Big question - does any US car have same stud pattern as Rolls Royce? Try Chrysler first. Perhaps you could post a pic of your 64 Crown up in General Discussion. Google shows a Crown Coupe with extended blind quarter - was that a special custom job? Looks SuperCool. | ||
Mike Thompson Prolific User Username: vroomrr Post Number: 101 Registered: 4-2019 |
My 1964 Chrysler Imperial Crown. It came from the junk yard in very bad condition. I rebuilt the whole brake system and everything else. 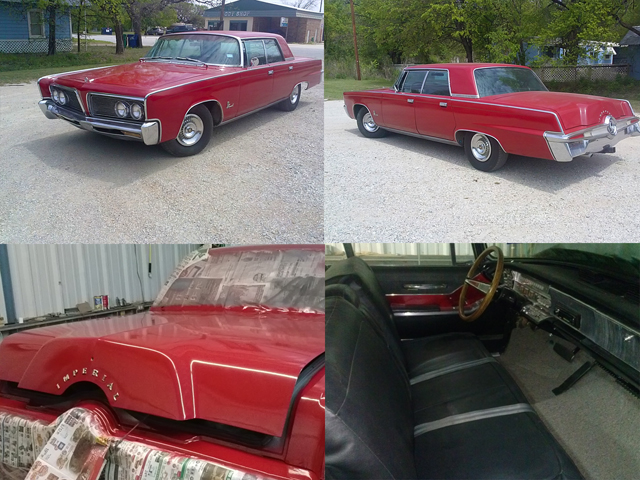 | ||
Larry Kavanagh Grand Master Username: shadow_11 Post Number: 399 Registered: 5-2016 |
That Imperial Crown looks great. | ||
Vladimir Ivanovich Kirillov Grand Master Username: soviet Post Number: 1350 Registered: 2-2013 |
Stunning Crown Mike, I always loved the rear end and pushbutton transmission. All Americans should look to those great years when you produced cars with stunning supercool shapes. Brilliant stuff from the USA. Then in the late 70s you fell totally off the perch! | ||
Mike Thompson Prolific User Username: vroomrr Post Number: 104 Registered: 4-2019 |
Elwood Engel came over from Ford where he helped design the Lincoln Continental with the same rear end. The 1964 was the first year he had full control so it got the Lincoln rear end. Oh thanks for the kind comments. This is what it looked like when I got it. 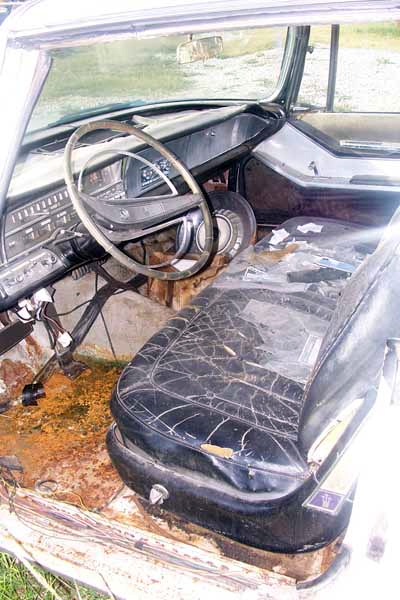 | ||
Mike Thompson Prolific User Username: vroomrr Post Number: 109 Registered: 4-2019 |
Patrick Lockyer Two questions: What are mobility controls? And how do you get the seats out, I need to do that to reupholster the seats. | ||
Patrick Lockyer. Grand Master Username: pat_lockyer Post Number: 2121 Registered: 9-2004 |
Mike the mobility controls are used for the adaption of hand controls to use the brakes etc, my idea would be to find a used kit ie bell cranks and the well made swivel joints and rods to fabricate a kit to use the existing brake pedal with s/h master cylinder and remote servo. Seats are a doddle to remove think I did a posting somewhere on the site also of the RR1 doing an indicated speed of 120MPH or more down the local runway can't remember if it was running on LPG. | ||
h_kelly Grand Master Username: h_kelly Post Number: 306 Registered: 3-2012 |
https://m.youtube.com/watch?v=g7nC8LXy5_Y Might be if interest | ||
Mike Thompson Prolific User Username: vroomrr Post Number: 110 Registered: 4-2019 |
h_kelly Many thanks for that video. He took it out somehow without taking off the manifold. But did not show how. But it showed the problem bit the low pressure intake adapter has that Y shape to it and the pump cannot turn. He showed it slides off. I wish someone would tell me how to do that. | ||
Robert J. Sprauer Prolific User Username: wraithman Post Number: 242 Registered: 11-2017 |
The top has a circlip...take a close look and refer to the TSD4200 Everything is shown and explained in detail. | ||
Mike Thompson Prolific User Username: vroomrr Post Number: 112 Registered: 4-2019 |
Oh yeah, I've seen that clip. If that's all it takes that would be wonderful. Then I just need to make a extractor tool. This is Texas Buba will make one, not pay $300 for some Brit to apply as loan payment on his new RR. Thanks a lot useful information. (That's what I like.) | ||
Steve Emmott Prolific User Username: steve_e Post Number: 226 Registered: 11-2018 |
Mike I made mine so if you need any detail measurements let me know. I think finding the pipe tube the right diameter was the biggest time I consumed. | ||
Mike Thompson Prolific User Username: vroomrr Post Number: 114 Registered: 4-2019 |
Steve Emmott Well heck yeah Buba needs that kind of info! I was hoping somewhere in the tech writings it would have that material. But loved to have all the specs and how you did it. No need to reinvent the wheel as it were. | ||
Robert J. Sprauer Prolific User Username: wraithman Post Number: 244 Registered: 11-2017 |
You can do a DIY for the serrated ring. Like Steve said , rummage around for a pipe that will slip over and the same diameter of the ring and then carbe away with a grinder on the end to form 2 or 4 teeth to mate up with the ring. Personally I prefer the socket. | ||
Robert J. Sprauer Prolific User Username: wraithman Post Number: 245 Registered: 11-2017 |
Mike, First remove lines to pump. Remove circlip. The housing slides upward and give a little twist and pull. The top nipple unscrews. Now you have access to the lower serrated ring nut. | ||
Mike Thompson Prolific User Username: vroomrr Post Number: 115 Registered: 4-2019 |
"Personally I prefer the socket", yeah but you have need for it. For me and probably Steve this is a one time deal. But the way you said how to make it was what I had in mind as well. Thanks | ||
h_kelly Grand Master Username: h_kelly Post Number: 307 Registered: 3-2012 |
Mike ya probably know you can rent the pump spanner https://www.flyingspares.com/shop/rolls-royce-bentley-shadow-t1-t2-corniche-mpw/tools-526/workshop-tools/silver-shadow-spirit-bentley-brake-pump-tool-rh8428.html | ||
Steve Emmott Prolific User Username: steve_e Post Number: 227 Registered: 11-2018 |
Such a shame you are so far away as I would be happy to GIFT you so many parts and have a whole set of the Shadow specialist tools.....parts include steering wheel center/centre horn push and back plate and sssooooo many other bits I no longer need....no use to me now. I will get the pump sprocket socket out tomorrow....sorry gone past the old swing the lantern mode here in UK and the alcohol gets the better of me after 5pm in the evening here. I did notice though your pictures of the front facia wood and see you have or had that re-laquered. It looks good so tell us where/how or if another one of your DIY skills. | ||
Mike Thompson Prolific User Username: vroomrr Post Number: 117 Registered: 4-2019 |
I am the type of person that if I see something done or need to do something I already have the knowledge to do it. That comes easy to me. Now spelling and grammar in your language, no. My first language is I think in pictures. Great for engineering very bad for Art History, and why I am not a professor of physics. I failed Art History, a fluff class, and thought I had no business in college. I regret that every day. But no average person at that time knew about dyslexia, and other things I have. I watched this video 4 years ago and knew all I needed to know to do my own upholstery. https://www.youtube.com/watch?v=I8NUOLFJdKs Example, I did all this upholstery with a $12 (from Goodwill store) home Singer sewing machine. I'd love to have tools etc. 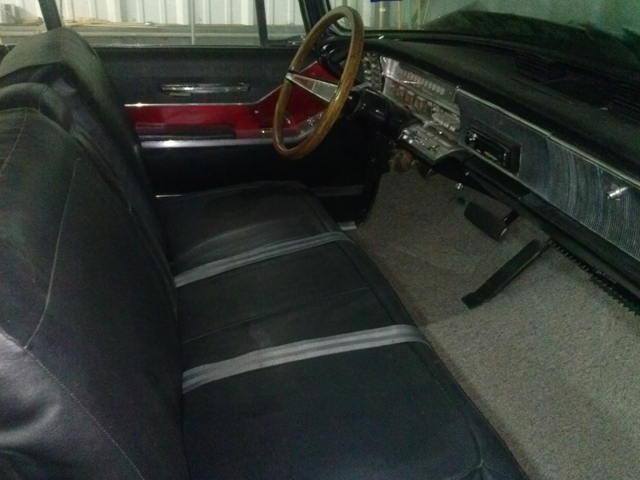 | ||
Jim Walters Prolific User Username: jim_walters Post Number: 220 Registered: 1-2014 |
As your year of Shadow already has a conventional master cylinder installed, mainly to give the system pedal feel, the rat trap is easily converted without having to rip half the car apart. Under dash area and firewall are untouched. No need to build a Rube Goldberg system of bell cranks and rods. The booster (servo) can be mounted where the original reservoir was postitioned. You need a remote fill master like this: https://www.wilwood.com/MasterCylinders/MasterCylinderList?group=Remote%20Tandem%20Master%20Cylinder And a remote servo like this: https://mossmotors.com/austin-healey-100-100-6-3000/brakes/brake-servo-kit-aftermarket-5-8-bore Here is a pic of the rat trap with the factory master cylinder installed and a suitable remote fill tandem master: 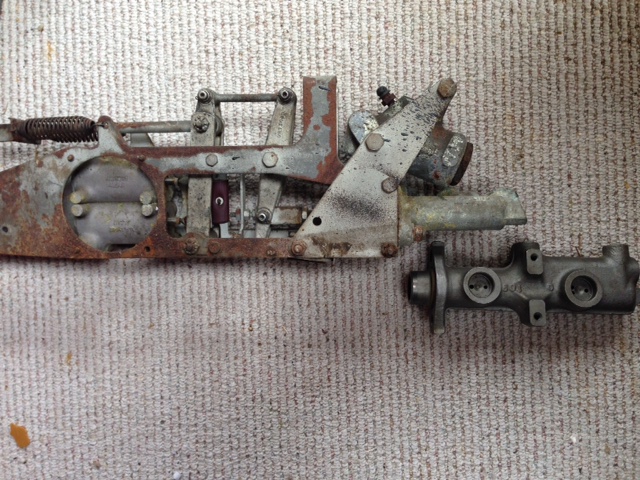 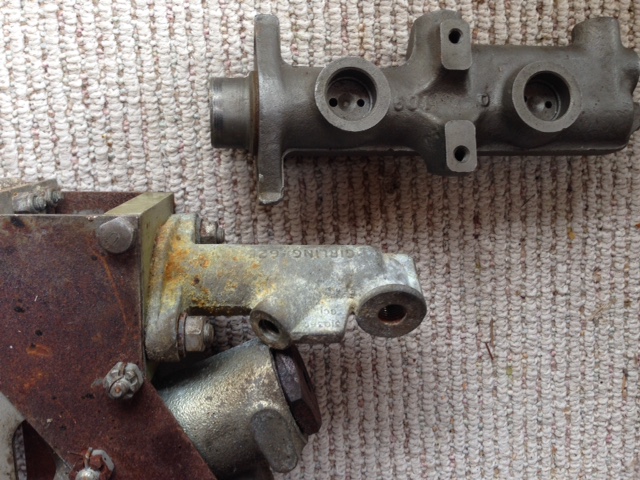 Remove the factory master and bolt on the new tandem. Mount the remote booster wherever you can fit it and plumb it into the front brake line. You can probably get away without a booster on the rear calipers as the fronts will be doing the majority of the work to stop the car. I personally would not change the factory system on any of my own or client's cars but feel that if you are determined to change the system you should do it in a way that ensures a safe outcome. SRH8505 SRC18015 SRE22493 NAC-05370 www.bristolmotors.com | ||
Vladimir Ivanovich Kirillov Grand Master Username: soviet Post Number: 1351 Registered: 2-2013 |
Pretty certain that Kelly of Utah is American and the removal tool he makes is a Duesenburg of tools for the caselated nut. I bought a heap of specialist tools from him. The socket is made out of stainless. You could make one out of mild steel if you had the patience of Buddha and it may just work once then break. Stainless is a total mongrel to fabricate by hand. If your nut is nicely corroded you may find yourself driven to eating the family pet dog, cat or iguana. But enjoy and let us know the hideous journey. | ||
Robert J. Sprauer Prolific User Username: wraithman Post Number: 246 Registered: 11-2017 |
Kelly is in Utah and his tools are SS and better engineered than the factory. I have several and they are the finest I have ever seen. | ||
Mike Thompson Prolific User Username: vroomrr Post Number: 121 Registered: 4-2019 |
Jim Walters So you are sure the Wilwood pictured (I guess) and the Wilwood link P/N 260-14244-P 1-1/8" bore will fit right into the rat trap? In my case on the factory brakes, the calipers are not functional (rusted), the lines are clogged and rusting, the height adjusters don't work and have spacers in the springs etc. If I am going to rebuild a system I want it simple and (in my opinion) a safer system (less to go wrong). I hope you stick around and give me advice, as above, to get me through this. But I stopped all work on the brakes at the moment to make sure of the best method, and had come to the conclusion (with a lot of help) that the way you described is the best way. And that MC is really elegant. | ||
Kelly Opfar Prolific User Username: kelly_opfar Post Number: 228 Registered: 7-2004 |
Here is the drawing I use to make Brake Pump Sockets from if anyone wants to make their own: 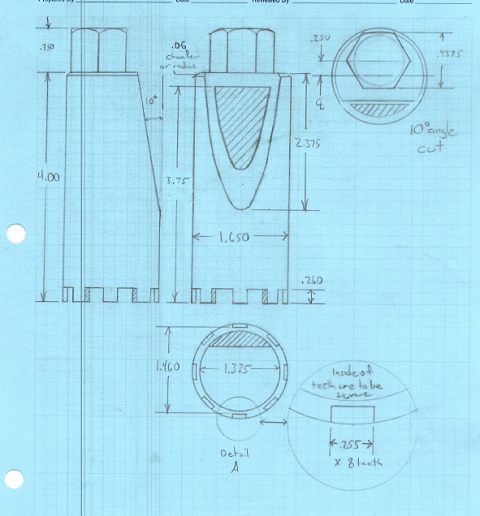 Kelly@BritishToolWorks.com http://BritishToolWorks.com | ||
Steve Emmott Prolific User Username: steve_e Post Number: 229 Registered: 11-2018 |
Mike I have done some pictures on the brake pump tool. I will follow up with written measurements too that may help. Like I said I struggled to find a suitable off the shelf pipe so had the main body turned. I bought a whole box of RR tools when a RR/Ferrari specialist garage was closing down. 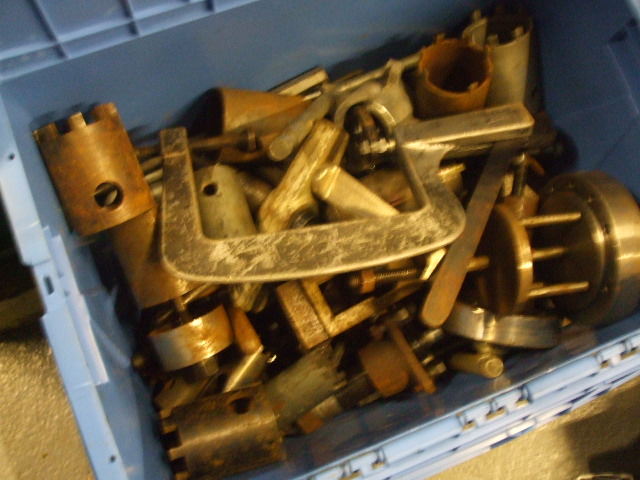 I have no idea what most of them are for but will individual picture them as Paul Y offered to help identify them. The original brake pump tool was so badly damaged I used it as a pattern to make the new one. As Vlad says they take some hammering. The only thing now I wish I would have checked exactly how much space was available on the outside diameter as it maybe could have been made a bitter thicker on the wall to increase strength. You need the elongated cut out to clear the casting form for the side pipe fitting. Hope this is enough to get you started. There are 8 castle prongs so using a bit of 'pye' maths you can check out the measurements as shown on the vernier.  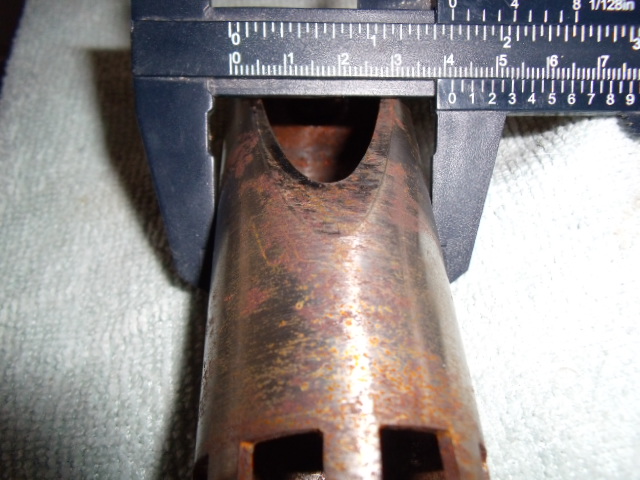 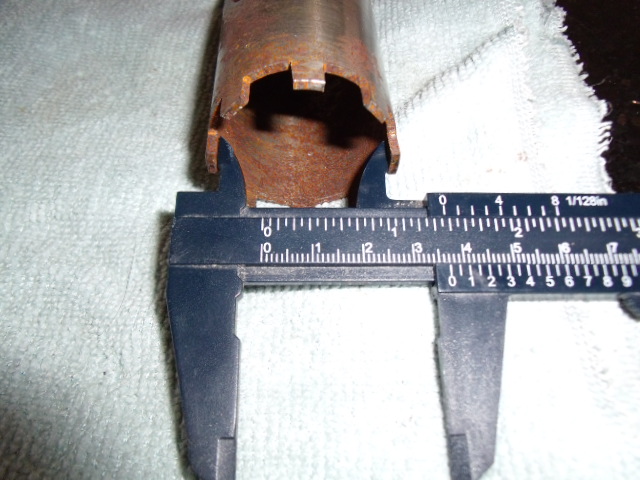 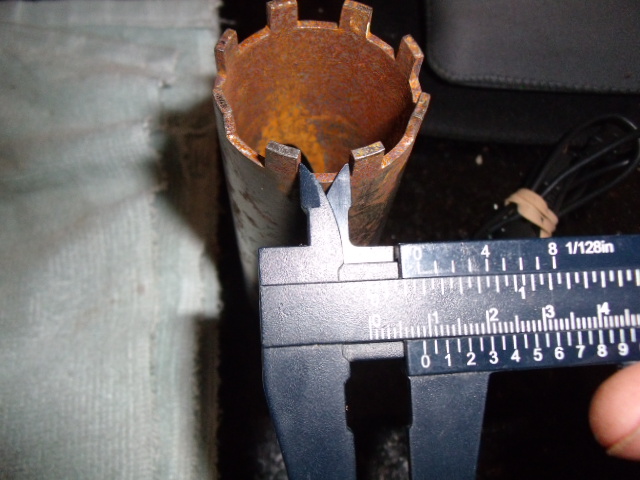  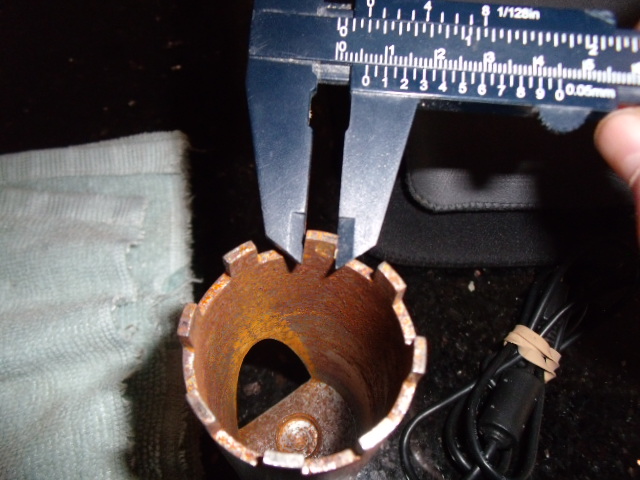 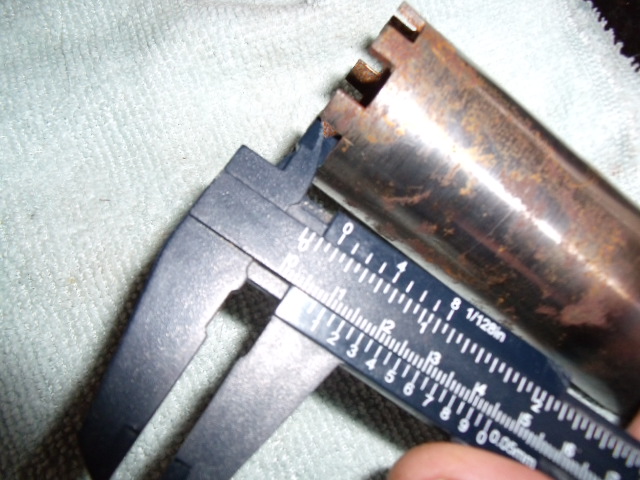 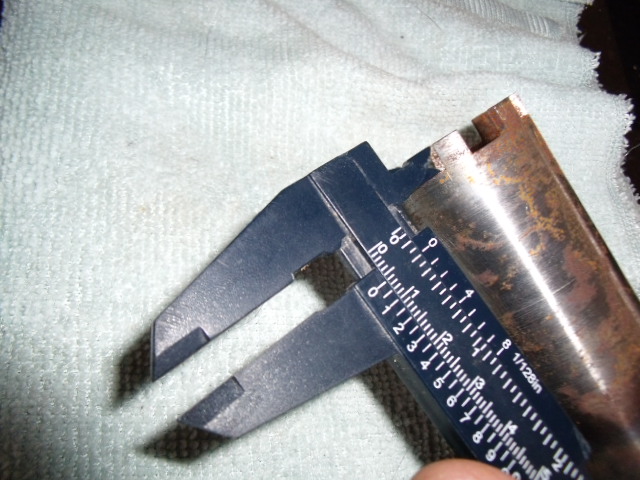 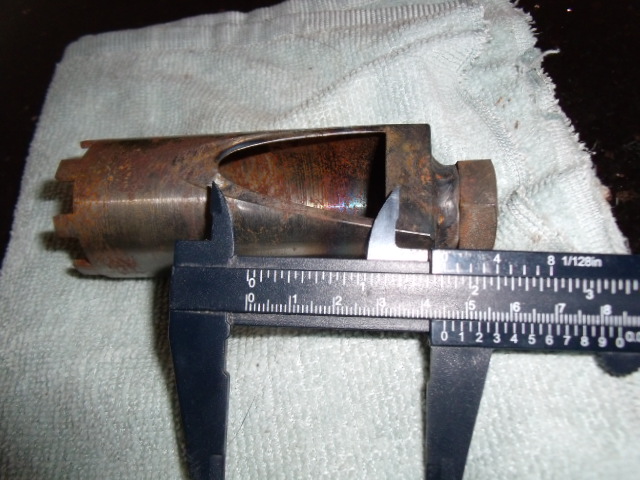 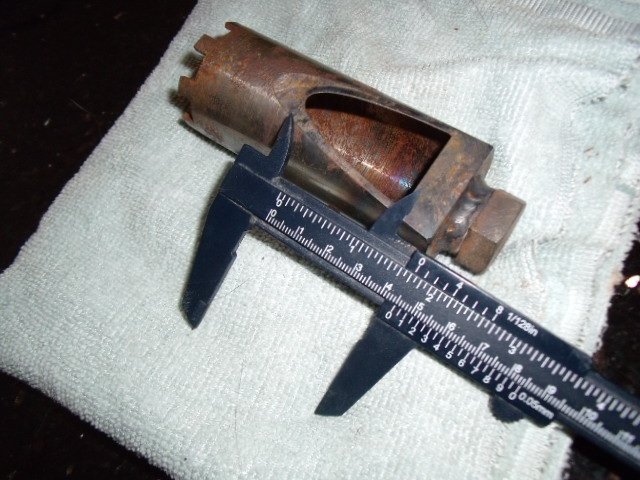 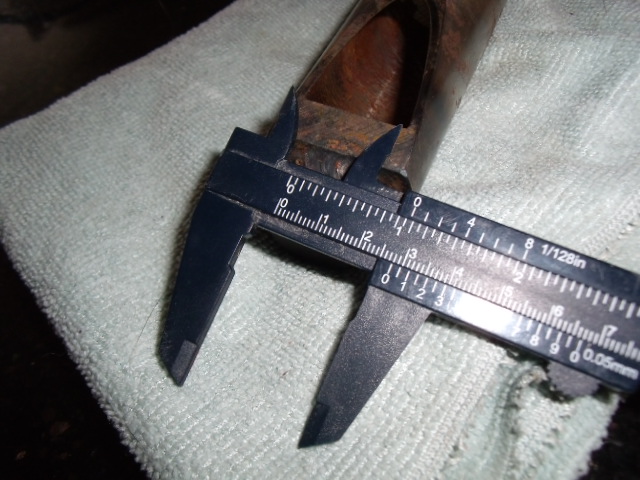 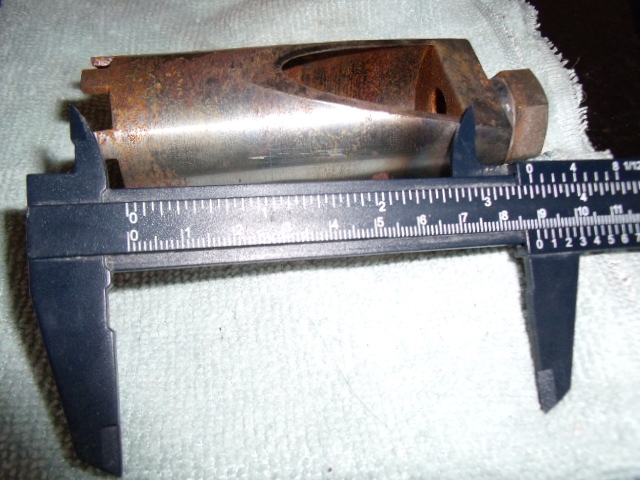 I see some detail measurements have been put up while I was writing this so you should have all you need | ||
Mike Thompson Prolific User Username: vroomrr Post Number: 126 Registered: 4-2019 |
Thanks all, good job! But it looked like in the video of h_kelly that you can slide off the sleeve that has the Y bit that causes the problem? | ||
Steve Emmott Prolific User Username: steve_e Post Number: 235 Registered: 11-2018 |
Just out of interest I found this picture of Kelly O's car in an old thread. I wonder if you read this Kelly if you still have any more pictures of your body stripped that might show areas that were lead loaded and post them all on a separate thread. Clearly from this picture the lead loading can be seen at the top of the D pillar and into the gutter and at the front it looks like the top gutter down to the A pillar which is consistent with Patricks exploded panel images.  | ||
Mike Thompson Prolific User Username: vroomrr Post Number: 130 Registered: 4-2019 |
Yeah I seen that somewhere too, I was wondering if that is the only way that RR will reach that 130 mph on the speedometer? | ||
Jim Walters Prolific User Username: jim_walters Post Number: 224 Registered: 1-2014 |
I checked clearance on an early Shadow in the shop today. You have 9 clear inches from the flange to the park brake cable guide tube in the crossmember behind the rat trap. You could get 10 inches by rerouting the park brake cable. 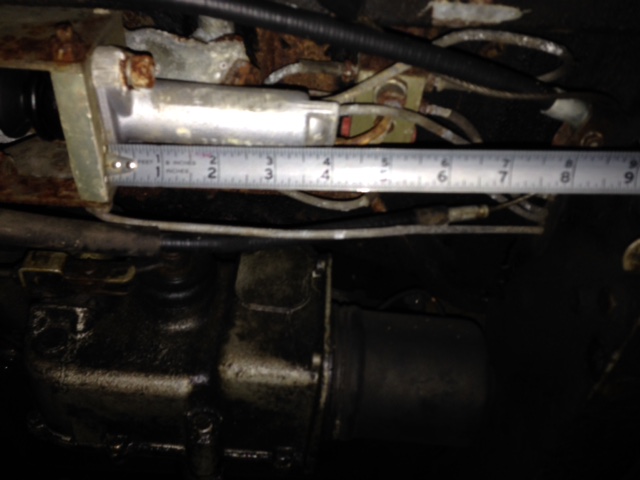 And 2 inches clearance from the centerline of the cylinder to the longeron. 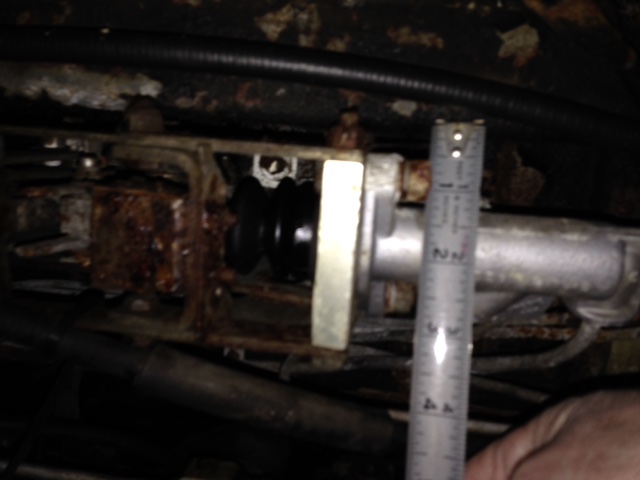 So if the dimensions of the Wilwood are equal or less than the space available it should work. I would also use a smaller diameter like the 7/8ths one perhaps. You will need to do some calculations of volume and travel to ascertain the correct one to use. Also you may have to correct the length of the existing pushrod. You can remove the distribution valves but leave the existing rods and levers to operate the pushrod into the replaced cylinder. SRH8505 SRC18015 SRE22493 NAC-05370 www.bristolmotors.com | ||
Geoff Wootton Grand Master Username: dounraey Post Number: 2075 Registered: 5-2012 |
It may also be worth removing the master cylinder on stop, since it will no longer be needed. This will allow greater pushrod travel, if required. | ||
Kelly Opfar Prolific User Username: kelly_opfar Post Number: 230 Registered: 7-2004 |
Steve, I've posted the lead loading pics previoiusly in this thread: http://au.rrforums.net/forum/messages/17001/19964.html?1461620493 Kelly@BritishToolWorks.com BTW | ||
Mike Thompson Prolific User Username: vroomrr Post Number: 135 Registered: 4-2019 |
S U C C E S S !! I got the old girl running. See my carb post for more details. Jim Walters Thanks for the informative continued posts. | ||
Mike Thompson Prolific User Username: vroomrr Post Number: 136 Registered: 4-2019 |
Geoff Wootton I was going to look at it today (still may) but I am still smiling from ear to ear because I finally got the RR running after 11+ years. Purrs like a kitten. | ||
Geoff Wootton Grand Master Username: dounraey Post Number: 2076 Registered: 5-2012 |
Congratulations Mike. I know you have already bought an "overhead" master cylinder system, but I would seriously consider the method outlined by Jim. It will, in my opinion, be much easier to implement. | ||
Mike Thompson Prolific User Username: vroomrr Post Number: 140 Registered: 4-2019 |
Well the thing about restoring cars, parts get used eventually. And thanks. I think you and Jim are right. Looking at parts already. Just got the old master cylinder out (not that fun), and looking at fitment. | ||
Mike Thompson Prolific User Username: vroomrr Post Number: 141 Registered: 4-2019 |
Wilwood for a master cylinder gives the dimensions like this: https://www.wilwood.com/Images/MasterCylinders/MasterCylinder_Drawings-Large/260-14243-BK_dwg-lg.jpg Doesn't say inches or metric and even after you convert the decimals they make no sense. The width of the bolt holes is 3.22 converted = 3 11/50 (where the heck am I going to find that on my ruler). Height 2.50 the only one that makes sense 2 1/2. Length 6.55 = 6 11/20. Really ! I'm going to get a micrometer up under the car with dirt in my eyes looking at 6.55 (unknown unit). | ||
ross kowalski Grand Master Username: cdfpw Post Number: 935 Registered: 11-2015 |
Mike, Have you looked into hydroboost. They were / are on all kinds of big stuff like commercial vehicles or RVs as well as a lot of diesels. You get like 2k psi similar to OEM. They are very small unlike a vacuum type booster. You already have a saganaw power steering pump so that might be really simple. The RR has lots to capacity in terms of piston swept volume and lots of pressure needs. If you do try the manual route be sure to look at the numbers thoroughly. | ||
ross kowalski Grand Master Username: cdfpw Post Number: 936 Registered: 11-2015 |
Mike, Also some old GM stuff had electro boost, as did some Jaguars. They basically filled an accumulstor by meand of a small hydraulic motor at the booster. I don't think these had a ton of line pressure, but maybe something to think about. | ||
ross kowalski Grand Master Username: cdfpw Post Number: 937 Registered: 11-2015 |
Mike, Also make sure if you mount the Wildwood at the mousetrap you add some residual pressure valves 2/3psi to prevent back flow with the master below the wheels. The folks at Wilwood should be able to help you out there. If your master cylinder came from something with rear drums it probably has 10psi internal residual pressure valves. That could be a problem as 10 psi will keep a disk dragging and the Shadow has rear disks. | ||
Mike Thompson Prolific User Username: vroomrr Post Number: 145 Registered: 4-2019 |
Ross with hydroboost I read there are drawbacks as a pull on the engine power when you brake. And more complexity. If it does not stop well, new option will need to be looked at. Thanks for reminding me of the residual pressure valves 2/3psi to prevent back flow. In the picture way above I bought the master cylinder and it has all that stuff at the side. I could not find anything on it, but probably the 10 psi internal residual pressure valves, if any, are there. Thanks Oh and for long threads you can use your keys to go to the bottom or the top as: ctrl + home goes all the way to the top. crtl + end goes all the way to the bottom. On long threads like this one it helps. | ||
Steve Emmott Prolific User Username: steve_e Post Number: 237 Registered: 11-2018 |
Mike above your forum name and others on the left hand side are some arrows which do the same thing and take you up to top or down Nice to read you got the engine purring | ||
Steve Emmott Prolific User Username: steve_e Post Number: 239 Registered: 11-2018 |
Kelly thanks for the link........that is a brilliant thread and super info. | ||
ross kowalski Grand Master Username: cdfpw Post Number: 938 Registered: 11-2015 |
Mike, I've had hydroboost on a few vehicles and losing engine power on breaking really doesn't happen. Breaking uses power from a little hydraulic reservoir next to the MC not directly from the pump. The only issue I noted is that Hydroboost doesn't have a very direct feel but the OEM really didn't either. I pulled one from a Chevy P30 chassis last year. Now that I think about it, p30's also have a rod with at least one bell crank, so if you go the rube Goldberg route that might be a good source of ready made parts. | ||
ross kowalski Grand Master Username: cdfpw Post Number: 944 Registered: 11-2015 |
Mike, The brakes probable deserve their own list. Replumb as a dual circuit using 3/16 cunifer. Everything is bubble flare and cunifer is like butter. The rear calipers are two separate pressure systems. Plumb the bleeder from the rear lower pot to the input to the rear upper upper pot. That way it acts like a conventional one line caliper. Some Shadow calipers used two different sized pots top and bottom, ignore that. Run cunifer to the front of the swing arm and cross to the frame using some jaguar brake hoses, they are the same just measure what you have. Don't go too long as hose expands more than line, and cunifer expands more than steel as well. Pull the front front calipers, rebuild the best two and use one on each side mounted at the front rear position. Use some cunifer and hose as necessary. Plumb that into your two circuits and presto the simplest brakes you can make on a RR. Calipers. You can get rebuild kits for the calipers, 95% can be rebuilt. I rebuilt tons of calipers over the years including the RR unit's and never had one fail. Tee in an inline pressure brake light switch if removing the mousetrap. | ||
Mike Thompson Prolific User Username: vroomrr Post Number: 149 Registered: 4-2019 |
ross kowalski I made a picture in hopes you will say the above, but use the numbers on the picture to tell me what to what. (I think in pictures) I'm not quite getting what you are saying. 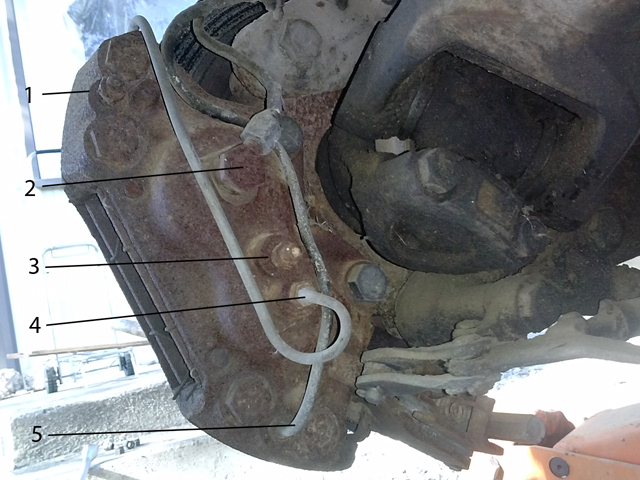 | ||
h_kelly Grand Master Username: h_kelly Post Number: 309 Registered: 3-2012 |
Caliper rebuild ya might find of use https://m.youtube.com/watch?v=b5e25xhy0P0 | ||
Robert J. Sprauer Prolific User Username: wraithman Post Number: 261 Registered: 11-2017 |
Your parking brake issue is the result of corrosion of the many levers and probably the junction located in the middle underneath of the car. NOTE: the parking brake is not an emergency brake by any means. Again, I would read up on the system. | ||
h_kelly Grand Master Username: h_kelly Post Number: 310 Registered: 3-2012 |
https://m.youtube.com/watch?v=nVhh4MHAvIw Basic hand brake adjustment | ||
ross kowalski Grand Master Username: cdfpw Post Number: 946 Registered: 11-2015 |
Mike, Looking at the picture, I think the simplest option would be to put a tee fitting in the line going to this caliper and run one branch into 2 and another into 5 and bleed the system at 1 and 3. I was suggesting in the other post was to come in on 5 and add a line from 3 into 2 and bleed it at 1, replacing 4 with cunifer but keeping it as is. That would be a better layout for keeping the lines and connections to a minimum while making it easy to service. | ||
Robert J. Sprauer Prolific User Username: wraithman Post Number: 262 Registered: 11-2017 |
Whatever you do the calipers have to come off and the pistons removed to inspect what 11 yrs of sitting has done. | ||
Mike Thompson Prolific User Username: vroomrr Post Number: 155 Registered: 4-2019 |
Ross Thanks, it now is transduced into my language. And I agree 2 and 5 are better. Robert Yeah you can see what 11 + years has been doing to it. I agree it all needs to come apart. | ||
ross kowalski Grand Master Username: cdfpw Post Number: 950 Registered: 11-2015 |
Mike, Don't forget to add stp to the oil. The car has no cat and flat tappets. Modern oil is based on cars having roller lifters and catalytic converters so no ZDDP. I put in a can of the red stuff each oil change on everything with flat lifters. | ||
Mike Thompson Prolific User Username: vroomrr Post Number: 164 Registered: 4-2019 |
I got an email back from Wilwood to ask about brakes for a Rolls Royce and this is what I got. Hello, Thank you for the inquiry with Wilwood Disc Brakes. Unfortunately we do not currently have any kits or calipers for Rolls Royce applications. You may be able to adapt some of our universal calipers and a universal master cylinder, but you'll need to fabricate your own caliper mount brackets to do so. If you want to explore that option please let us know, we'd be happy to help you select some calipers. Regards, Wilwood Disc Brakes | ||
David Gore Moderator Username: david_gore Post Number: 3225 Registered: 4-2003 |
Mike, From memory, the front callipers are a standard Girling 4 pot calliper fitted to GM mid-size V8 vehicles [Holden Statesman and Monaro] in Australia in the early 1970's. You would have to check what was fitted to US assembled mid-size performance cars around this period to see if a similar calliper was used. . | ||
Mike Thompson Prolific User Username: vroomrr Post Number: 167 Registered: 4-2019 |
David Gore interesting I'll give it a try in case. | ||
Steve Emmott Prolific User Username: steve_e Post Number: 246 Registered: 11-2018 |
My rears are 4 pot callipers but fronts are just two off standard 2 pot... one at front and one at rear of disc. When I rebuilt them all I fitted stainless steel pots. | ||
Mike Thompson Prolific User Username: vroomrr Post Number: 168 Registered: 4-2019 |
Install power brakes, example The process in this blog: https://www.thesamba.com/vw/forum/viewtopic.php?t=511636 | ||
Steve Emmott Prolific User Username: steve_e Post Number: 249 Registered: 11-2018 |
Mike the guy is a brilliant engineer but needs to practice his welding skills a bit more | ||
Mike Thompson Prolific User Username: vroomrr Post Number: 169 Registered: 4-2019 |
Steve Emmott I didn't look that close, yeah that is pretty bad. Even I can do better than that. But he showed the basics of the remote reservoir concept. The booster part would not work on my application. | ||
David Gore Moderator Username: david_gore Post Number: 3226 Registered: 4-2003 |
Mike, My apologies, I posted the brake calliper details in error whilst waiting for SWMBO and should have looked in the manual first which I have now done after arriving home. Steve Emmott is correct. The front callipers are definitely 2 pot and not 4 pot as I indicated however the Girling and GM Australia references are correct. | ||
Mike Thompson Prolific User Username: vroomrr Post Number: 171 Registered: 4-2019 |
David Gore Yeah I got the drift of it anyway, no problems. | ||
Mike Thompson Prolific User Username: vroomrr Post Number: 185 Registered: 4-2019 |
My scuba buddy Ronald Reagan Juggernaut. With Scuba Carb. 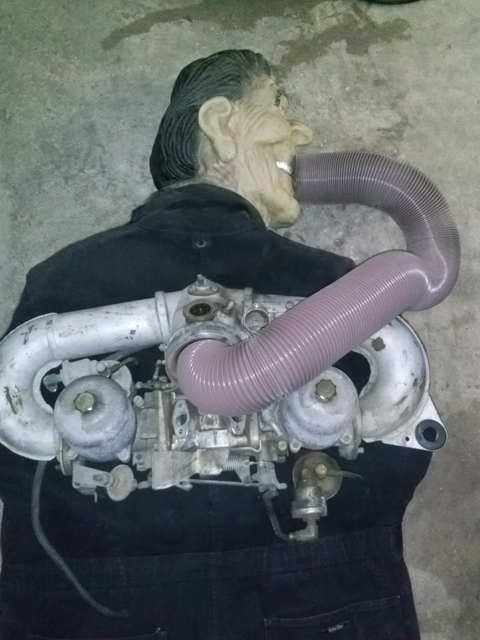 | ||
Mike Thompson Prolific User Username: vroomrr Post Number: 205 Registered: 4-2019 |
Shouldn't there be a thermal switch somewhere for the electric cooling fan on the radiator instead of someone sticking a switch on the dash? | ||
Robert J. Sprauer Prolific User Username: wraithman Post Number: 290 Registered: 11-2017 |
RR never had a manual switch for fans and most cars don't . It makes no engineering sense based on human behaviour and general lack of knowledge about most technical things. The sensor is not located in the radiator, it is in the outlet neck where the thermostat is located. RR's have very good cooling system and when properly cared for does a great job of cooling and most often the coolant gauge just moves up a little when underway. A coolant flush will be in order for a car that has sat with lack of maintenance. I would not be surprised if down the road there will be issues with the liner seals. In due time you will find out. | ||
Mike Thompson Prolific User Username: vroomrr Post Number: 207 Registered: 4-2019 |
One of my post (about the park brake) it shows that the top switch was installed at some time to control the elec. fan. So I'm thinking the sensor no longer works. I installed the bottom switch to turn off the elec. fuel pump while work on things. I have no gas in the tank don't know if that will damage the pump? | ||
Robert J. Sprauer Prolific User Username: wraithman Post Number: 292 Registered: 11-2017 |
Just pull the pump fuse. There is a pull down chart on the drop down fuse panel. | ||
Mike Thompson Prolific User Username: vroomrr Post Number: 208 Registered: 4-2019 |
The shop owner is the one that installed the race fuel pump. It emptied the tank in less than a minute. Thoughts on the fan sensor? And speaking of fuel tanks, how much will it hold? (With that new carb I might watch the fuel gauge move while pressing down on the gas.) | ||
Mike Thompson Prolific User Username: vroomrr Post Number: 237 Registered: 4-2019 |
Theoretically now that my park brakes work, I could drive the Rolls into the garage. Very very slowly, so that I can put it on tire stands that I made and work on the brakes. 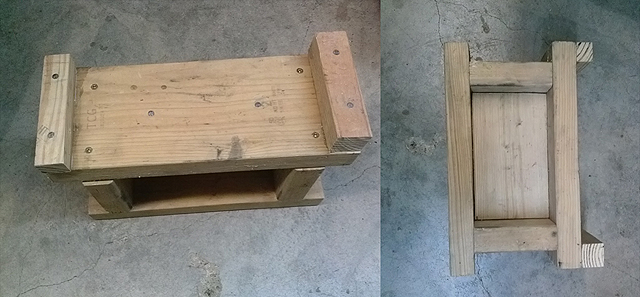 | ||
Robert J. Sprauer Grand Master Username: wraithman Post Number: 303 Registered: 11-2017 |
When I first started my choice for blocks were tree trunks or 8x8 or 10x10 landscape ties. I would throw all kinds of stuff under there. Do you own safety stands...this backyard stuff gets people killed. | ||
David Gore Moderator Username: david_gore Post Number: 3227 Registered: 4-2003 |
Mike, 1977 Shadow II fuel tank capacity is: 107 litres/23.5 UK gallons/28.3 US gallons My apologies for delay - had to wait till I came to Sydney to access my RRMC archives. | ||
Mike Thompson Prolific User Username: vroomrr Post Number: 239 Registered: 4-2019 |
That is probably more than my 2007 Cadillac STS 4.6L V8. I can fill it up on only $20 USD. Little, hate to take it cross country. Thanks for the breakdown into gallons. | ||
Mike Thompson Prolific User Username: vroomrr Post Number: 240 Registered: 4-2019 |
I work alone so I put lots of stuff under there. 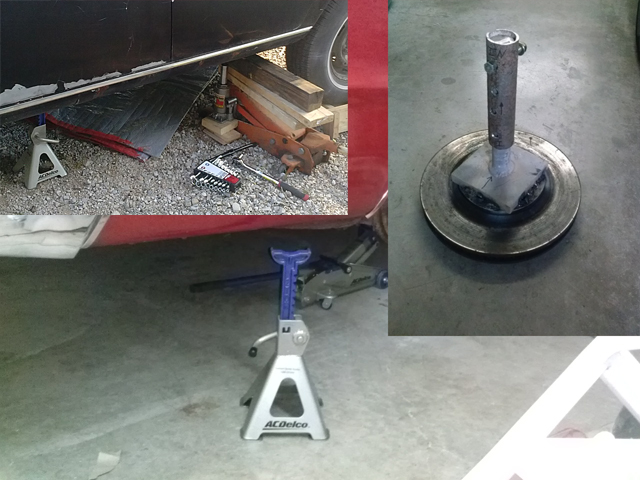 | ||
ross kowalski Grand Master Username: cdfpw Post Number: 1015 Registered: 11-2015 |
Mike, What I've found works pretty good for lying under cars is cardboard sheet, not only is it an insulator and thin, it's free from appliance stores and can be thrown out when you spill a gallon of stale gas on it or whatever. | ||
ross kowalski Grand Master Username: cdfpw Post Number: 1016 Registered: 11-2015 |
Mike What's the current plan for the brakes? | ||
Mike Thompson Prolific User Username: vroomrr Post Number: 241 Registered: 4-2019 |
Ross seems master cylinder and remote booster is the only way I can see at the moment. | ||
Mike Thompson Prolific User Username: vroomrr Post Number: 251 Registered: 4-2019 |
OK I have seen Rolls on a tilt a world contraption, where they can spin the car around, but how do the get the brake lines in? They go everywhere. | ||
Mike Thompson Prolific User Username: vroomrr Post Number: 265 Registered: 4-2019 |
Kelly Opfar made a nice draft drawing and Steve Emmott made a brake pump socket. The question is: is the cut out piece because the manifold is so close to the brake pump? (See posts above, Posted on Monday, 15 April, 2019) Thanks | ||
Mike Thompson Prolific User Username: vroomrr Post Number: 270 Registered: 4-2019 |
I was hoping that someone out there knows a forum where one can ask technical questions about brakes as the correct master cylinder, to pot size etc. along with the added force a remote booster would add. And which ones I should buy and installed. I have a budget of around max $1500. Thanks Best I have found so far is: May be Master Cylinders Losses http://www.engineeringinspiration.co.uk/brakecalcs.html (I posted before in the wrong thread. Hard to keep up with myself.) | ||
Mike Thompson Prolific User Username: vroomrr Post Number: 271 Registered: 4-2019 |
What is behind the accumulators, as does it need to be closed off with a plate so oil does not leak out. It does not show in the manual. | ||
Robert J. Sprauer Grand Master Username: wraithman Post Number: 316 Registered: 11-2017 |
No plate. They simply bolt onto the block with 3 bolts and spacers. Check the Bentley Heritage site for parts drawings. | ||
Mike Thompson Prolific User Username: vroomrr Post Number: 272 Registered: 4-2019 |
All the drawings I found shows the accumulators, but not the block. But you are the first one to say it is just a parasite (as it were) on the block. Thanks Now the problem is how to get to them, yeah that Mohawk System 1 is looking real good about now. | ||
Robert J. Sprauer Grand Master Username: wraithman Post Number: 321 Registered: 11-2017 |
Best access is with the wheels off. Jack the car under the front cast bracket with the 2 nuts facing you. This bracket is cast and strong and the factory recommended spot for lifting with a floor jack in the front. You will also need 2 3/4 wrenches for the heavy metal line that comes down from the hydraulic pumps. One wrench holds the fitting adapter and the other wrench will hopefully loosen the line nut. Heat from a mini torch will be very helpful on the fittings. If you try to use one wrench in all likely hood the metal feed line will twist and finally break. Do you have line wrenches?? | ||
Robert J. Sprauer Grand Master Username: wraithman Post Number: 322 Registered: 11-2017 |
Oh one more thing..The lug nuts on the driver side (US) turn CLOCKWISE to LOOSEN or COUNTERCLOCKWISE to TIGHTEN..The right hand side of the car is normal Right to Tight. And...never tighten the lug nuts with an impact tool. You will curl the facing in and it will be very hard to put them back on next time. ONLY 50 FT LBS to TIGHTEN. | ||
Mike Thompson Prolific User Username: vroomrr Post Number: 275 Registered: 4-2019 |
Robert Good Posts! I found out the hard way on my 1964 Imperial, I was trying to take off the right side back wheel. I put an old small 4 way bar on it and tried to turn left (righty tighty- lefty loosy) kept pulling as hard as I could. No luck, I thought they put these on with an impact tool. I got out my cheater bar and again pulled as hard as I could. Luckily the old 4 way had a stress crack and broke. Then I remembered on old cars some used reverse threads (thinking the would stay on better). Turn right and the came off. (Welded the old 4 way, good as new.) Again thanks for the info. Oh and are these lug nuts brass, they look like it. | ||
Mike Thompson Prolific User Username: vroomrr Post Number: 276 Registered: 4-2019 |
Correction, the left side back (driver's side). | ||
Mike Thompson Prolific User Username: vroomrr Post Number: 277 Registered: 4-2019 |
On the 3/4 line wrenches, I went and looked, I thought I did, I only have up to 11/16, bummer. | ||
Mike Thompson Prolific User Username: vroomrr Post Number: 278 Registered: 4-2019 |
Where can I find in the manual what size allen wrench (hex) is the fuel tank drain plug? And is the oil pan plug, differential and the fuel tank drain plug the same size? I tried to make one but that sucker is on there tight, and the metal I used was soft. No joy in plugland. | ||
Robert J. Sprauer Grand Master Username: wraithman Post Number: 323 Registered: 11-2017 |
The lug nuts are soft, hence the 50ftlbs to tighten. | ||
Robert J. Sprauer Grand Master Username: wraithman Post Number: 324 Registered: 11-2017 |
..and forgot to mention the direction is stamped on the end of the nut | ||
Kelly Opfar Prolific User Username: kelly_opfar Post Number: 233 Registered: 7-2004 |
The size is .525". If you still have the toolkit, the factory tool looks like this: 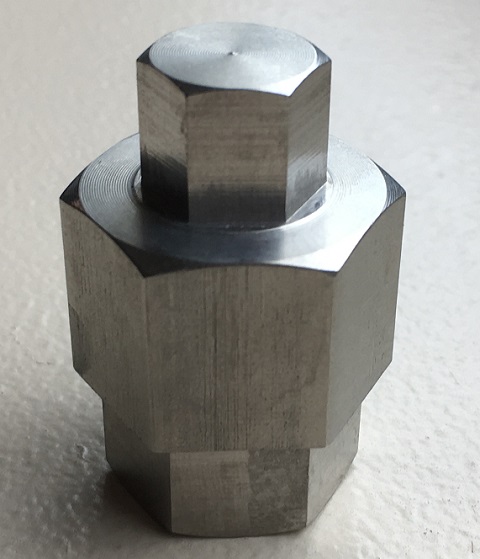 I have them available on my site. I also have these custom milled sockets available: 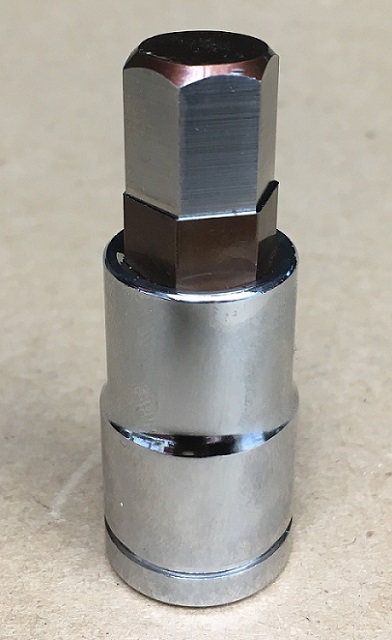 The oil sump, fuel drain and final drive all take the same size tool. Kelly@BritishToolWorks.com BritishToolWorks.com | ||
Mike Thompson Prolific User Username: vroomrr Post Number: 280 Registered: 4-2019 |
Kelly thanks for the info. As far as: "If you still have the toolkit" the only thing that this car came with was candy wrappers in the back ash trays, and a golf ball under the seat. And a million toothpicks everywhere. Guess some wise guy (mafia) drove his kids around chewing on a toothpick. On the socket for the brake pump, is the cut out bit so you can get between the pump and manifold? | ||
Mike Thompson Prolific User Username: vroomrr Post Number: 284 Registered: 4-2019 |
Robert so you don't know if the lug nuts are brass or not? I might try some Brasso on one and see if it sparkles. Brakes, brakes, brakes is constantly on my mind. Even though I pretty much so know which method I want to use, there are a million factors on how I'm going to do it. Sure wish someone who has made a proven method would have left a paper trail somewhere. I think for the filling of the hole where the brake pumps will no longer be, I can use an oil sump drain plug. Workshop Manual Chapter G page G20 does not tell what size the brake pump hole is. Anyone know? | ||
Robert J. Sprauer Grand Master Username: wraithman Post Number: 325 Registered: 11-2017 |
My lug nuts are polished and appear to be brass or a brass mix. Never looked into it. I was more concerned about the torque and direction no matter what they were made of. | ||
Kelly Opfar Prolific User Username: kelly_opfar Post Number: 234 Registered: 7-2004 |
The lug nuts are a bearing bronze. The cutout on the brake pump tool is for manifold clearance: 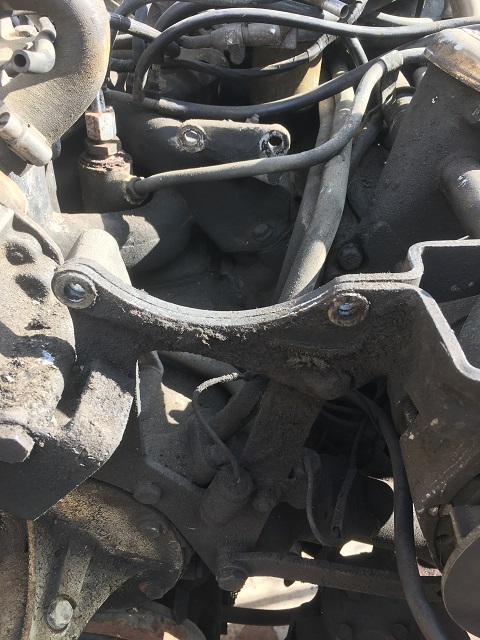 The threads on the brake pumps are 1 1/8"-16. The sump plugs are 1"-16. No joy. BritishToolWorks.com | ||
Mike Thompson Prolific User Username: vroomrr Post Number: 285 Registered: 4-2019 |
I'm wondering if all else fails that I might use a freeze plug? 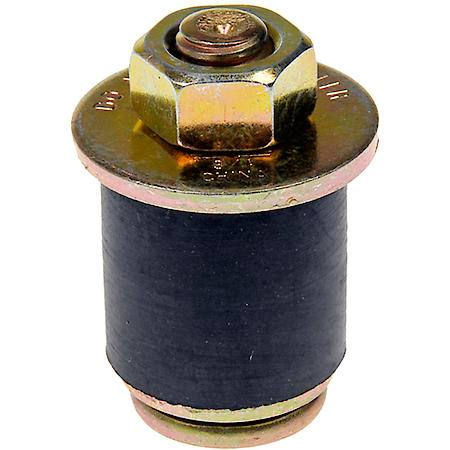 | ||
ross kowalski Grand Master Username: cdfpw Post Number: 1022 Registered: 11-2015 |
Mike, Moss motors has a really good PDF from Lockheed about the remote MCs. I got one for a non power 65 falcon and used the document. It has all the different options and install instructions. | ||
ross kowalski Grand Master Username: cdfpw Post Number: 1023 Registered: 11-2015 |
Mike, https://mossmotors.com/media/instructions/981-173.pdf How about powerbrakes.com I have not used them, but I think they know power brakes. | ||
ross kowalski Grand Master Username: cdfpw Post Number: 1024 Registered: 11-2015 |
Mike, Are you using the single circuit oem mc to single remote servo or dual circuit to dual servo's? | ||
Larry Kavanagh Grand Master Username: shadow_11 Post Number: 421 Registered: 5-2016 |
You could remove the brake pump, then remove the push rod underneath and then put the brake pump back in situ as a redundant pump/hole plug and put the pump cover back on and plug the inlet and outlet threaded holes in the cover, job done, hole blocked and pump deactivated although it would be a waste of a potentially good pump. Also, the accumulator valves bolt to the side of the engine block and can be removed without any loss of engine oil or coolant as the threaded holes are proud and don't go all the way through the block. | ||
Mike Thompson Prolific User Username: vroomrr Post Number: 288 Registered: 4-2019 |
Ross I would think dual. Even though the information provided was for a single, it provides more information on the subject. | ||
Mike Thompson Prolific User Username: vroomrr Post Number: 289 Registered: 4-2019 |
Have you seen The Crown a Netflix-original drama chronicles the life of Queen Elizabeth II. Personally I loved it. Can't wait until it starts up again. If you have seen it is it true to life? The old Rolls Royces are wonderful. | ||
David Gore Moderator Username: david_gore Post Number: 3236 Registered: 4-2003 |
"The old Rolls Royces are wonderful." Mike, I dare say you are weakening and about to cross over into the dark side that almost all of we R-R/B afficionados frequent. Be warned, once indoctrinated it is very hard to cure. | ||
Mike Thompson Prolific User Username: vroomrr Post Number: 290 Registered: 4-2019 |
Ever since I lived in Los Angeles California and saw (not a lot of course but enough of) the old Rolls Royces (1960s Silver Cloud monster machines) I wanted to have one, but of course I never thought I would have enough money to own one. Seeing sometimes stars strolling down Hollywood Blvd. me with dreams of grander (I still have that, but now it is probably because I'm crazy) driving on the same streets in the same luxury cars. If only I had brakes, I too could be one with the Borg. Resistance is Futile! (Vlad will get it.) | ||
Mike Thompson Prolific User Username: vroomrr Post Number: 291 Registered: 4-2019 |
Height adjusters, there is another thread about leaks in height adjusters. Once I take all the lines off, is there something that needs to be lubricated with brake fluid? And does someone know a place that sells the right size master cylinder to fit on the rat trap with remote fill, and dual lines? (That will stop it.) Thanks | ||
Patrick Lockyer. Grand Master Username: pat_lockyer Post Number: 2127 Registered: 9-2004 |
A great deal of work to change the original braking concept, IMO better to fix what you have as original. Jim Walters and others have given all the ideas if you do make a change and rip out the braking and self levelling. The rest is up to you to do your own calculations. BTW I would never use a claw hammer on the RR shinny work and also Ronny someone using a screwdriver to remove the chrome fittings on a door card removal. | ||
Robert J. Sprauer Grand Master Username: wraithman Post Number: 334 Registered: 11-2017 |
Height Control Valves will never be working if you remove the brake pumps and associated plumbing. Kiss it goodbye. You should also disconnect the 2 leads at the height control solenoid since it will not be functioning. | ||
h_kelly Grand Master Username: h_kelly Post Number: 311 Registered: 3-2012 |
Mike have you considered, that the brakes may very well have been working as your car arrived at the auction and it just leaked fluid dry.the picture of the reservoir you highlighted is probably similar to one not cleaned in years. So Mike, how about buying some dot 3 and trying same before you dismantle same?. P's if it's to late apologies. | ||
Mike Thompson Prolific User Username: vroomrr Post Number: 295 Registered: 4-2019 |
Patrick it was not a matter of choice on the brakes. I have a budget of only $5000 max on this project (and I have already spent over $2800), all the parts on this brake system are rusted and corroded. Most at least would have to be rebuilt or replaced. I knew nothing about this brake HL system. And as I said before, if I am going to rebuild the whole system (brake lines and all) in my budget it will cost less to make an American brake system. The inside of the brake pump sleeve is just corroded. This is what the whole system looks like. As every professional has said to me, this is a parts car. The only value outside to me is in its part. And Patrick I am not asking about ideas anymore. I am asking where to buy it. I'm thinking someone knows and is willing to say where. Wilwood will help design the system if I give all the spects but there parts would be beyond my current budget. It is going to have to be a hybrid. | ||
h_kelly Grand Master Username: h_kelly Post Number: 314 Registered: 3-2012 |
Check this out ,master cylinder foot pedal https://fr.motor1.com/news/226213/rolls-royce-silver-shadow-hot-rod/ | ||
ross kowalski Grand Master Username: cdfpw Post Number: 1029 Registered: 11-2015 |
Mike, Could you carefully cut an access panel in the floor right over the rat trap and just use a normal attached reservoir? That way you you would not be limited by needing a remote MC, just one that fits and has the correct volume. | ||
ross kowalski Grand Master Username: cdfpw Post Number: 1030 Registered: 11-2015 |
Mike, You could also make the existing MC on the RR a remote unit. If it had the needed volume, I would think that would be the easiest route. | ||
Mike Thompson Prolific User Username: vroomrr Post Number: 297 Registered: 4-2019 |
h kelly you're back. I'll try to look at it, but on a good day my internet barely works, when it rains all bets are off. I am so glad my RR is in the garage no water inside the car and don't have to stop when the sun goes down. If you missed that, the car is running and will drive, stopping is another matter. Above you warned me about the potential explosive force of an accumulator. I went to an associate who owns a auto repair shop. And he told me a story of old GM cars having accumulator and one guy was taking one off and it sent parts through his hood (bonnet). So going to be careful with that. And in that he reminded me Buicks had accumulators which I read but forgot. I am going to see if any converted their cars to vacuum brakes and how. Now part of that site came up, it's in French. My Spanish will not do any good. No pics yet. I've been trying to post this for hours. | ||
Mike Thompson Prolific User Username: vroomrr Post Number: 298 Registered: 4-2019 |
Ross I don't have to cut anything in that floor board. It has so many holes just pick one. But access instead of a remote reservoir to the MC is only a small problem. Working out how to obtain some 2500 psi to the calipers by a combination of master cylinder and remote booster as master and slave is the tricky part, and then find one that will fit the existing rat trap (which could be modified). The original MC is only for feel and I've been told (here) it could not stop the vehicle. But the hole is a nice idea, I'll think on it. Getting data at this time is my problem. | ||
Mike Thompson Grand Master Username: vroomrr Post Number: 306 Registered: 4-2019 |
As I said above getting data is a problem I am having on working out which product for the master cylinder and remote booster as master and slave. I'm wondering if anyone out there knows where I can get on say a master cylinder the output psi, and for the remote booster? Thanks I hope this goes through it took all day to post one post with a picture, and they double post. | ||
Mike Thompson Grand Master Username: vroomrr Post Number: 312 Registered: 4-2019 |
This is the only site I have found that says anything of converting to a vacuum booster. I cannot believe there is no data at all out there. https://specialadditions.com/proddetail.asp?prod=VacBrakes | ||
Mike Thompson Grand Master Username: vroomrr Post Number: 313 Registered: 4-2019 |
This is the only site I have found that says anything of converting to a vacuum booster. I cannot believe there is no data at all out there. https://specialadditions.com/proddetail.asp?prod=VacBrakes | ||
Mark Luft Prolific User Username: bentleyman1993 Post Number: 251 Registered: 10-2016 |
Mike, that looks like a nice kit! | ||
Mike Thompson Grand Master Username: vroomrr Post Number: 316 Registered: 4-2019 |
I took off a front caliper and took it to a local auto parts store and looked through every box with calipers. All are too new and no way to adapt them. The only one even remote was a 1986 Jaguar XJ6. Contacted Summit Racing by email, hope they can help. Ross said 16 April: "Also some old GM stuff had electro boost, as did some Jaguars. They basically filled an accumulator by means of a small hydraulic motor at the booster. I don't think these had a ton of line pressure, but maybe something to think about." I think the link above may be about that. One was saying if the fuse blew you had no brakes. | ||
Jim Walters Prolific User Username: jim_walters Post Number: 225 Registered: 1-2014 |
I'm always looking for rebuildable cores. Send me the calipers off your car and I'll rebuild them all for you for the cost of parts (new pistons and seals). In trade for the labor I'll accept all the parts you remove from your car. Brake pumps & accumulators, distribution valves, height control valves, etc. and the carbs. They'll come back to you looking like this: 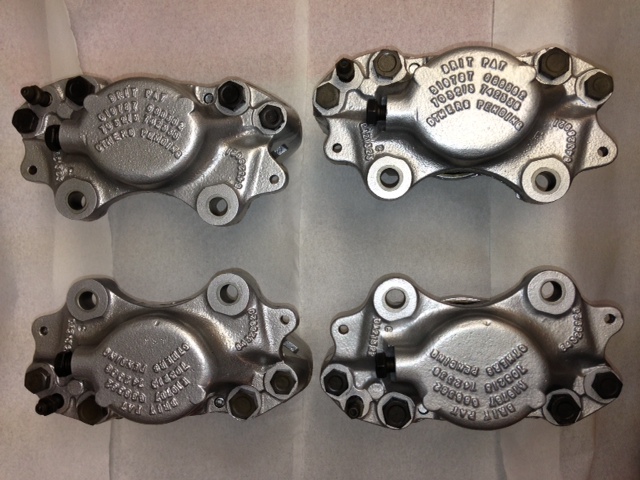 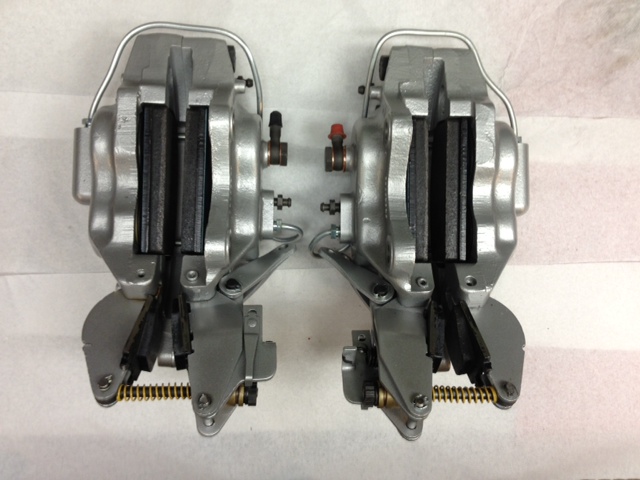 SRH8505 SRC18015 SRE22493 NAC-05370 www.bristolmotors.com | ||
Mike Thompson Grand Master Username: vroomrr Post Number: 320 Registered: 4-2019 |
Sorry already got a much better offer. And I can rebuild brakes, been doing it since I was 16 years old. And all I have to do is dip them into white vinegar for four days and they'll look like new. Thanks anyway. PS plus at this time I'm not sure I'll be using them. | ||
Geoff Wootton Grand Master Username: dounraey Post Number: 2091 Registered: 5-2012 |
Beautiful job Jim. I have noted this in case I need replacements in the future. | ||
Mike Thompson Grand Master Username: vroomrr Post Number: 323 Registered: 4-2019 |
I have looked in the manual for the size of the pistons in the calipers and could not find them. Could someone kindly tell me their sizes (if different)? And someone said they use stainless steel for theirs. Thanks | ||
Mike Thompson Grand Master Username: vroomrr Post Number: 324 Registered: 4-2019 |
If you notice in this video Mark Caro has in his RR a double booster (maybe two 9") and a master cylinder. Right where the heater and air is (I think). He said he put in an aftermarket Air Con. If you notice the wheel, it looks like it only has one caliper at the top. So he did not do as I want to do (use the existing calipers). It is all modified. https://www.youtube.com/watch?v=lT4R3hyB1oM 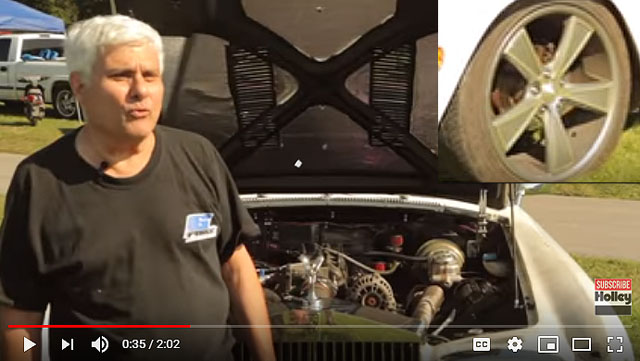 | ||
Jim Walters Prolific User Username: jim_walters Post Number: 226 Registered: 1-2014 |
Thanks Geoff. I powdercoat the calipers I rebuild to protect them from corrosion so they stay looking new. Same with accumulator valves and spheres. I usually rebuild some over the winter to have them ready to go on the shelf but this past winter I've just been swamped with work so had no spare time to get some done. Good complaint to have I guess. SRH8505 SRC18015 SRE22493 NAC-05370 www.bristolmotors.com | ||
Mike Thompson Grand Master Username: vroomrr Post Number: 326 Registered: 4-2019 |
I have looked in the manual and the internet for the size of the pistons in the calipers and could not find their sizes. Could someone please tell me their sizes (if different)? And someone said they use stainless steel for theirs. Thanks | ||
h_kelly Grand Master Username: h_kelly Post Number: 315 Registered: 3-2012 |
Mike re Mark Caro, if you put a comment on bottom of youtube clip he may very well contact you?. Amy harm to ask why your not reconditioning the original calipers?. For a couple hundred dollars you could reseal with new pistons?. | ||
Mike Thompson Grand Master Username: vroomrr Post Number: 327 Registered: 4-2019 |
h kelly: It is because if I can find normal calipers and adapter plates to bolt them to the RR, it will provide normal truck stopping power (for instance) with large pistoned calipers (as apposed to the very small pistons on the RR) that do not require the 2500 to 3000 psi to the calipers. I could then be able to buy any truck remote fill master cylinder and remote vacuum booster. Without all the calculations etc. A truck system will stop it guaranteed. My truck pulled that RR and stopped "both" vehicles. The problem with adding a comment, is it is not his video or channel. It is the HolleyPerformance channel. Unlikely he would answer (even if it was his channel). Oh and without your help of asking questions I would not know this stuff (with you and other's help). And I'm working on a car, first start video (for Ross etc.). | ||
Mark Luft Prolific User Username: bentleyman1993 Post Number: 252 Registered: 10-2016 |
I think that having two calipers on each front wheel showing through the wheels is spot on. No one else has this. Just RR/B. Very cool. | ||
Mike Thompson Grand Master Username: vroomrr Post Number: 330 Registered: 4-2019 |
They'd be much cooler if I knew what size the pistons are. | ||
Robert J. Sprauer Grand Master Username: wraithman Post Number: 351 Registered: 11-2017 |
Instead of asking, why don't you simply unbolt the calipers, split them open and measure the pistons.... or would that be too easy? | ||
Mike Thompson Grand Master Username: vroomrr Post Number: 331 Registered: 4-2019 |
Have you people seen how much you can get for parts on ebay? I have a gold mine sitting in my garage. | ||
h_kelly Grand Master Username: h_kelly Post Number: 316 Registered: 3-2012 |
Mike piston size front https://brakeparts.co.uk/shop/Rolls%20Royce/Silver/65-/Silver%20Shadow,wraith,spur%20&%20Spirit/Front%20-%20Brake%20Calipers%20and%20Wheel%20Cylinders/BCP5401 Rear https://brakeparts.co.uk/shop/Rolls%20Royce/Silver/65-/Silver%20Shadow,wraith,spur%20&%20Spirit/Rear%20-%20Brake%20Calipers%20and%20Wheel%20Cylinders/BCP4801 https://brakeparts.co.uk/shop/Rolls%20Royce/Silver/65-/Silver%20Shadow,wraith,spur%20&%20Spirit/Rear%20-%20Brake%20Calipers%20and%20Wheel%20Cylinders/BCP4001 | ||
ross kowalski Grand Master Username: cdfpw Post Number: 1032 Registered: 11-2015 |
https://www.youtube.com/watch?v=MpAhXrLpvZo and https://youtu.be/cyNZLmHqtog?t=375 | ||
Mike Thompson Grand Master Username: vroomrr Post Number: 332 Registered: 4-2019 |
h_kelly you must be part blood hound the way you sniff out this sites (a complement). ross kowalski I'd love to watch them but my internet is still not working to watch. I live in a dead zone. | ||
ross kowalski Grand Master Username: cdfpw Post Number: 1033 Registered: 11-2015 |
Just as well https://youtu.be/F5SJZP-_xxw?t=223 | ||
Mike Thompson Grand Master Username: vroomrr Post Number: 333 Registered: 4-2019 |
Ross I got a little of that one, up to the part that "brakes were invented by pussies" (cats). About peed myself. Reminds me of when I was a boy. | ||
David Gore Moderator Username: david_gore Post Number: 3243 Registered: 4-2003 |
""Reminds me of when I was a boy." Same here except as a 12 year old. I took the rope-start 2 stroke engine off an early Victa lawnmover and fitted it to my wood billycart using the start pully housing as a friction drive on one of the rear wheels salvaged from the old pram previously used for my sister and I as babies. 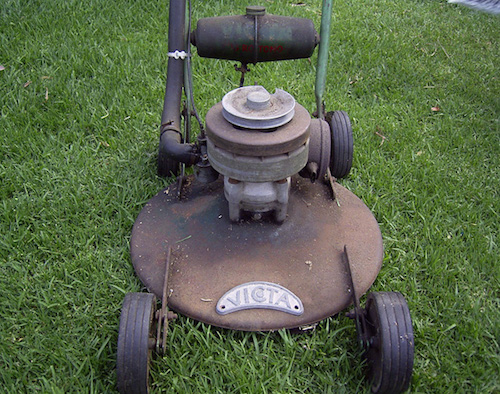 The brake was a length of timber pivoting on a bolt throught the billycart wooden frame which pushed a wood block onto the ground to stop the cart and which also served to lift the drive wheel off the ground for starting the engine and lifting the drive wheel off the ground if the engine didn't stall when emergency braking was needed. Starting was a 2 boy operation, one to rope start the engine and the driver who was responsible for making sure the contraption didn't crash once mobile. My parents had no idea what we had done and there was no way I was going to tell them. My partners in ingenuity and I kept our creation in a farm shed on a large paddock just outside town where we kept our corrugated iron tin canoes until it fell to pieces from engine vibration and less-than-robust construction. Unfortunately, we never allowed our achievement to be photographed for fear of parental retribution if they ever found out what we had done. | ||
Mike Thompson Grand Master Username: vroomrr Post Number: 334 Registered: 4-2019 |
David not bad for a 12 year old. I started driving when I was 10 years old a VW, no one taught me just got in and took off. Day after day for a while. Had to teach myself how to hot wire it. Never got a ticket for that, I got a ticket at 12 for riding a minibike. The cop said you keep it up and you won't be able to get a license at 16. Sometimes being able to do things without being taught is not a good thing. | ||
ross kowalski Grand Master Username: cdfpw Post Number: 1035 Registered: 11-2015 |
Mike, The other video said the power master system used on the buick GN was electric over hydraulic and made 2300 psi. He also mentioned some issues with the system, but it did look like you could mount the pump remotly. | ||
Mike Thompson Grand Master Username: vroomrr Post Number: 338 Registered: 4-2019 |
Thanks Ross I finally through many minutes got to watch it. As someone else said if the fuse blows you have no brakes. Now that he explained how a hydroboost works I might be able to go with that. I am talking with Fastbrakes to see i the can devise a system. I gave them all the info I could as: http://www.rrsilvershadow.com/ETechn/Hydr/Compbrcal.htm And the pot sizes that h_kelly gave me above. Good work guys we'll get this yet I believe. | ||
Vladimir Ivanovich Kirillov Grand Master Username: soviet Post Number: 1379 Registered: 2-2013 |
Mike you are pure entertainment. Love your tyre stands. I often use wheels or wheels with inflated tyres and cannot see that would cause any falling of vehicle. Your craftsmanship is extraordinary. I presently work in third world conditions on large trucks and huge forklifts for a total lunatic. Dangerous as hell but that's life. Nice pic of the Victa David. Good for Cane Toads and Rare lizards. Aussie invention I believe. | ||
David Gore Moderator Username: david_gore Post Number: 3244 Registered: 4-2003 |
Yes - best ever device for cutting toe nails and the 4 wheel independent suspension was a hoot to adjust!!! Starting the mower was fraught with danger for the inexperienced as a failure to exercise due caution would result in the mower coming forward while you were unbalanced and the complete lack of a blade guard meant your toes were the first responders. The start procedure for a right-hander was to first close the choke on the mesh air filter on the side of the handle then pivot the mower on the rear wheels and shake to mix the 2-stroke fuel mix in the tank. You then turned on the petrol tap under the tank to feed the carburettor [you quickly learnt to run the carburettor dry by turning the tap off when you you finished mowing and letting the motor run till it stopped of its own accord - otherwise the petrol in the carburettor bowl would evaporate leaving an oil residue behind that always caused carbon fouling next time the mower was started]. Next step was to use the "tickler" on the carburettor body to open the inlet needle valve to fill the bowl until fuel spurted out the bowl breather hole. You then opened the throttle on the handle, wound the starting rope around the pulley on top of the engine, put your right foot on the LHS front wheel making sure it was properly postioned so it wouldn't slide off and then you pulled the rope as fast as possible and if you had done everything right the engine would start with a cloud of blue smoke. If your foot slipped off the wheel, your only priority was to get your foot away from the mower base so it didn't get hit by the unprotected blades - steel capped safety boots were a rarity in the 1950's. Failure to start was always a problem if the normal practice of opening the choke, opening the throttle wide and trying to clear a flooded engine didn't work. Next step was to disconnect the spark plug lead, remove the spark plug, clean it with a wire brush, use a points file to remove any pitting on the electrodes and reset the gap with a feeler gauge. It was essential to pull the engine over a few times while the plug was out to clear the fuel/air in the cylinder before reinstalling the plug and trying to start the engine. You quickly became an expert in doing this................... Mervyn Victor Richardson [the inventor of the Victa lawn mover and later the Air Tourer light aircraft] had a lot to answer for. The Victa Company was later purchased by the US Sunbeam Appliance Company if my memory is correct. | ||
Mike Thompson Grand Master Username: vroomrr Post Number: 344 Registered: 4-2019 |
So Victa was short for victims. Martha put another toe on the barbie. Gives a new meaning to down under. | ||
Mike Thompson Grand Master Username: vroomrr Post Number: 345 Registered: 4-2019 |
As you may know I was having a lot of trouble with the sleeve on brake pump #1. So the sleeve suffered just the teenest tiniest little bitty blemish, hardly even noticeable. Well from the moon. 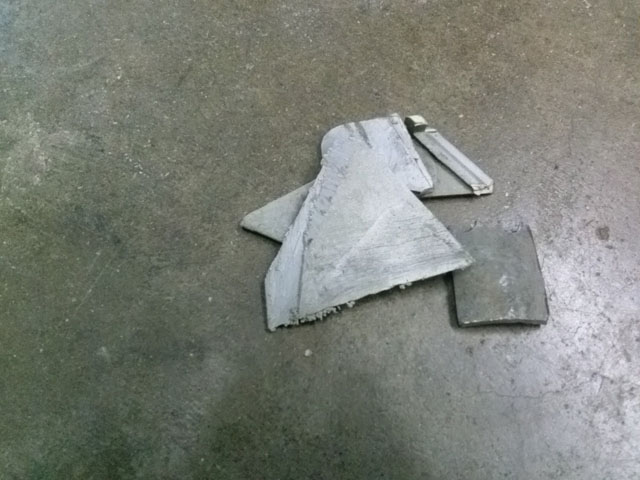 Not really it will be just find, it's in the recovery room. | ||
ross kowalski Grand Master Username: cdfpw Post Number: 1036 Registered: 11-2015 |
Mike, 53 ford linkage ebay $150 Hydroboost ebay $100 1.125 corvette MC rock auto $50 -8 hoses jegs $75 2psi residual valves jegs $40 Cunifer line autozone $80 Fitting it all up $priceless You could go cheaper sourcing the parts locally. I wouldn't go smaller than 1.125 for the bore as you would have too long a pedal stroke with the capacity of the RR system. Smaller gives you more line pressure but less volume. | ||
Mike Thompson Grand Master Username: vroomrr Post Number: 346 Registered: 4-2019 |
Thanks Ross We have like 3 junk yards close by. One has nothing but classic cars, one both, and one more modern. The last one is spread over a large area with a bit of everything, if you can find it, and it has not been burnt. (large fire). The last one is the one I call the pick and pull, because if you take it off it is cheaper. Did the hydroboost have a truck or car I could find it on? Maybe the pick and pull has one for real cheap. | ||
Mike Thompson Grand Master Username: vroomrr Post Number: 347 Registered: 4-2019 |
I looked in the A/C manual and found the heater core and A/C is in the middle of the console. So I started to take things out. And found that I can put a rod through the firewall to a booster or master cylinder. A game changer. I now could just get a hydroboost and work it that way. No more remote anything. Below, after I took things out, lots of room #1. To show there is nothing between the firewall to stop a rod going through there, use the speedometer cable to show it goes right through #2 and 3. Only the air con lines go through the firewall, the A/C is in the middle of the console #4. 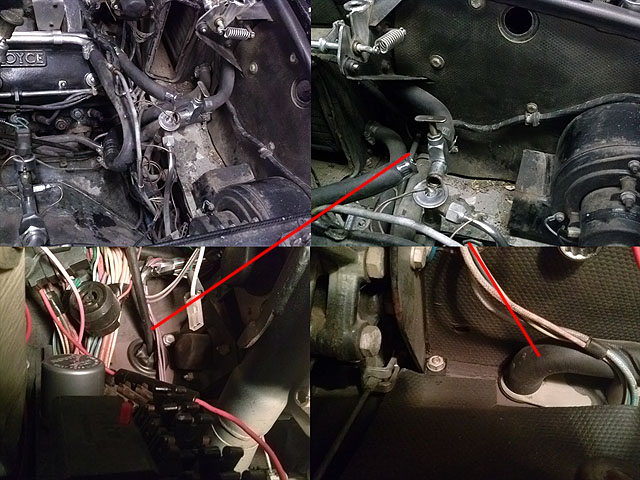 | ||
Mike Thompson Grand Master Username: vroomrr Post Number: 348 Registered: 4-2019 |
My RR's First Run and Drive. https://www.youtube.com/watch?v=_Z5o1ljesno | ||
ross kowalski Grand Master Username: cdfpw Post Number: 1043 Registered: 11-2015 |
Mike, Hydroboost was used on a lot of bigger pickup / van kind of things. A benefit of the pick and pull is that you would likely source all the hoses as well. A vehicle that came with hydroboost would have had an extra return nipple on the PS pump reservoir. It might be worth scoring that as well. No one ever adds the return to the reservoir but it is actually the correct way of plumbing the job. | ||
Mike Thompson Grand Master Username: vroomrr Post Number: 350 Registered: 4-2019 |
As you can see on my engine, I do like nipples. Hope you saw my new video of the RR. https://www.youtube.com/watch?v=_Z5o1ljesno | ||
Mike Thompson Grand Master Username: vroomrr Post Number: 353 Registered: 4-2019 |
I'm in class for Hydroboost 101. Lesson one. https://bangshift.com/general-news/tech-stories/tech-how-to-swap-a-junkyard-hyrdoboost-on-your-classic-gm-muscle-car-or-truck/ | ||
ross kowalski Grand Master Username: cdfpw Post Number: 1045 Registered: 11-2015 |
Mike, That tutorial looks right. It's not the crewe system just three hoses. Pretty straight forward. | ||
Mike Thompson Grand Master Username: vroomrr Post Number: 354 Registered: 4-2019 |
I'm thinking if I can find a hydroboost system at the pick and pull, I would get the whole system. And put its power steering pump on it as well so the hydroboost has its own supply (and nipple). The RR pump is really small and old, don't know I trust it. And the old CA emission had a pump, now gone, so a belt just for the brakes. I think h_kelly was telling me about the same thing at the first. I just wanted at the time to trash the whole system. Yeah his first post h_kelly 08 April, 2019 - 05:19 am he said I should use a similar system. now I'm ready to listen. For the front brakes I think I would use a Distribution Block for each front end set, and a Proportioning Valve for the rear brakes. I think there are gobs of Distribution Blocks on the car already. | ||
Mike Thompson Grand Master Username: vroomrr Post Number: 356 Registered: 4-2019 |
How to properly remove pistons from calipers. A Step by Step Instruction. First put your caliper on an appropriate working surface. Bubba Reaction: Put it on the floor, check. Take note of where all the various components go to reassemble. Bubba Reaction: Take picture, check. 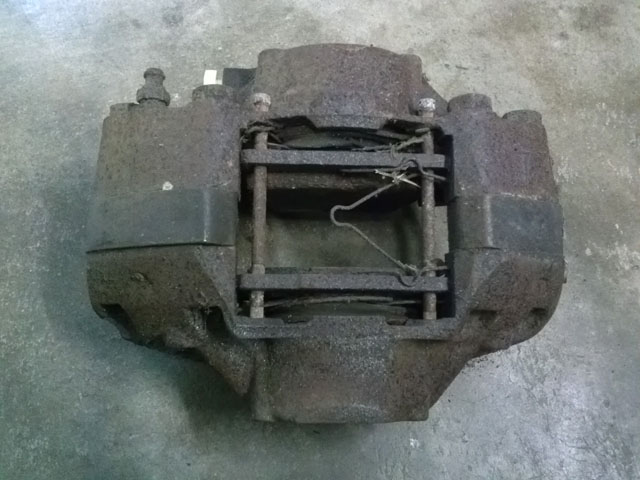 Remove brake pins with appropriate tools. Bubba Reaction: Get a hammer and a nail and wack it. Make sure to remove keeper clips before doing so. Bubba Reaction: That's why the sucker wouldn't come out. 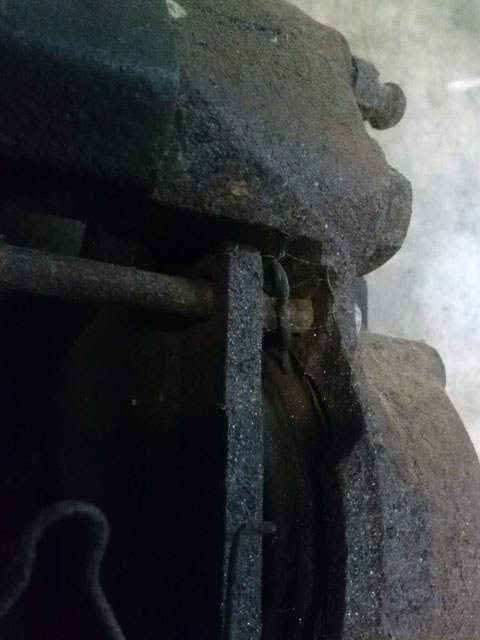 Remove brake pads Bubba Reaction: Wack pads with hammer, check. Inspect brake pads to insure they have enough material to reuse. Bubba Reaction: Yeah got some stuff left, check.  Use the proper tools to remove pistons. Bubba Reaction: Get a hammer and ViseGrips, check. 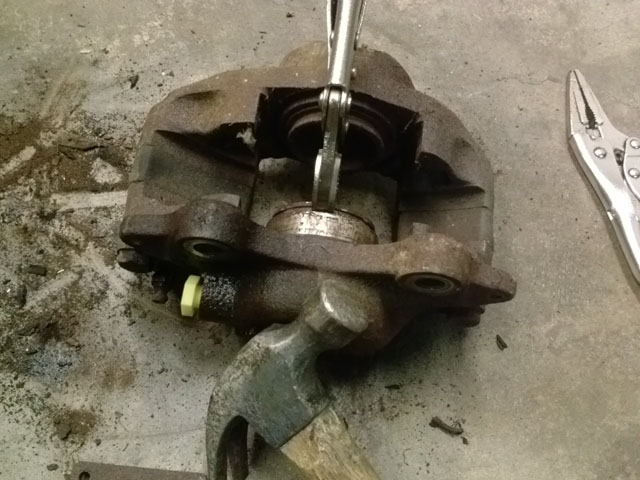 Inspect the pistons and interior of piston housing. Inspect the caliper piston dust seals for signs of damage or heat hardening and renew if necessary. Bubba Reaction: Good enough sick em back in there. 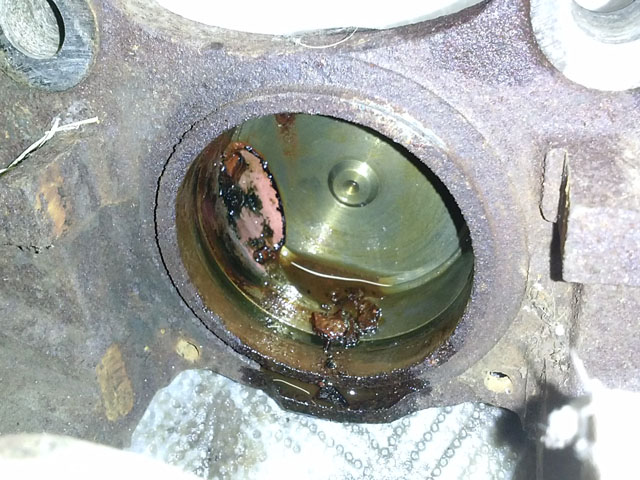 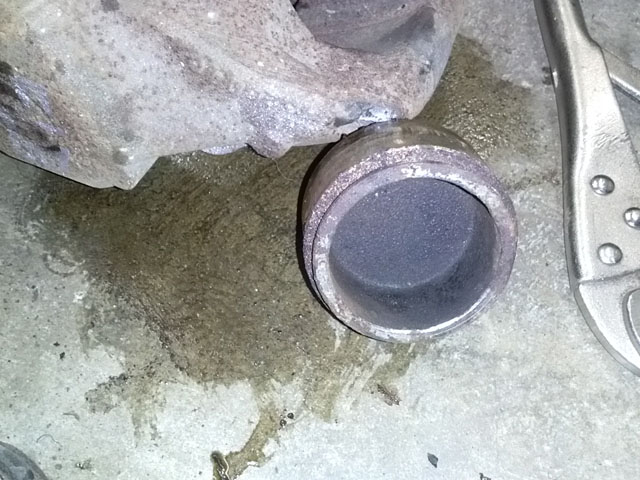 | ||
Robert J. Sprauer Grand Master Username: wraithman Post Number: 361 Registered: 11-2017 |
Ok so you're going to reuse those pistons, seals and pads? BTW proper way to remove pistons is to pump grease or use compressed air. FYI Once the walls of the piston are scratched it's game over. | ||
Mike Thompson Grand Master Username: vroomrr Post Number: 357 Registered: 4-2019 |
Where is the cheapest place for the rubber parts, ring keepers etc. ? I think they reached their expiration date. | ||
ross kowalski Grand Master Username: cdfpw Post Number: 1047 Registered: 11-2015 |
Mike, Those calipers look pretty good. That goo in the calipers will just wash out. The pistons would work. Clean them and remove any flaking chrome. They are ugly and would not last forever, but they would last years. Two of my rears were WAY worse than those and they haven't frozen or leaked or whatever. You can always replace them later if you are feeling it. Also, there are orings between the halves of the caliper. I replaced mine but if I had to do it again, I think I would skip it. | ||
Mike Thompson Grand Master Username: vroomrr Post Number: 361 Registered: 4-2019 |
With that much rust on there, breaking the calipers apart seems a scary thing to me. If it ain't broke don't fix it (as they say). One piston had those worms in there too. I knew any car that sits around for 11 + years and the system is dry of brake fluid, the whole thing will have to be rebuilt or replaced. I didn't want to get into that with this car. Where is the cheapest place for the rubber parts, ring keepers etc. ? | ||
Mike Thompson Grand Master Username: vroomrr Post Number: 364 Registered: 4-2019 |
Are you about to suddenly die in your car? Read this: http://makanannusa.blogspot.com/2015/11/sudden-brake-failure-in-shadow-era.html | ||
Mike Thompson Grand Master Username: vroomrr Post Number: 367 Registered: 4-2019 |
Have the calipers changed over the years to say 1986. There is a auto parts for very cheap. See https://www.autopartswarehouse.com/rolls-royce-parts/rolls-royce-silver-shadow-parts/silver-shadow-brake-caliper-repair-kit | ||
Mike Thompson Grand Master Username: vroomrr Post Number: 368 Registered: 4-2019 |
1970s VW have girling brakes. They look very similar to the RR. The piston sizes are a bit different, and as always finding data is the problem. Now I went to a local auto parts (well all of them) and found at one a coolant flat O-ring, fits the piston but is too wide. It won't go into the grove. (P/N 26272 Stant thermostat seal). https://www.ebay.com/p/VW-Bug-Beetle-Ghia-Brake-Caliper-EMPI-98-1150-b/655321211?iid=323754043351&chn=ps https://www.go-parts.com/ps-product.php?product=6736792&name=1972%20Volkswagen%20Transporter%20Disc%20Brake%20Caliper%20Repair%20Kit%20%20-%20Front%20Centric&year=1972&make=Volkswagen&model=Transporter&parttype=Disc%20Brake%20Caliper%20Repair%20Kit&sku=2D61E4F | ||
Jim Walters Prolific User Username: jim_walters Post Number: 227 Registered: 1-2014 |
I would recommend you just order the correct seal kits from Albers Rolls-Royce in Indiana. 1981 and newer RR's use mineral oil for brake fluid so the seals are made from a different rubber compound and are not compatible with DOT3 based fluids like RR363. http://www.albersrollsbentley.com/parts/ SRH8505 SRC18015 SRE22493 NAC-05370 www.bristolmotors.com | ||
Mike Thompson Grand Master Username: vroomrr Post Number: 370 Registered: 4-2019 |
So volkswagen has finally done it, turned Bentleys into high priced SUVs. Bound to happen, what will BMW do to Rolls, Make Rolls trucks. 2019 Bentley Bentayga V8 SUV Jim How do you find parts on that site? | ||
Robert J. Sprauer Grand Master Username: wraithman Post Number: 367 Registered: 11-2017 |
The Bentley SUV and RR Cullinan are now approx 2 yrs old | ||
Jim Walters Prolific User Username: jim_walters Post Number: 228 Registered: 1-2014 |
You fill in the linked page asking for the parts you want and they will email you a quote. I find they usually have the best price for parts in North America when shipping is taken into account. Specify that you would like aftermarket parts where available. SRH8505 SRC18015 SRE22493 NAC-05370 www.bristolmotors.com | ||
Mike Thompson Grand Master Username: vroomrr Post Number: 371 Registered: 4-2019 |
Rear rebuild kits, if it says Rolls Royce it is �32.93 (no VAT) rear, front �44.45. If it says VW on them it is $8.00 rear, front $16.00. https://www.flyingspares.com/shop/rolls-royce-bentley-shadow-t1-t2-corniche-mpw/silver-shadow-t-1-2-brakes-pads-discs-fluid/rear-brakes-pads-discs-calipers/rear-brake-calipers-early-cars-with-master-cylinder/rear-caliper-seal-kit-cd6287p.html https://www.flyingspares.com/shop/rolls-royce-bentley-shadow-t1-t2-corniche-mpw/silver-shadow-t-1-2-brakes-pads-discs-fluid/front-brakes-pads-discs-calipers/cars-with-solid-front-brake-discs-rotors/front-brake-calipers-for-solid-brake-discs/front-brake-caliper-seal-kit-cd5339p.html The Rolls Cullinan is not as bad as the Bentley. Nissan should suit Bentley for Copyright infringement. https://media.ed.edmunds-media.com/for-sale/1b-jn8af5mr7ft512245/img-1-600x263.jpg | ||
Mike Thompson Grand Master Username: vroomrr Post Number: 372 Registered: 4-2019 |
Jim weird way of doing things. But what is Coach Builder. The vin is SDR that's all I know and whatever numbers, the door says made at Cheshire England. It was last in California. | ||
Mike Thompson Grand Master Username: vroomrr Post Number: 373 Registered: 4-2019 |
David Gore Castrol-RR363 Real expensive stuff. Have reposted below as an image due to problems with original link to website corrupting width of the thread. | ||
Jim Walters Prolific User Username: jim_walters Post Number: 229 Registered: 1-2014 |
Select standard RR/B coachwork. Their request for details and VIN when quoting prices is necessary because of the great variety of options and models throughout the years. Also Rolls-Royce made constant specification changes throughout production. For instance, the conventional master cylinder was discontinued at VIN 22118 and a rubber 'spring' replaced it for pedal feel. Albers needs the VIN to supply the correct parts for your car. Your VIN is SRD21318, that is what they are asking for. SRH8505 SRC18015 SRE22493 NAC-05370 www.bristolmotors.com | ||
Jim Walters Prolific User Username: jim_walters Post Number: 230 Registered: 1-2014 |
Also if you are interested in what changes occurred during production it can be found here: http://www.rrsilvershadow.com/EMod/Chnr3.htm Home for that link is: http://www.rrsilvershadow.com/EIndex.htm It has lots of really good RR information. SRH8505 SRC18015 SRE22493 NAC-05370 www.bristolmotors.com | ||
David Gore Moderator Username: david_gore Post Number: 3251 Registered: 4-2003 |
Mike, CASTROL officially announced the demise of RR363 some time ago and I am not aware it has been reinstated to their current product range. It would be great if one of our UK Shadow owners could check and advise if there has been a quiet reversal of the previous Castrol decision to delete RR363 from their product range. In any case, "YAK 363" made by members of this forum has been used for a considerable period of time with no reported problems. | ||
Mike Thompson Grand Master Username: vroomrr Post Number: 374 Registered: 4-2019 |
Jim thanks for the info, and that's great just 1000 cars later they introduced breakerless electronic ignition by Lucas, known as OPUS. I was wishing I had one. I bought one for my 1974 C10 truck. Ran much better and no fooling around with points, and had much more power. David I intend on not having to be stuck to the RR363 teet. And I saw the big argument over dot5 or dot3 + castrol oil. But for the brake parts in the calipers (I'm forced to use) I think they need dot3 correct? And while I'm asking, what coolant do RRs need? After 11 + years I'm sure it needs a flush. It stinks like wet dog. Thanks | ||
h_kelly Grand Master Username: h_kelly Post Number: 318 Registered: 3-2012 |
Mike check out some of Ronnie YouTube clips on brakes in which he discusses the brake fluid he uses. Your car sounds real sweet on idle, as a matter of interest does your new carb have to be balanced?. Will dot 3 suit your new brake setup, ie master cylinder and booster?. | ||
David Gore Moderator Username: david_gore Post Number: 3253 Registered: 4-2003 |
YAK363 only needed if you use the RR hydraulic pumps as they are diesel injection pumps given a change of life - the castor oil only serves as a lubricant to minimise wear on the pump. Diesel fuel is sufficient lubricant on its own when the pumps are used for their intended purpose. Otherwise DOT 4 or DOT 5.1 brake fluid will suffice. . | ||
Mike Thompson Grand Master Username: vroomrr Post Number: 377 Registered: 4-2019 |
h_kelly It definitely needs a tuneup. It is out of time and backfiring. If you see in the video, it flashes before it stops, that's backfiring. I think the carb comes with a video (on cd) and instructions. Getting it running good is a ways down the road in another episode of As The Rolls Turns. You probably should not hear the engine at all, but it had some exhaust leaks due to things taken off the emission control for the scuba carb. I have (I think) fixed that. And if you look in the video at the oil dip stick, it's not running that smooth. https://youtu.be/_Z5o1ljesno And there are a whole lot more lurkers reading this than you might think. There is 53 views of my video. Let's say 1 out of 10 go watch it. That may be 500 are out there just reading and never post. Scary like the Twilight Zone. A whole other world is out there that we can't see. Like dark matter. Dark humans reading our posts and no scientific instrument can detect them (like virtual particles). (People stop watching the video when it actually starts moving, you can only tell by the light moving.) Was DOT 4 or 5.1 invented in 1975? | ||
David Gore Moderator Username: david_gore Post Number: 3260 Registered: 4-2003 |
David Gore Castrol-RR363 Real expensive stuff..... 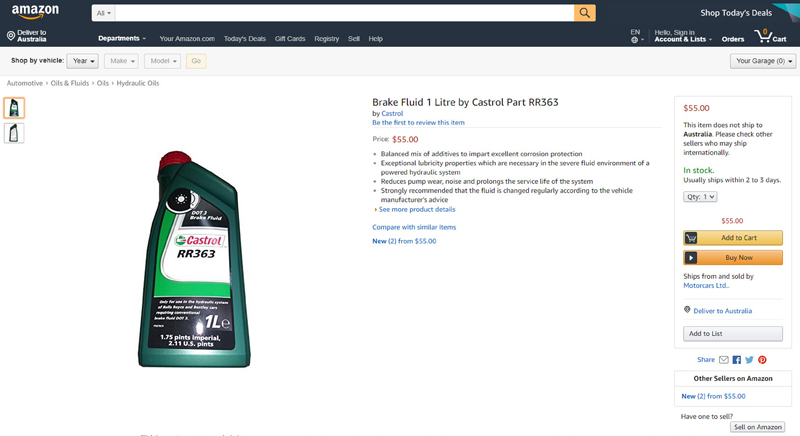 . | ||
Mike Thompson Grand Master Username: vroomrr Post Number: 385 Registered: 4-2019 |
Thanks David for fixing that. I got a quote from albersrollsbentley .com and all I can say is holly crap. And you wonder why I'm trying to find a VW with the same brakes? They are both Girling brakes with the same dust covers and O-ring. See https://www.zeckhausen.com/catalog/product_info.php?products_id=27347&gclid=EAIaIQobChMI3LfW-On44QIVLB-tBh0vyAQeEAQYAyABEgKqzPD_BwE 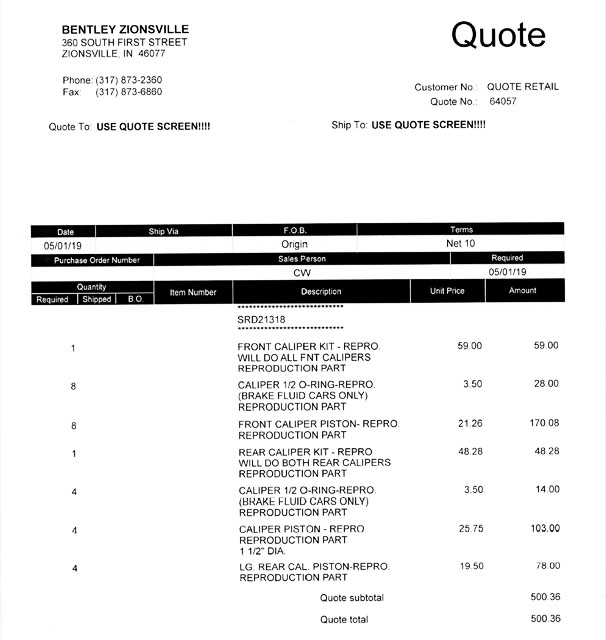 | ||
Mike Thompson Grand Master Username: vroomrr Post Number: 386 Registered: 4-2019 |
See VW calipers https://airheadparts.com/vw-part/brake-calipers-w-pads-pair/ | ||
Robert J. Sprauer Grand Master Username: wraithman Post Number: 376 Registered: 11-2017 |
VW calipers on a 5000# car. I'm sure it will work real well...How much do VW's weigh? | ||
Mike Thompson Grand Master Username: vroomrr Post Number: 390 Registered: 4-2019 |
I think you said you were an engineer. It does not matter the weight if the calipers are the same, that is why RR has two calipers on each front wheel at 2500 psi. A VW has one caliper at 1000 to 1500 psi, but they are the same caliper. I showed a VW caliper to show they are the same design. The dust covers and O-rings have nothing to do with the weight. I need dust covers and O-rings, I don't need calipers. I'm I not going to pay 44 pounds for something I can get for $4.00. I am trying to find someone (that can figure out I'm making an analogy) that knows where I can find them. If you don't have anything significant to offer why make these inflammatory remarks? | ||
Robert J. Sprauer Grand Master Username: wraithman Post Number: 377 Registered: 11-2017 |
Your earlier post sounded like you were sourcing VW parts for your rehab project. Going cheap rather than using the correct parts would not surprise me. | ||
h_kelly Grand Master Username: h_kelly Post Number: 321 Registered: 3-2012 |
https://www.autopartswarehouse.com/rolls-royce-parts/rolls-royce-silver-shadow-parts/silver-shadow-brake-caliper-repair-kit http://www.mevspares.co.uk/REAR-BRAKE-PADS-SET-Rolls-Royce-Silver-Shadow-1965-80.html https://picclick.co.uk/x4-ROLLS-ROYCE-Silver-Shadow-142086703299.html | ||
Mike Thompson Grand Master Username: vroomrr Post Number: 391 Registered: 4-2019 |
Again Robert If you don't have anything significant to offer why make these inflammatory remarks? | ||
h_kelly Grand Master Username: h_kelly Post Number: 322 Registered: 3-2012 |
http://braboparts.com/cs_parts_select.php?brand=1&brandtype=27 http://mutley.hypermart.net/RollsSubstituteParts.html | ||
Jim Walters Prolific User Username: jim_walters Post Number: 231 Registered: 1-2014 |
When buying parts from someone outside of the USA keep in mind the added shipping and brokerage cost may exceed the cost of buying from Albers. Although I don't recommend it, you could elect not to split the caliper halves in which case you would not need to buy the caliper half O rings (actually square cross section rings). SRH8505 SRC18015 SRE22493 NAC-05370 www.bristolmotors.com | ||
Mike Thompson Grand Master Username: vroomrr Post Number: 392 Registered: 4-2019 |
See how helpful h_kelly is and never any inflammatory remarks. h_kelly I appreciate you and your help very much. The last time I checked the first URL they said they don't have anything that will fit, now they say (not in stock, for me): (We're sorry! We are out of stock of Brake Caliper Repair Kit for your 1975 Rolls Royce Silver Shadow. Please try back later.) https://www.autopartswarehouse.com/brakes-suspension-and-steering/brake-discs-pads-and-calipers/brake-caliper-repair-kit?searchType=global&N=0&Ntt=1986+Rolls+Royce+Silver+Shadow+Brake+Caliper+Repair+Kit The first two are cheaper, (well the first one for sure). The last one is ebay. I am a bit leery of ebay from the stories I have heard. http://www.mevspares.co.uk/FRONT-BRAKE-CALIPER-REPAIR-SEALS-KITS-x2-Rolls-Royce-Silver-Shadow-1965-80.html?main_cat=1510&child=0 They show the same picture on ebay, humm. Thanks again. | ||
Jim Walters Prolific User Username: jim_walters Post Number: 232 Registered: 1-2014 |
Mike, the figure of 2500 psi for RR brakes is a red herring. The actual pressure that gets to the calipers is probably never that much. The amount of pressure the distribution valves send to the calipers is dependent on how far down the brake pedal is pushed. Normal driving it probably doesn't exceed 1000 psi. In a panic stop it may get to 2000. The pressure in the accumulator valve and sphere will fluctuate from 1850 to 2500, assuming the accumulator valve is working perfectly. Then there are line losses by the time the pressure reaches the calipers. In using a different master with the original calipers you really only have to worry about the volume of fluid moved and not running out of travel on the master. A large remote booster will make the pressure adequate. SRH8505 SRC18015 SRE22493 NAC-05370 www.bristolmotors.com | ||
Jim Walters Prolific User Username: jim_walters Post Number: 233 Registered: 1-2014 |
Of course they are out of stock. That looks to me like a bait and switch ad. It's like thousands of other sites out there that say "parts for your xxx here" but when you input your model nothing except perhaps a light bulb is available. Buying from Albers guarantees you get the correct parts for your model, and they will pass on good advice if they know of a substitute or superseded part. SRH8505 SRC18015 SRE22493 NAC-05370 www.bristolmotors.com | ||
Mike Thompson Grand Master Username: vroomrr Post Number: 393 Registered: 4-2019 |
h_kelly Man I think you have hit the jackpot on: http://mutley.hypermart.net/RollsSubstituteParts.html Exactly what I need, wish there were more sites like that. I've been thinking of starting a wiki site for "Will Fit", exactly like that. I need that kind of info all the time in my work. Front Brake Caliper Rebuild Kits: PBR kit K606S, two kits required, one each side. Go to google with that part number and lots of them. Factory - Number AUTOFREN SEINSA D4360 ERT 400015 FRENKIT 254071 TOYOTA 04479-30020 Thanks a million. Going to check it out. | ||
Mike Thompson Grand Master Username: vroomrr Post Number: 394 Registered: 4-2019 |
Jim Walters I love that kind of information on the psi to calipers wish more would give that kind of information (instead of trying to pick a fight ... trolling). Very useful information as always. And if I can find a readily available substitute for much less money, wouldn't you like to know that? For me it is just I have a tight budget and need these parts for as cheap as I can get. Albers may not meet that qualification. Thanks again. | ||
Mike Thompson Grand Master Username: vroomrr Post Number: 395 Registered: 4-2019 |
Here is a start on the list above: TOYOTA 04479-30020 now 04479-30022 can be gotten at any Toyota Dealer. (My internet is tethered to my phone, so I can call around right now.) I'll call around to see if Toyota has released the patent for this product. If so I will buy one and see if it fits. FRENKIT 254071 Company with Spain URL https://frenkit.es/en/catalogo/catalogo-online/254071 ERT must be Russian. AUTOFREN SEINSA D4360 Is another company in Spain. | ||
h_kelly Grand Master Username: h_kelly Post Number: 323 Registered: 3-2012 |
I used to buy oil filter for shadow one here https://hdrogers.com/collections/rolls-royce-parts-for-silver-cloud-shadow-spur-spirit-corniche | ||
David Gore Moderator Username: david_gore Post Number: 3263 Registered: 4-2003 |
Mike, The PBR kits were made by Repco Australia and are usually readily available off-the-shelf from local Repco auto spares outlets. I have just checked and it appears there is a Bosch K606S equivalent for the Girling/Girlock callipers. http://www.sunburybrakes.com.au/holden-hk-ht-hg-front-caliper-kits-x-2-k606s https://www.supercheapauto.com.au/p/bosch-repair-kit/SPO1393209.html If you have problems sourcing Bosch kits in the USA which I suspect is HIGHLY unlikely; just message me and I will get them and post to you. P.S. FYI Holden was the local equivalent to the US Chevrolet | ||
Mike Thompson Grand Master Username: vroomrr Post Number: 397 Registered: 4-2019 |
Well I went to all the auto parts stores around here and no luck on the Toyota (which I thought, dealers always hoard their patents), nor the Bosch, which surprised me. Like you David I thought for sure they would have that (guess not many Holdens around here). I'll keep trying, may have to take you up on your kind offer. Maybe someone knows on Dodge trucks and vans the large master cylinder has a first piston near the booster and a second one from the MC. The first one is for the front brakes and the second one is for the drum brakes. What would happen if you tied them together? Would you get more or less psi? (I'm thinking less.) Although I deal in physics I have forgotten all the large scale stuff (I only deal in strings and below). (Not exactly like Sherlock with Benedict Cumberbatch who deletes unneeded stuff, but if I don't use stuff the neurons are culled, it's called old age.) | ||
ross kowalski Grand Master Username: cdfpw Post Number: 1058 Registered: 11-2015 |
Mike, These all might be equivalent part numbers. I looked one up and found it was for some kind of toyota cressida and the Rock Auto price for a rebuild kit was $1.65 USD, I'll do some more searching. SP8629 0449830020 400268 400015 73083 257022 400260 257023 D4251 0447930060 D4360 0447930020 GK201 D4235 0447930050 26040229 0447930022 0447930021 | ||
ross kowalski Grand Master Username: cdfpw Post Number: 1059 Registered: 11-2015 |
Mike, Also possibly for these cars. Toyota Century, VG35 Toyota Chaser, GX60, GX61, LX60, RX60, RX63, TX60 Toyota Corona, RT102, RT104, RT105, RT114, RT117, RT118, RT119, RT132, RT133, RT134, RT135, TT132, XT130 Toyota Cressida, LX60, MX32, MX36, MX62, RX30, RX35, RX60, RX62, TX10, TX30, TX62 Toyota Cresta, GX50, GX51, TX50 Toyota Crown, GS110, GS117, GS120, GS120G, GS121, GS126, GS126V, LS110, LS111, LS117, LS120, LS120G, LS126, LS126V, MS110, MS111, MS112, MS117, MS120, MS122, MS123, MS125, MS83, MS85 , MS88, MS95, RS110, RS80, YS120 Toyota Hilux Pick Up, LN40, RN32, RN34, RN42, RN44 Toyota Hilux, RN41 Toyota Mark II, GX60, GX60G, GX61, LX60, LX67, MX60, MX63, RX60, RX63, TX60, TX67 Toyota Pickup, LN40, RN32, RN34, RN42, RN44 Toyota Soarer, GZ10, MZ10, MZ11 | ||
ross kowalski Grand Master Username: cdfpw Post Number: 1060 Registered: 11-2015 |
Mike, MERCURY CAPRI 1971-1977 NISSAN 240Z 1970-1973 NISSAN 260Z 1974 NISSAN 280Z 1975-1978 TOYOTA CORONA 1972-1982 TOYOTA CRESSIDA 1978-1980 TOYOTA CROWN 1968-1972 TOYOTA MARK II 1972-1976 TOYOTA PICKUP 1975-1983 TRIUMPH GT6 1968-1969 | ||
ross kowalski Grand Master Username: cdfpw Post Number: 1061 Registered: 11-2015 |
Mike, Rockauto, $3.50 USD? https://www.rockauto.com/en/moreinfo.php?pk=878532&jsn=573 | ||
Mike Thompson Grand Master Username: vroomrr Post Number: 398 Registered: 4-2019 |
Ross The rockauto URL link is for a Bore Size of 2.125 In. Which is 54 mm the size of the front caliper pistons. Good job I think I have ordered from RockAuto before. I might order one to make sure it fits, if it does, I can get 3 more. The backs are 48 mm, I have not taken them apart yet. I'm in the process of painting the front ones, and doing upholstery. Where did you get all the cars, and in association to what? | ||
Mike Thompson Grand Master Username: vroomrr Post Number: 411 Registered: 4-2019 |
I ordered Sat. the Dorman caliper repair kit D35667 and it came today. It was substituted with the O'Reilly's Auto Parts house brand of BrakeBest part number 15002 and it seems to fit just fine. If so the days of ordering from FlyingSpares at 44 pounds need not happen again. I'm sure the two part numbers will cross anywhere in the USA. Here are the questions to make sure they are in fact right. When I put the O-ring on the piston outside the caliper it is loose, then when I put it in the caliper it is tight, is that correct? The dust covers fit perfect, even has the two small O-rings, I guess if you split the caliper. What is the easiest way to get the pistons in after you put in the O-rings in? | ||
David Gore Moderator Username: david_gore Post Number: 3271 Registered: 4-2003 |
Mike, I used a large "G" clamp for this purpose - I cannot remember what lubricant I used; I think it might have been petroleum jelly but it was 25 years ago and my memory is not strong. I am 400km [250 miles] from my archives right now so cannot confirm what I used. | ||
Robert J. Sprauer Grand Master Username: wraithman Post Number: 397 Registered: 11-2017 |
Best lube is either brake fluid or "assembly fluid" petroleum jelly jelly can soften and destroy certain rubbers. Pistons have to put in "square" and if they are rough they may not retract into the caliper when pressure is released causing another set of issues. They are chrome plated for corrosion resistance, and if corroded they will not retract all the way. Some pistons are actually made of phenolic material for this reason and also less heat transfer to the brake fluid. There should be slight resistance when going in, but if you need serious clamping force the internal O ring seal may not be the right fit. | ||
Larry Kavanagh Grand Master Username: shadow_11 Post Number: 438 Registered: 5-2016 |
The manual says that the calliper seals should be coated in brake fluid which helps lubricate them so that the pistons can slide in. Some folk use red rubber grease on the seals and that works too and is miscible with brake fluid so won't cause a problem. If the inside of the calliper has been well cleaned and polished with 00000 grade steel wool and brake cleaner or methylated spirit and any dust blown out with an air hose the pistons should slide over the seals quite easily provided the pistons themselves are nicely polished too. The callipers have to be split to do this. A G-clamp is a handy tool to assist with the job. From memory I think I placed each side of the split calliper in a small bench vice, then inserted the pistons part of the way by hand, then placed a small wooden block over the end of the piston and squeezed them in by slowly tightening the vice. They slid in easily. | ||
h_kelly Grand Master Username: h_kelly Post Number: 324 Registered: 3-2012 |
Mike as already mentioned I used a smear of rr363 brake fluid and a g Clamp.the manual does recommend methylated spirit to clean which I used.Larry has mentioned that already. | ||
Jim Walters Prolific User Username: jim_walters Post Number: 236 Registered: 1-2014 |
Not all red greases are DOT 3, 4, or RR363 compatible. Phillips 66 makes a red lithium grease which must NOT be used on glycol based systems. https://www.fastenal.com/products/details/0411136 The only type of red grease that should be used is Girling rubber grease. PBR also makes rubber grease but it is clear. The pistons and seals should be well lubed before installation and should not need a C clamp to install them. If lubed properly they will slide in with firm hand pressure. They will be tight because they need to grip the piston when the brakes are applied then twist and pull the piston back a bit to provide pad running clearance when the brakes are released. SRH8505 SRC18015 SRE22493 NAC-05370 www.bristolmotors.com | ||
Mike Thompson Grand Master Username: vroomrr Post Number: 412 Registered: 4-2019 |
Thank you all, I was thinking the same thing as you were saying I just wanted to make sure. And make sure they seemed to be the right ones for the job. I paid $5.73 at O'rielly's I could have gotten them online for $3 something but probably shipping costs, so equal. That is for one caliper, a total for 4 calipers @ $5.73 = $22.92. Savings: 44 pounds @ $1.31 (exchange) = $57.64 a savings of $34.72 + shipping. I would rather pay for my Rolls Royce not the owner of FlyingSpares paying for his. Just me. Thanks again. | ||
Geoff Wootton Grand Master Username: dounraey Post Number: 2096 Registered: 5-2012 |
To give another viewpoint, I would always recon my calipers (as I have done) with a service kit specifically designed for my 1974 Shadow, as they are safety critical components. The saving of 35 bucks + shipping, for me, is just not worth it. I'm not a purist and don't mind using substitute parts where they don't change the nature of car, but I would need to be convinced that the dimensions and type of rubber used in the O'Reilly kit was identical before contemplating using it. One obvious difference is the two small O-rings for splitting the calipers - these appear from the O'Reilly picture to be of round cross section - they should be square. It seems to me that this job only needs to be done every 5 or 10 years or more, so just not worth the risk for such a small saving. Just my two cents worth. | ||
Mark Luft Prolific User Username: bentleyman1993 Post Number: 256 Registered: 10-2016 |
Hey Mike! I saw this and thought of you. SS parts car. https://johnthenryauction.hibid.com/lot/51327654/1971-rolls-royce-silver-shadow-saloon-parts-only--?q=Rolls&fbclid=IwAR1GGCFuUqbns62Xb-XTLDLGoglXX6rOSejxpQanlTVhoYf5mjSdDHch2_w | ||
Mike Thompson Grand Master Username: vroomrr Post Number: 416 Registered: 4-2019 |
For a lot of you price is no deterrent. You just dip into the bank well and drink to your hearts content. I'm unemployed, every dime I spend takes me that much closer to needing to find another job. (Unless I can unload one of my cars.) So $35 + shipping is a lot to me. So just buying this or buying that is prohibitive to me, and why I make so many things. | ||
ross kowalski Grand Master Username: cdfpw Post Number: 1072 Registered: 11-2015 |
Mark, What a find. I would buy that in a hartbeat if I were nearer. It's worth it for the bumpers! | ||
Mike Thompson Grand Master Username: vroomrr Post Number: 417 Registered: 4-2019 |
You know, that is what I was drooling at, the bumpers. And my Rolls took two days to get it home, some 300 miles. it is some 1200 miles to South Carolina. It would take 8 grueling days to get it home. And it don't have the radiator cover. Buzz fail. I think everyone knows by now I hate those rubber bumpers. Ross you don't have a brake pump socket do you? | ||
ross kowalski Grand Master Username: cdfpw Post Number: 1073 Registered: 11-2015 |
Mike, Piston? https://www.bpnorthwest.com/caliper-piston-nitrided-tr6-from-cc29930-to-76.html?gclid=CjwKCAjw2cTmBRAVEiwA8YMgzcf2trqUpD-3iekbrKzh34DIs-ghLNrONZWdv0m595-hF-dxtz59phoCkWMQAvD_BwE | ||
ross kowalski Grand Master Username: cdfpw Post Number: 1074 Registered: 11-2015 |
Mike, No brake pump socket, sorry. As for that car, I'd weld up my own grill for that car in a heartbeat. | ||
Mike Thompson Grand Master Username: vroomrr Post Number: 424 Registered: 4-2019 |
Well I learned what nitrided is. What I am still looking for is the back brakes repair kit. Found for the 48mm back piston: https://www.zeckhausen.com/catalog/product_info.php?products_id=16331 and https://www.walmart.com/ip/CENTRIC-PARTS-CALIPER-KIT/172343166 Walmart has possible brake parts whod a thunk it. | ||
Mike Thompson Grand Master Username: vroomrr Post Number: 425 Registered: 4-2019 |
As for the caliper pistons, the rust is above the O-rings so will not effect the brake response, in either the retraction nor leaking. Brake fluid is hydroscopic (tending to absorb moisture from the air), so the water accumulated in the brake fluid (because of the lack of heat to evaporate it) and there is a little bit of rust at the back of 1 or 2 of the calipers (formed a bit of muck in the brake fluid). But never made it through the chrome barrier. So a good flush to clear out the muck, new seals and give it a go. Just needs to pass inspection for now. (Sure wish I could borrow a brake pump socket.) | ||
Mike Thompson Grand Master Username: vroomrr Post Number: 431 Registered: 4-2019 |
https://www.bardahl.nl/assets/uploads/2018/01/53455-Bardahl_Dot3_BrakeFluid_5ltr.png Humm a h_kelly find RR363 | ||
Robert J. Sprauer Grand Master Username: wraithman Post Number: 404 Registered: 11-2017 |
I buy 363 from Welsh Enterprises in Ohio.. They supplied alot of Jaguar parts for me over the 25yrs. | ||
Mike Thompson Grand Master Username: vroomrr Post Number: 432 Registered: 4-2019 |
I found out my assumption that there is a single firewall was dashed today when I stuck a coat hanger wire through the speedometer cable hole to get measurements. I hit another wall. Back to the underneath rat trap again it seems. Sometimes it's just not easy working on a POS on a shoestring budget, where's roadkill when you need them. (They put together cars very cheap in about a week.) | ||
Mike Thompson Grand Master Username: vroomrr Post Number: 461 Registered: 4-2019 |
Thinking out loud. Some may know when you take off the fan on the RH side there is a vent door for the fresh air. Were I to put a hole through there that side's fresh air would no longer work. The door could be cut and narrowed to have fresh air but would have to modify the attachment for the door. In the picture you can see that the speedometer cable does indeed go through a double wall. But the hole the fan has into that cavity between the firewalls may solve a problem I had (in my mind) how to turn the nuts to attach the booster to the firewall. Either way a hydroboost or vacuum booster will need to be attached to the firewall or the master cylinder must go underneath with a remote booster. 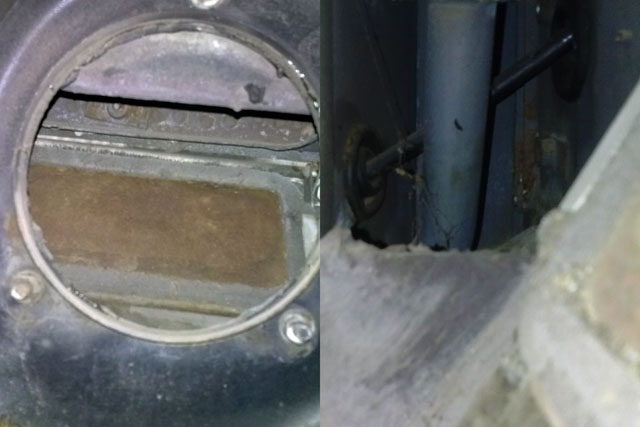 | ||
Mike Thompson Grand Master Username: vroomrr Post Number: 463 Registered: 4-2019 |
The more I look the more conclusive it becomes, that unless I want to do some major remodeling, cutting out the frog mouth, and other reinforcements, etc. I just cannot put a booster in that location "through" those firewalls. I can now put the remote booster there closer to the front so lessen the travel and its associated loss of pressure to the front, but not through those firewalls. Future inhabitants of Earth be forewarned, you can't put it there (without remodeling a lot). | ||
ross kowalski Grand Master Username: cdfpw Post Number: 1090 Registered: 11-2015 |
Mike, I still have to vote for pulling the rat trap, welding in a after market under floor pedal assembly and puting a hydroboost down there. The only thing that would be odd, would be that you would likely have to cut an access panel in the floor to be able to fill the reservoir of the MC. You could run a remote reservoir but why? The hydro-boost is a lot smaller than a vacuum unit so should go in place without clearance issues. The other thing I can tell you about hydroboost is it generates a lot of line pressure and would stop the daylights out of a 5.5k lb car. | ||
Mike Thompson Grand Master Username: vroomrr Post Number: 464 Registered: 4-2019 |
Ross you and h_kelly are a whiz at finding stuff. The master cylinder bolt pattern is 2 5/16 wide. I think someone said there are remote hydroboost units. Maybe you can find something I have been having no luck. I just get garbage when searching, like a master cylinder 2 5/16 will bring up something like a bolt and clamps for a master cylinder something. | ||
Mark Luft Prolific User Username: bentleyman1993 Post Number: 261 Registered: 10-2016 |
Mike, my friend works on Humvee's. H1's, They use a remote mounted hydro-boost system that puts out almost 1,500 psi. He also says parts are cheep. Check Ebay or other military surplus sites. | ||
Mike Thompson Grand Master Username: vroomrr Post Number: 469 Registered: 4-2019 |
I like the idea of this hydroboost but it costs half as much as the car. So I'll keep looking. http://www.vancopbs.com/category_s/167.htm and kit https://www.tdsideas.com/store/p1/Remote_Hydroboost_Mounting_Kit.html I don't know how these work maybe someone can explain it. | ||
ross kowalski Grand Master Username: cdfpw Post Number: 1092 Registered: 11-2015 |
Mike, The 165 USD kit looks like just what you want. You put the hydroboost wherever you want in the engine compartment with the kit and a clutch slave cylinder on it. Pressurize the clutch master cylinder with a MC on the rat trap and presto. Hydraulic brakes on your shadow. | ||
ross kowalski Grand Master Username: cdfpw Post Number: 1093 Registered: 11-2015 |
Mike, hydroboost scroundge up hydroboost hoses $75 kit $165 clutch slave kit $20 mc for rat trap $75 This remote mounting kit for hydroboost is a very good thing. I think this is your answer. | ||
Mike Thompson Grand Master Username: vroomrr Post Number: 470 Registered: 4-2019 |
From the sound of it hydroboost brakes are a bit touchy, so I guess you don't want to sneeze while putting on the brakes, or hope that seat belt works. This is what it says you have to have: https://www.dormanproducts.com/p-33627-cs37793.aspx And Ross I guess those are estimates of cost, that you did not find all those items, right? (One other item a power steering pump, that I would get from the Astro Van hydroboost donor if the pick and pull has one.) | ||
ross kowalski Grand Master Username: cdfpw Post Number: 1094 Registered: 11-2015 |
Mike, You could probably install hydroboost to make it touchy, but they are not inherently touchy. I think you have a power steering pump so I would use that one. The prices are estimates, but I bet they are close. | ||
Mike Thompson Grand Master Username: vroomrr Post Number: 471 Registered: 4-2019 |
A 44 year old little bitty power steering pump, that sat for 11 + years in a field. I'm thinking not. I'll give it its own pump that ran it before. Now finding the parts. | ||
Mike Thompson Grand Master Username: vroomrr Post Number: 475 Registered: 4-2019 |
As I look at how the master cylinder works: http://www.rrsilvershadow.com/ETechn/Hydr/Compmstr.htm It looks like all it needs is a remote fill reservoir to make it work, but it says it takes a little brake fluid. Would that eventually empty the reservoir so needs a loop back to it to keep it filled? I have the Clutch Slave Cylinder ordered, it will come today. Dorman CS37793 (Power torque). Since I have a vacuum booster and master cylinder I'm going to try it to see how it stops. The plumbing will all be there as a result, and all I would have to do is switch to a hydroboost and add lines for it from the power steering pump. (Experiment) | ||
Mike Thompson Grand Master Username: vroomrr Post Number: 477 Registered: 4-2019 |
From the site: https://www.tdsideas.com/store/p1/Remote_Hydroboost_Mounting_Kit.html I superimposed the length of the rod with the adapter. That tells me the slave clutch cylinder is right up against the hydroboost end and tells me the measurement to make the adapter my way. The master cylinder from the rat trap should have enough power to push the slave cylinder that will in turn push the vacuum booster power brakes. It will need a remote fill reservoir and I still don't know if the master cylinder will use this fluid up or does it come and go out of it. But I am going to make the plates, (and after I finish the interior work) run the plumbing. I have the front brakes caliper rebuild kits ordered and will be here today. I don't yet know a cross over for the back brakes. 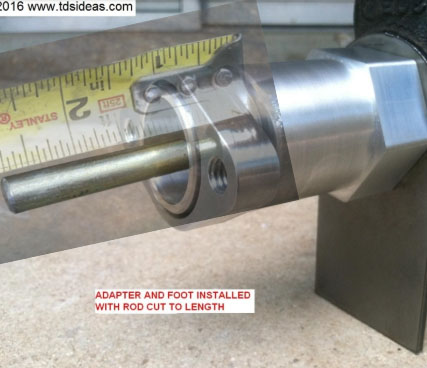 | ||
ross kowalski Grand Master Username: cdfpw Post Number: 1096 Registered: 11-2015 |
Mike, The rat trap cylinder does not appear to be anything special. I would think it would work just fine as a master for the slave on your remote MC. It does not appear to lose fluid by design. | ||
Mike Thompson Grand Master Username: vroomrr Post Number: 482 Registered: 4-2019 |
Yeah it is a closed system a line coming from the remote fill reservoir and out to the slave and it has to go back to the master, then any loss comes from the remote fill reservoir. (At least that's what I think. Maybe a caliper repair kit for the back: https://www.zeckhausen.com/catalog/product_info.php?products_id=16331 | ||
Mike Thompson Grand Master Username: vroomrr Post Number: 483 Registered: 4-2019 |
Do a google image search with "castle nut socket RH8428" a bunch British Tool Works comes up for me. | ||
Mike Thompson Grand Master Username: vroomrr Post Number: 484 Registered: 4-2019 |
I contacted MP Brakes and got the same yada yada mostly (we don't do Rolls Royce, let me waste some more of your time to maybe get you to buy something). Good afternoon! Thank you for contacting MP Brakes! Sorry for the delay as we were having E-mail issues earlier this week and i was out of the office yesterday. The problem i see here is the original bore size i feel is fairly large and the only remote fill master cylinders we do are a 1" bore. It will have a mounting pattern of 3 3/8" will be the only other issue as the smaller ones i have being the ford style are 3 1/8". We work with mainly Ford,GM, and Mopar so it may make things a little more difficult. The remote booster would be universal and the master cylinder shouldn't be a problem but we need to work around the mounting and the bore size. Do you know what the bore size is now? Let's start there and we will see what we can do. Thanks, ---------- I don't know what the bore size is of the master cylinder, it was only made to feel something and maybe slow the car down as a last resort. | ||
David Gore Moderator Username: david_gore Post Number: 3307 Registered: 4-2003 |
Mike, There are past posts detailing replacement of the original Shadow 1 master cylinder with a larger unit from a Landrover, my memory suggests the original unit was a 5/8 inch bore and the Landrover is 3/4 inch bore. http://au.rrforums.net/forum/messages/17001/23716.html The manufacturer would almost certainly have been Girling [Girlock]. http://www.girlingauto.com/ If you do a search for Holden/Ford brake parts for their V8 models, you might find a large bore master cylinder listed otherwise a truck master cylinder from the 1950 -1970 era might be an alternative. | ||
Mike Thompson Grand Master Username: vroomrr Post Number: 485 Registered: 4-2019 |
You are of course as wise as you are tall. Land Rover Series 2 2A & 3 SWB88 3/4" Bore Center Valve Brake Master Cylinder (replacing 5/8) I think the guy was asking about the bore size because he knows nothing about Silver Shadows despite me giving him enough info to melt any brain. I wrote: I have a 1975 Rolls Royce Silver Shadow. It sat for 11 + years outside. The extremely complex brake system is shot. It has two, one pot on each side of the calipers, on each wheel on the front, and two pot on each side of the calipers, 1 caliper on each wheel on the back. The car weights 5000 pounds, so needs a good braking system. The rotor is 11 inches across and is 1 5/32 wide. The bolt pattern (that bolts to the back of the rotor area) is two bolts that are 3 5/8 across from each other. I want to use the original master cylinder with a remote fill and a clutch slave to have a remote vacuum boost or hydroboost on a master cylinder conversion. Can you help. There are some good pictures of them below. http://au.rrforums.net/forum/messages/17001/35958.jpg http://au.rrforums.net/forum/messages/17001/35959.jpg How they hook up at the back http://au.rrforums.net/forum/messages/17001/35597.jpg Below are the dimensions of the existing pots. https://brakeparts.co.uk/shop/Rolls%20Royce/Silver/65-/Silver%20Shadow%2Cwraith%2Cspur%20&%20Spirit/Front%20-%20Brake%20Calipers%20and%20Wheel%20Cylinders/BCP5401 https://brakeparts.co.uk/shop/Rolls%20Royce/Silver/65-/Silver%20Shadow%2Cwraith%2Cspur%20&%20Spirit/Rear%20-%20Brake%20Calipers%20and%20Wheel%20Cylinders/BCP4801 A look at this weird system http://www.rrsilvershadow.com/ETechn/Hydr/Compbrcal.htm | ||
David Gore Moderator Username: david_gore Post Number: 3308 Registered: 4-2003 |
Mike, Would a 1 inch bore master cylinder help: https://www.ebay.com.au/itm/NEW-HYSTER-FORKLIFT-BRAKE-MASTER-CYLINDER-1-BORE-25MM-1358206-/122020867583 Even more interesting with even larger bore MC's and relevant to Hydroboost: https://www.camaros.net/forums/16-brakes-suspension-steering/152269-large-bore-master-cylinder-use-hydroboost.html . | ||
Mike Thompson Grand Master Username: vroomrr Post Number: 486 Registered: 4-2019 |
As I have said right now I am conducting an experiment. And what I am going to try to do is to use as much existing material as I possible. As off the shelf resources that are not proprietary and some original equipment. As the original rat trap master cylinder not to stop with, but as a clutch would do, to activate the slave clutch cylinder to push on the power brake vacuum booster which in turn will multiply the forces to the master cylinder that will be doing the stopping. Since there is no data to be found on these components I just have to guess will it work. The only risk is in my parking lot, just as I had bringing the car into the garage. I will test its stop-ability in the parking lot, as, will all four tires lock up, and do they smoothly stop with the available pedal movement etc. I had already come to the conclusion in a previous episode of As The Rolls Turns, that the donor would be a Chevy Astro Van for the hydroboost. But thought what the heck, let's see if the vacuum booster + master cylinder will work. (Less complications, and to which I have already fabricated the stands and tomorrow will try to figure out how much of the shaft of the vacuum booster to cut off (which I made the discovery below). I have the original measurement from the site: https://www.tdsideas.com/store/p1/Remote_Hydroboost_Mounting_Kit.html of 2 1/2 inches but I have concluded that there is a bit of room between the slave cylinder and the hydroboost. So that number is not accurate. I believe it is that nub at the exit of the hydroboost. I have of course no measurements. I'm just guessing at this. (After all it is an experiment. The ebay has it's built in remote fill hose connector nice but expensive.) Here are the stand and slave cylinder connector, I just need the measurement where to weld the two together and where to cut the vacuum booster shaft. The slave without brake fluid in it has a lot of resistance. It would activate the brakes by itself. (Discovery) I just noticed in the 7th photo (above site) the ruler tells the nub is 1/2 so the measurement of the rod itself (the factor I needed to know) looks like, (right to left) 1/2 + 1 + 3/4 = 9/4 or 2 1/4". Then there is a warning with the slave cylinder (Power Torque CS2235 house brand) that says:"If the pushrod is adjusted too long, fluid may not be able to flow from the reservoir into the master cylinder bore, and it will not bleed at all." (Which is an incomprehensible jumble of words to me.) Getting those big holes in there is a serious pain in the asp. 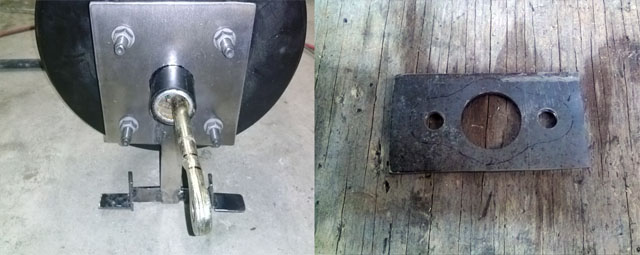 | ||
Patrick Lockyer. Grand Master Username: pat_lockyer Post Number: 2159 Registered: 9-2004 |
Pleased to see this is just an experiment! IMO in my old age, to build a high performance heavy car with a single main braking system is total madness. The hydroboost goes to dual but what powers it does not. Remember that a clutch slave in most cases has the return pressure of the clutch diaphragm under working operation. As for the use of a stage single master cylinder bad bad news IMO. | ||
Robert J. Sprauer Grand Master Username: wraithman Post Number: 428 Registered: 11-2017 |
Patrick. I agree.. Recipe for disaster with no safety in mind for the driver or the general public with a 5000 lb car on the road. With all the banter and time spent cobbling this collection of bits together with the hope that it will work better than the original system is mindless. The original system could have been up and running by now. | ||
Mike Thompson Grand Master Username: vroomrr Post Number: 488 Registered: 4-2019 |
Dual master cylinders have a dual system built in. One line goes to the front one to the back. https://s.hswstatic.com/gif/master-brake3.jpg https://auto.howstuffworks.com/auto-parts/brakes/brake-types/master-brake1.htm For those who did not read it I said "After all it is an experiment." and "The only risk is in my parking lot." Very few people drive in "my" parking lot, it's called trespassing down here and we have the right to shoot them (or hit them with a 5000 lbs car). Anyone that thinks this car could stop with the original break system that had sat for 11 + years with water accumulating in a hydroscopic fluid, has no experience working on Rolls Royces in this condition, and believes in unicorns and that money will buy anything. To get that system working again would cost more than this car is worth. The brake pump sleeves had to be beat off with a hammer and pry bars due to corrosion. Rust is in every part of the original braking system. Pistons had to be forced out with a hammer and vise grips due to corrosion. The high pressure brake pump line so rusted it fell apart. Every part in this system would have to be rebuilt or replaced at a cost of more than the car is worth. 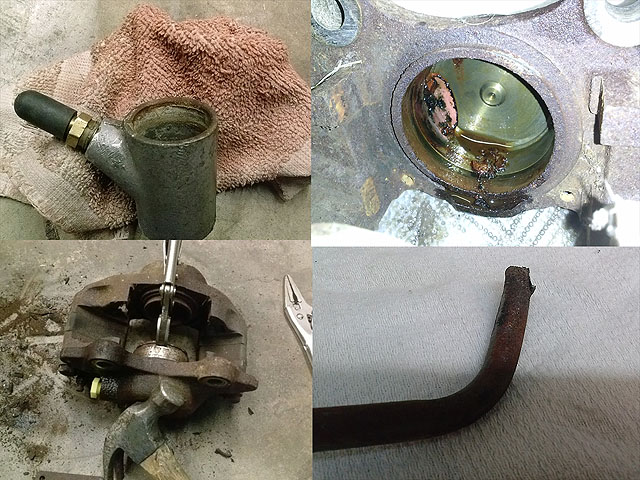 | ||
Mike Thompson Grand Master Username: vroomrr Post Number: 496 Registered: 4-2019 |
Page 6 of the below PDF file answers the question, does the master cylinder send the fluid back to the reservoir. (Answer is yes.) Click link to download the PDF file Booster Master Cylinders (Don't click link if you don't want to download it.) https://www.mico.com/sites/default/files/document-pdfs/84460007_0.pdf | ||
Mike Thompson Grand Master Username: vroomrr Post Number: 497 Registered: 4-2019 |
This one bracket I made replaces all these parts from tdsideas.com and saves me $165 USD plus tax. 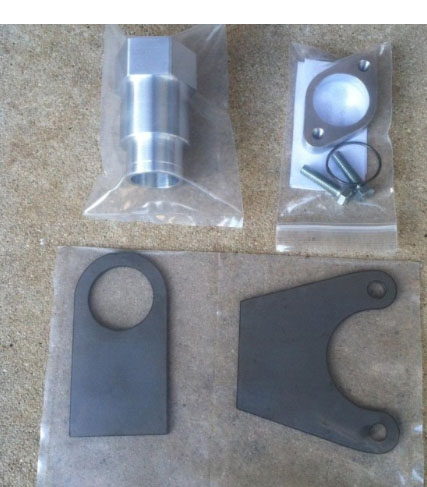 Replaced with  And can be re-adapted for a hydroboost. 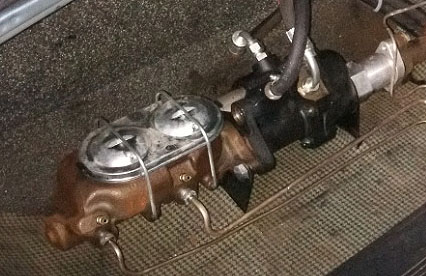 Close up. 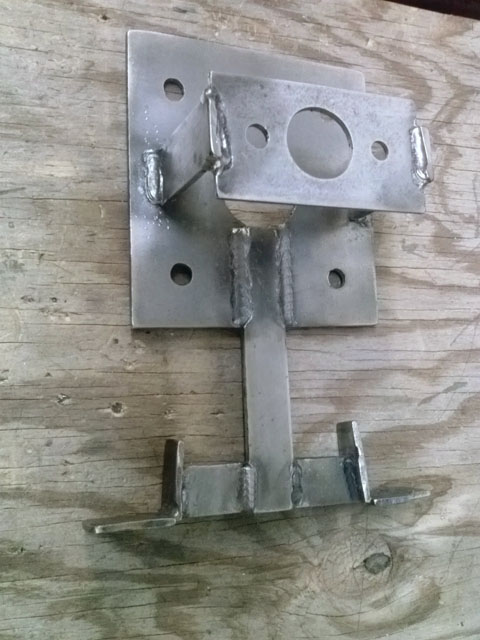 | ||
h_kelly Grand Master Username: h_kelly Post Number: 335 Registered: 3-2012 |
You have mentioned on a few occasions the need to know the psi of the system. How about putting a pressure gauge on one of the exit ports on the system. This could be done as a bench test?. | ||
Mike Thompson Grand Master Username: vroomrr Post Number: 498 Registered: 4-2019 |
h_kelly I was thinking about that, and as you can see below I have this big honking gauge 4 inches across that goes up to 5000 psi. I would have to make an adapter for it. 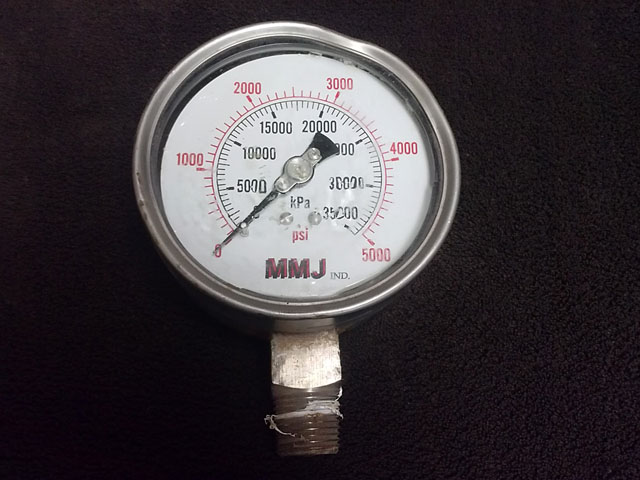 | ||
ross kowalski Grand Master Username: cdfpw Post Number: 1101 Registered: 11-2015 |
Mike, The DIY servo looks good, If it tests out fine you might want to gusset the bracket some. If you don't get enough pressure out of the current booster and want a fierce vacuum booster, get a double from an 2001 e320 wagon. I can tell you that that unit generates a serious amount of pressure. The biggest load I ever had in it was 2500 lbs of coal and with the weight of the car made the whole thing 6K and it still stopped with authority. Those vintage cars are quite common and the transmissions go bad a lot so there should be a good supply at the pick a part. Good Luck. | ||
Mike Thompson Grand Master Username: vroomrr Post Number: 501 Registered: 4-2019 |
Ross That metal I used is very strong, it is all I can do to get a drill bit through it. It rusts a bit so it is not stainless but I'm betting it does have some nickel in it. It came off of a 18 wheeler truck bumper. I used it to make a swivel tow dolly. (My old CTS I fixed the boo boo on it, and my old BMW are are shown.) The booster and master cylinder is more or less the same as on my truck (but smaller width because it was in a van) and I pulled and stopped the Rolls and the truck a total of around 9000 lbs. My only worry is the slave cylinder has a spring inside that pushes a lot on the booster rod, and may be stop mode all the time. (Or it is held back by the rat trap master cylinder when they are hooked together. I don't know an unknown variable.) 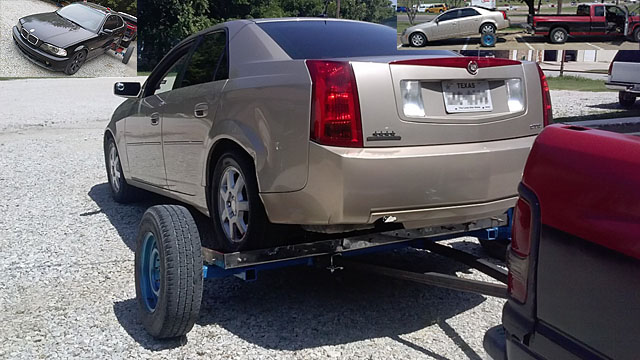 | ||
ross kowalski Grand Master Username: cdfpw Post Number: 1102 Registered: 11-2015 |
Mike, The metal is not going to fail. I figured it was mild steel and that is in no danger of failing. You would the gussets to help the welds survive vibration and cracking at the welds. If that part fails, it will be from a crack in a weld. | ||
Mike Thompson Grand Master Username: vroomrr Post Number: 504 Registered: 4-2019 |
Yeah that would happen, the weld busting, long before that metal does (I use E6011 for welding). But it will be in the trunk, but even planes explode after a time from the expansion and contraction of the body due to air pressure, and stress lines. Do you know anything about slave cylinders and if after they are hooked to master cylinders, what pressure they exert on the rod? | ||
ross kowalski Grand Master Username: cdfpw Post Number: 1103 Registered: 11-2015 |
Mike, I think the fatigue will come from the cycling of the on / off pressure of the cylinder actuating. I'm pretty sure you will be OK from air pressure changes. Regarding the MC / slave design. To figure out if your parts will work, you need three pieces of information. 1. The bore diameter of the rat trap cylinder and how far the MC piston travels when the brake pedal is fully depressed. 5/8 cylinder with ??? stroke. 2. The distance the booster pin / socket needs to move to fully activate the brakes. 3. The diameter of the piston in the slave cylinder. You can likely look this up based on the part number. If you can measure those parameters the calculations to figure out how it will work are pretty straight forward. | ||
Mike Thompson Grand Master Username: vroomrr Post Number: 510 Registered: 4-2019 |
Well in searching I found out what the slave goes to: "New Clutch Slave Cylinder Fits 1983-1986 Jeep CJ5 CJ7 Cherokee Comanche P/N CS2235 1. The travel of the MC (rat trap) is 1" 2. The travel of the booster max is 2" 3. Diameter of piston (go with 5/8 as well, could not find it). Please answer it and show the equation how to figure it out. (Maybe write it on paper and take photo if you can't do it here.) This is not exactly what I was asking but I'm sure I need to know this type of stuff. | ||
ross kowalski Grand Master Username: cdfpw Post Number: 1104 Registered: 11-2015 |
Mike, For your pressure question your mc has a diameter 5/8 and the diameter of the slave piston is .625 in so the pressure the slave cylinder is the same as the input. For the rat trap, take the total brake pedal movement to the floor divide that by the rattrap cylinder movement and you get the mechanical advantage of that rat trap system. Let's say the pedal travel is 4 inches and you press with 60 lbs of force. That means the mechanical advantage is 4:1 ( 4 at the floor, one on the mc). So if you pushed the brake pedal with 60 lbs of force the rattrap cylinder gets an input of 240 lbs of pressure. Because the input and output pistons are the same diameter the output at the piston would be 240 lbs at the slave output rod. As for travel, the distance the output piston moves would be the same as the input piston as well. As your rattrap piston moves an inch your output piston would move an inch. If you need two to fully move the booster your system won't fully move the booster. That may or may not be a problem. Because we don't have the volume of your system and the specs on the brake mc there is no way to tell if it's right. I would guess a half push on the booster will move enough fluid volume in the lines. That is a guess though. | ||
ross kowalski Grand Master Username: cdfpw Post Number: 1105 Registered: 11-2015 |
Mike, You can indirectly get booster amplification ratios from this link. I didn't look to closely at the #s but it looks plausable. link | ||
h_kelly Grand Master Username: h_kelly Post Number: 336 Registered: 3-2012 |
Mike,the master cylinder at the rat trap can be adjusted for use in regular shadows,might this adjustment be any good for your job?. Have you considered adopting the rat trap so it only has a master cylinder with distribution valves removed. This may give you several options re new bigger master cylinder?. | ||
Mike Thompson Frequent User Username: vroomrr Post Number: 513 Registered: 4-2019 |
In a truck or van it does not take much force on the pedal to move it and to cause the brakes to stop. What I am trying to figure out is there is a spring in the slave cylinder that has a lot of push to the vacuum rod. When the vacuum is attached to the vacuum booster and this force of the spring pushing on the booster rod, I worry that the brakes will already be fully activated and the car will not move. That is the question I am asking. Will the car move with that spring pushing on the booster rod, or will the brakes already be locked. Right now without vacuum the ratio is about the same, the spring in the slave is about equal to the the spring in the vacuum booster, but that is without the assist of vacuum. I fear when the car is started and it gains vacuum the force of the spring in the slave cylinder will then push the rod the full extent of 2 1/4 inch which means the brakes are fully engaged. In the van I took this vacuum booster and master cylinder from there was no spring that pushed the pedal back up. The pedal was pushed back up by the spring in the booster. I guess the only real way to tell if is will work is to try it. Hence why it is an experiment. All the plumbing will be setup if I need to switch to a hydroboost or something if this does not work. | ||
Jim Walters Prolific User Username: jim_walters Post Number: 238 Registered: 1-2014 |
Shorten the booster pushrod until you have free play between the slave and booster. No free play brakes will apply. If no circlip in end of slave to prevent piston coming right out you will have to machine a groove in it and install one or change to a slave with one. Also you could shorten the spring in the slave you have until it only pushes the piston to the edge of the cylinder. SRH8505 SRC18015 SRE22493 NAC-05370 www.bristolmotors.com | ||
Mike Thompson Frequent User Username: vroomrr Post Number: 515 Registered: 4-2019 |
Jim, That was my thought as well, to either take out the spring in the slave or lessen the force if necessary (cut the spring). And there is a circlip in there or it would shoot out of there. The experiment will tell me what I need to do. The PDF file Ross posted gave me more hope this may actually work. I have no idea the bore size, another unknown variable. I don't get to make real life experiments much so I'm kind of excited to do it. | ||
Jim Walters Prolific User Username: jim_walters Post Number: 239 Registered: 1-2014 |
My advice above is wrong. If you use a slave cylinder you must remove the spring so the piston will bottom out when the booster pushrod is attached. A slave cylinder is not the best choice for this application. You must make sure the slave piston travel is less than the maximum booster pushrod travel or the slave piston will pop out and cause a complete failure of braking. Using the method you are planning leaves you with no backup and is most likely illegal as you are converting a car made with a dual brake system to a single. As of about 1968 all vehicles in North America were mandated to have dual circuit brake systems. You should use a dual master bolted right to the rat trap and a remote booster like I suggested earlier for safety's sake. SRH8505 SRC18015 SRE22493 NAC-05370 www.bristolmotors.com | ||
Mike Thompson Frequent User Username: vroomrr Post Number: 518 Registered: 4-2019 |
Jim Please explain to me how a remote booster is a dual brake system. All the ones I have seen only have one line coming from it. https://www.google.com/search?hl=en&tbm=isch&source=hp&biw=&bih=&ei=-FLnXLnkGNHesAWArLK4CA&q=remote+booster I have never once (where I live) seen them even open the hood let alone do more than drive the car and stomp on the brakes. This is (the country of) Texas (that is how they see it down here, no joking on that). | ||
ross kowalski Grand Master Username: cdfpw Post Number: 1106 Registered: 11-2015 |
Mike, I think Jim means run each leg of the master cylinder to a single remote servo going to one of the circuits. You would have a dual circuit MC at the rat trap, two hydraulic lines coming out and a couple remote servos. | ||
Mike Thompson Frequent User Username: vroomrr Post Number: 519 Registered: 4-2019 |
If I were to remotely think of putting two remote systems in for the comfort of gaining only a statistical error point I would go with something like: https://www.jalopyjournal.com/forum/threads/remote-mounted-hydro-vac-units.1002886/ The original study demanded by Presidential Executive Order delayed the actual full implementation until 1976, so I believe my car is therefore exempted. Even so I believe the only requirement is at the master cylinder, which must be dual. At the time of the original study they gave the value of benefit to cost ratio for dual vs single. Of 40,000 estimated casualties each year the dual system gained 200-300 lives saved. That is within the standard error deviation. Now it might sound nice some 200-300 lives saved a year, in real safety terms it is a wash, and a single is as safe as the dual, by statistics. | ||
Jim Walters Prolific User Username: jim_walters Post Number: 240 Registered: 1-2014 |
Ross is right. Morgan did exactly this with the +8 in 1968. One booster for the front calipers and one for the rear cylinders. In your situation I think a single booster on the front four calipers would suffice and leave off a second booster to the rear calipers. The fronts do the majority of the braking and with four front calipers connected together it would most likely work just fine with a single booster. I think you are mistaken in your statement about full implementation of dual circuit brakes not happening until 1976. Every British car that came into North America from 1968 on had to have dual circuit brakes. The definition was that the failure of a single part cannot result in a total loss of braking. Using a single master and slave to operate the booster as you have designed violates this statement. Your car isn't exempted as it was built with a dual system and was imported conforming to the law in effect at that time. Having a dual system is not for your comfort it is for the safety of you and more importantly others sharing the road with you. SRH8505 SRC18015 SRE22493 NAC-05370 www.bristolmotors.com | ||
Mike Thompson Frequent User Username: vroomrr Post Number: 521 Registered: 4-2019 |
As I have read it that applies only to manufacturers not individuals. I have talked to several custom shops that build hot rods down here, and they have said the same thing. You must have a title for the body, and what you do after that is up to you and the inspection station. And if it has a 4 wheel slide to stop it passes. I lived in Missouri where they have a vested interest in failing your car. The only shops in Missouri that can inspect a car is a repair shop capable of lifting your car and to shake ball joints and such. So it is very difficult to pass an inspection in Missouri because they make their money in repairs not on the inspection. Down here in Texas any shop can do inspections (even I could do it) so there is no incentive to repair cars, only to get them done as fast as they can so they can get back to work. I guarantee you no one is going to look at my brakes. There are 100s of thousands cars on the road with single systems, and only 200-300 people more died each year out of 40,000 when they only had single systems. I have been driving since I was 10 years old and have never had one wreck (my fault) in my life. I'm going to hit a tree before I hit another car if in the case of a one in a million chance my brakes fail. Statistically speaking there is no difference in the chance of failure between a dual vs single system. And that is why they have/had emergency brakes. They still could stop in total failure of the hydraulic system. The Rolls has a parking brake that will stop it, I have tested that. I got it into the garage with only the parking brake to stop it, same as other cars I've driven that way. (And yes this is not the first time I did that.) From what I read the law was on the books so manufacturers followed the laws, but it is like Obama Care it has no teeth, because Trump made an Executive Order to not take any action, if you do not have full year medical care, as the law states. To change the system would put me back in the position I was in, how to find a dual master cylinder that will fit the rat trap. They only want to know the car it is to go on, no measurements are out there. I have yet to figure out how to find one and I have tried over and over. | ||
Jim Walters Prolific User Username: jim_walters Post Number: 241 Registered: 1-2014 |
I posted a link to a suitable dual master that would bolt to the rat trap in my post on 15 April in this thread. It would be an easy, straight forward installation. SRH8505 SRC18015 SRE22493 NAC-05370 www.bristolmotors.com | ||
Mike Thompson Frequent User Username: vroomrr Post Number: 522 Registered: 4-2019 |
Jim I'm aware of that, that one is too big, the bolt pattern is too big. | ||
Jim Walters Prolific User Username: jim_walters Post Number: 242 Registered: 1-2014 |
Just make an adapter plate from 1/4" steel. Two countersunk bolt holes attach the plate to the rat trap, two regular bolts attach new master to plate. You might not even have to countersink the plate to rat trap bolts if you mount the new master with the bolt holes at 90� to the existing mountings. No welding required, just drill some holes. With your fabricating skills it should be easy. SRH8505 SRC18015 SRE22493 NAC-05370 www.bristolmotors.com | ||
ross kowalski Grand Master Username: cdfpw Post Number: 1107 Registered: 11-2015 |
Mike, The relevant info is here "Dual master cylinders are clearly a cost-effective safety device. They eliminate 2.4 Equivalent Fatality Units per million dollars of cost (superior to the 1.7 for side door beams El2j) while, at the same time, eliminating nonserious injuries as efficiently as adjustable head restraints (130 per million dollars [llU) and eliminating an amount of property damage that, by itself, comes close to paying for the cost of dual master cylinders." It looks like the accident reduction for brake related accidents was 2% better for dual circuit brakes. The highway safety act was a 1967 thing. No more chrome on the dash, seat belts mandatory, dual circuit brakes, etc. | ||
Mike Thompson Frequent User Username: vroomrr Post Number: 524 Registered: 04-2019 |
Ross please if it is a PDF File tell us. Have the link say PDF File etc. My internet is so bad I just keep clicking on a link until something happens, now I have 10 copies of that file. Thanks | ||
Mike Thompson Frequent User Username: vroomrr Post Number: 525 Registered: 04-2019 |
How hydrovac works https://www.youtube.com/watch?v=keChCevuKk8 | ||
Mike Thompson Frequent User Username: vroomrr Post Number: 543 Registered: 04-2019 |
Ghost satellite abandoned in space in 1967, Then this U.S. satellite started transmitting again in 2013. Calling out a 1965 Rolls Royce UK License plate number over and over. The man reportedly died horribly in his Rolls Royce from lack of help. Now still seeking help. https://www.thevintagenews.com/2017/11/28/abandoned-in-space-in-1967/ | ||
Mike Thompson Frequent User Username: vroomrr Post Number: 559 Registered: 04-2019 |
"If your master cylinder is located below the floorboard, installing a 2 PSI residual valve is highly recommended. If your master cylinder is mounted on the firewall, a residual valve is generally not needed because gravity will provide a natural residual pressure within the brake line. Ever had problems with a spongy pedal or slow, unresponsive brakes? If so, you may need a residual pressure valve installed in your brake line. A residual valve acts like a one-way or check valve to maintain brake system pressure to eliminate the problems of a spongy pedal. This 2 PSI residual valve is installed inline between the master cylinder and disc brake calipers to keep 2 PSI of residual pressure at the caliper after the brake pedal is released. This ensures that you will have a high, firm pedal next time you press the brake pedal." Copied from: https://www.speedwaymotors.com/Speedway-Disc-Brake-Residual-Valve-2-PSI-Purple,5312.html | ||
Mike Thompson Frequent User Username: vroomrr Post Number: 567 Registered: 04-2019 |
I went with the: EMPI 98-6020 BRAKE FLUID RESERVOIR, VW TYPE 2 BUS, 1955-66, 211 611 301C Through Amazon $8.95 + $5.99 Shipping https://www.amazon.com/98-6020-BRAKE-FLUID-RESERVOIR-1955-66/dp/B00C2D9CF2 And the: 2 PSI Residual Brake Pressure Valve Also through Amazon $7.15 + $8.00 shipping https://www.amazon.com/Procomp-Electronics-PCE492-1001-Residual-Pressure/dp/B01LYXI829 To leave a paper trial. (Follow the yellow brick road.) Paper, paper, paper. | ||
Mike Thompson Frequent User Username: vroomrr Post Number: 568 Registered: 04-2019 |
A question: Let's say with this guy the RR engine blows up, and puts a rod through the engine. The guy has a Chevy truck with an LS motor in it but the transmission is shot (and does not have the money to get another RR motor). Would you scorn him and tell him you must put the original engine back in the Rolls Royce or you will bastardize the car, or I'm with you do what you need to do to get it back on the road (and let me help)? OK now some of you have said do what you need to do to get back on the road. Now the brakes become an issue because the LS engine has no brake pumps nor accumulators. Would you then tell him I would do this and that, or again scorn him and tell him you must put the original brake system back on there or you will bastardize the car? | ||
Patrick Lockyer. Grand Master Username: pat_lockyer Post Number: 2164 Registered: 09-2004 |
2lb psi holding the calipers pistons in contact with the discs with the hub clearance set up at less than 0.006in or 0.152mm spells big trouble. Are you fitting a priority valve in this strange setup that in the way stated IMO will not work! | ||
Mike Thompson Frequent User Username: vroomrr Post Number: 573 Registered: 04-2019 |
The 2 PSI Residual Brake Pressure Valve is for the Rolls Royce master cylinder, it has nothing to do with the brake calipers. The Residual Valve is only because the RR master cylinder (going to the slave) is under the car, so the brake fluid is not backflowing into the RR master cylinder when not in use. This is the setup (in case anyone has forgotten): The RR master cylinder operates the slave cylinder that then operates the vacuum booster to the Dodge Ram Mark III Van master cylinder. Which is the same thing as on my Dodge Ram truck, which stopped my truck and the Rolls while towing. Here is the setup. This is the original hydroboost set up that gave me the idea.  And this is my setup with a vacuum booster same working principle. 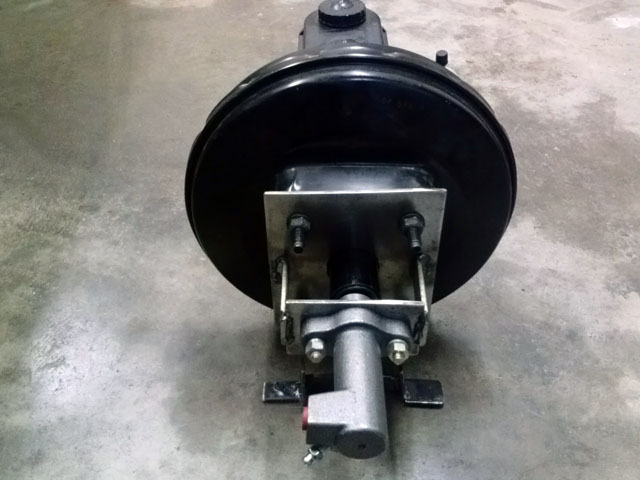 | ||
Patrick Lockyer. Grand Master Username: pat_lockyer Post Number: 2165 Registered: 09-2004 |
Your info on the 2bl psi pressure quote: [This 2 PSI residual valve is installed inline between the master cylinder and disc brake calipers to keep 2 PSI of residual pressure at the caliper after the brake pedal is released]. As for your latest change addition the RR master cylinder with a 2lb psi holding the slave is another IMO no go, go figure. | ||
Mark Luft Prolific User Username: bentleyman1993 Post Number: 264 Registered: 10-2016 |
You could always use an external mount hydraulic pump like Maserati or Citroen.Bolt it on in place of the air pump (if you have one). Then you could keep the original braking system. | ||
Mike Thompson Frequent User Username: vroomrr Post Number: 574 Registered: 04-2019 |
Do you not see the quotation marks at the beginning and end of that. Then it says, Copied from: It is not my statement. "2lb psi holding the slave is another IMO no go" (Your statement) That well may be, I have been told to use one not sure why in this application. Only that if it is under the calipers it will have backflow. | ||
RR Forums Administrator Board Administrator Username: admin Post Number: 110 Registered: 10-2002 |
This thread is too long and has been closed. If you wish to continue the conversation please start a new thread. |