| Author | Message | ||
Alan Scard Experienced User Username: alanscard Post Number: 25 Registered: 7-2015 |
Ref 1972 Shadow SRH 13952. I would appreciate if someone could let me know the ohms reading of the solenoid used in the auto-choke? As I have the carbs off the car and cleaning them up I thought just out of curiosity I would measure the 2 black wires which are connected to the solenoid windings. It turned out they were open circuit, which calls into question whether the car I have owned since 2002 has ever had a functional auto-choke, but living in the UK with the car in the garage, cold starting has never been a problem. The solenoid for my car which has the black plastic cover is p/n RD8574, but is not available anymore. An alternative which is slightly different is p/n UD21161 but at £339.22 including vat seems expensive. A retired Engineer friend of mine, a fellow classic car person as he has owned a Daimler SP250 sports car for over 40 years wants to try a built a new solenoid. As mine has corroded the windings we cannot ascertain the correct ohm age, hence my question if anyone can perhaps measure a known working solenoid I would be grateful. Thanks Alan | ||
Jim Walters Prolific User Username: jim_walters Post Number: 203 Registered: 1-2014 |
22.6 Ohms. If it is still all together weigh it before you tear off the old windings. Use the same diameter of magnet wire and wind it until it looks close to the same amount of wire that was on it, then weigh it with one of those little digital weigh scales until you are very close to the same weight as before. This saves trying to count the number of turns. SRH8505 SRC18015 SRE22493 NAC-05370 www.bristolmotors.com | ||
Patrick Lockyer. Grand Master Username: pat_lockyer Post Number: 1977 Registered: 9-2004 |
Just measured my car, engine still warm from a run out in the autumn sunshine, reading 25.6 Ohms!! | ||
Patrick Lockyer. Grand Master Username: pat_lockyer Post Number: 1979 Registered: 9-2004 |
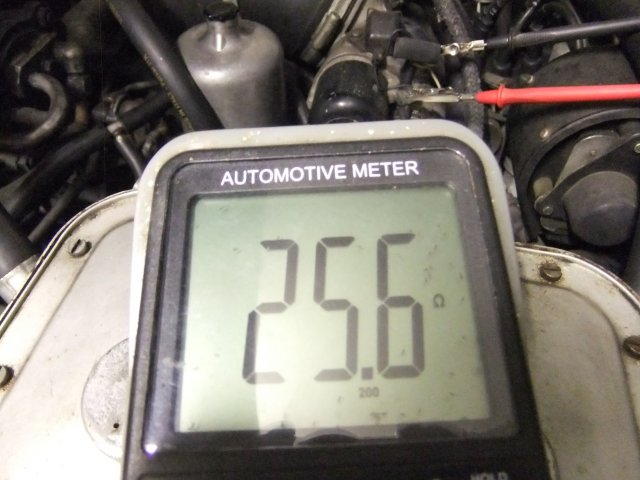 | ||
Geoff Wootton Grand Master Username: dounraey Post Number: 2043 Registered: 5-2012 |
Hi Alan When you are carrying out your repair check the two black wires are ok as they pass through the top plate. What tends to happen over the 40 years is the wires chafe against the top plate and if the insulation is rubbed away totally you get a short which will take out the fuse. Check out this entry: http://au.rrforums.net/forum/messages/17001/13329.html?1423300654 | ||
Patrick Lockyer. Grand Master Username: pat_lockyer Post Number: 1981 Registered: 9-2004 |
If the cover fits the loom as intended tight the wires cannot chafe as they are held firm, maybe the loom cover is not in the correct position when fitted to cause the failing. This is still original with the rivet[centre] holding the assembly together without the set screw and nut. 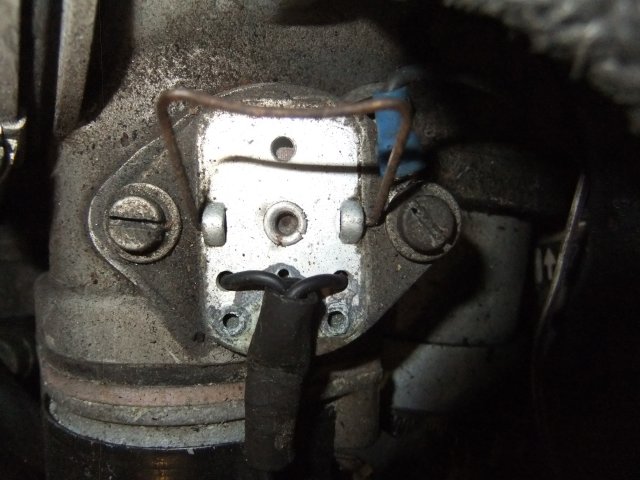 | ||
Geoff Wootton Grand Master Username: dounraey Post Number: 2044 Registered: 5-2012 |
Hi Patrick On my car the wires were not held by a clip. I suspect a previous owner did not replace it when working on the car. One of many horrors I have found, including the starter motor solenoid wired direct to the ignition switch box, bypassing a faulty starter relay. It's still worth owners checking these wires are fastened properly. If you read the entry I linked to above you will see even Bill Coburn got caught out by it. | ||
Patrick Lockyer. Grand Master Username: pat_lockyer Post Number: 1982 Registered: 9-2004 |
To just show that Jims reading difference to the one I submitted is heat related etc, today temp at a cool 14c and the reading is 23.3 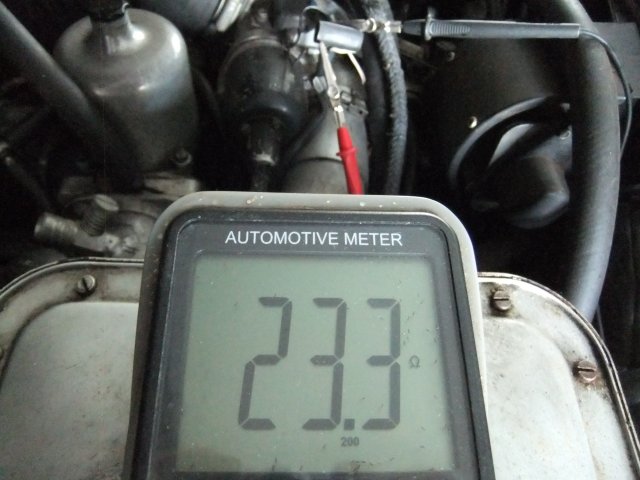 | ||
Alan Scard Experienced User Username: alanscard Post Number: 26 Registered: 7-2015 |
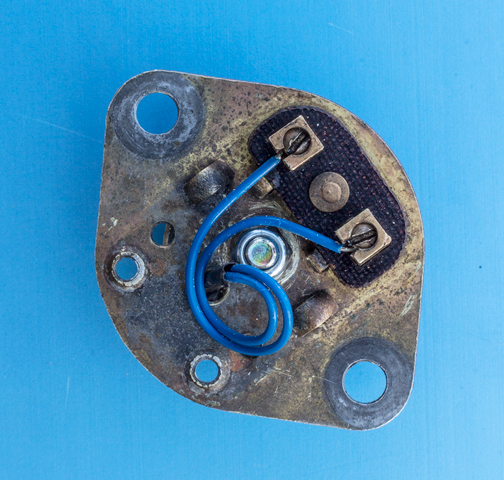
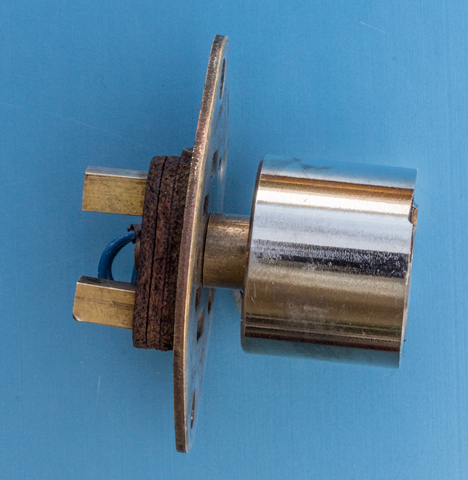
Many thanks to all who replied to my request for info on the choke solenoid. My Engineer friend has managed to build a new solenoid, see details below, which may help others who encounter a similar problem. If you need more info please let me know. SUBSTITUTE AUTO CHOKE SOLENOID (Contributed by 1964 Daimler Dart (SP250 Sports) Owner of 52 years). I think David likes working on a proper V8 i.e 6.75 as his Dart V8 is only 2.5. He will kill me for that comment! I was astonished at the audacious cost of a replacement RR Choke Solenoid assembly (£300 + plus P&P and an indefinite delivery lead time). I was equally astonished at the extreme complication of the RR Choke mechanism, the Daimler has a simple manual control, be that as it may, the objective was to find a suitable cost effective solution. The original solenoid was removed by simply drilling out the armature rivet from the top of the mounting plate. The armature core was found to be seriously rusted and the rust expansion had caused the coil windings to sheer. The secondary armature that is wrapped around the winding assembly was equally corroded and would require remanufacture. A simple rewind/remake was contemplated but could prove to be a very protracted process. EBay came to the rescue with a selection of Lifting Electro Magnets. The item selected: 12v, 38 Ohm, 25mm diameter 20mm high which develops 5.5Kg Magnetic Attraction (In the spirit of RR philosophy – that is more than sufficient force). The device comes with a 4mm centre-bored thread. The item was ordered from a UK Seller with delivery just 3 days later. It is a very well made item with resin encapsulated windings and heavily plated nickel-iron armature core and body. The solenoid is mounted with a 4mm threaded rod and a Nylock nut using the 5mm hole left vacant by the original armature. To achieve the RR recommended airgap (4-15 thou) we now work in Imperial Inches, the distance between the top of the mounting plate to the choke mechanism interface lever was found to be 1.088”. The solenoid is therefore mounted with a brass spacer to achieve the necessary airgap clearance (5-6 thou was easily achieved). Whilst organising the gap it became apparent that the outer ring of the solenoid face might just come into contact with the shaft and spring mechanism so, (as may be seen in the images) approx. 30 thou was removed using a fine grind stone. The solenoid should be rotated to ensure the rebate is located over the shaft and spring assembly. The result – a very positive magnetic hold and the cost - £6.99 from a UK Seller – it could have been as little as £2.80 directly from China. I have uploaded 2 photos but cannot load the other 2, so I will try in a follow up post. Regards Alan 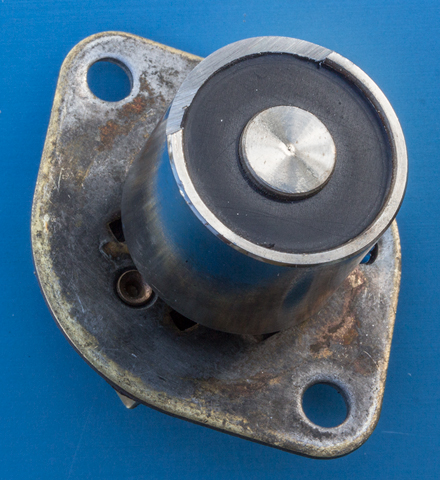 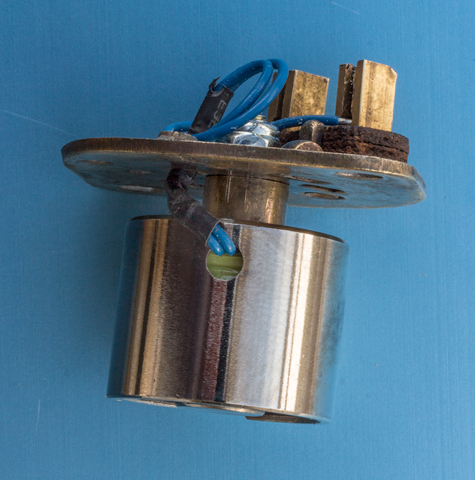 Moderator Comment: Alan, just use the ENTER car twice after each IMAGE command and you can paste any number of images down the page as I have done with the images above and below.  . . | ||
Alan Scard Experienced User Username: alanscard Post Number: 27 Registered: 7-2015 |
   . . | ||
Larry Kavanagh Prolific User Username: shadow_11 Post Number: 245 Registered: 5-2016 |
Excellent cost-effective engineering solution. Perhaps this could be added to T1 Topics? Moderator comment - Larry, regrettably Bill Coburn has retired from publishing Tee One Topics - a Forum search when necessary should find this topic.  . . | ||
Guido Broich Unregistered guest Posted From: 81.174.11.26 |
very interesting. I am interested to make one for me. As I am still awaiting registering, I attach my mail for a possible direct contact. (Message approved by david_gore) Guido, please email your email address to me and I can return email your address through the forum to any member wishing to contact you direct: drh14434@yahoo.com.au  |