| Author | Message | ||
Martin Cutler Prolific User Username: martin_cutler Post Number: 113 Registered: 7-2007 |
I got a few free hours this afternoon to have a look at the R Type project. I purchased a new type of stud puller which is basically a nut with the tapered spiral spline in the centre. I managed to get another 9 studs out. This leaves a total of 5 studs in the block, 2 in the middle, the other 3 down the back. I lifted the front of the head around 2mm, and will try bolting it back down to see if I can get some movement at the rear. When I could go no further with the head, I turned my attention to the gearbox. There are almost no teeth left on first gear, and the thrust race bearing was very noisy when I had it running. I disconnected the brake servo, and was starting in on looking at the gear change shaft when I was called for dinner. Looking at the shaft, do I have to take the floor out to remove the gear lever? The floor bolts look VERY rusty. I found the rear brake shafts rusted and seized solid. The servo looks decidedly knackered as well. cheers Marty | ||
Brian Crump Experienced User Username: brian_crump Post Number: 38 Registered: 2-2007 |
Martin. I have great faith in your ability to transform this into a silky smooth motor car. Good luck. Regards, Brian Crump | ||
Martin Cutler Prolific User Username: martin_cutler Post Number: 114 Registered: 7-2007 |
Thanks Brian, I do have a pretty good teacher :-) | ||
Martin Cutler Prolific User Username: martin_cutler Post Number: 162 Registered: 7-2007 |
Hi guys, Well, nearly 2 years down the track, and the head is finally off. #6 exhaust valve was the culprit. The last 5 studs held on with a vengence, I ended up cutting them off with a hack saw. Now to get the remains of the studs out of the block. At best I need a set of exhaust valves. I will be taking the block out of the car for chemical cleaning, as the amount of silt is the worst I have seen. Any recommendations for sourcing exhaust valves? I have an account with Black Diamond Valves in the US, for sourcing Italian Motorcycle valves, but there may be a solution closer to home? Cheers Marty | ||
David Gore Moderator Username: david_gore Post Number: 989 Registered: 4-2003 |
Martin, It is possible to spark erode [electro-discharge machine (EDM)] the stud remains from the block when all other methods fail. Have a look at the following links for more information: http://www.sparkeroding.co.uk/ http://brokentap.blogspot.com/ http://www.moreg.org.au/broken_bolts.htm How to build home EDM is detailed in the following book: http://www.ploughbooksales.com.au/011197.htm Otherwise look around for an engineering shop that has an EDM machine with a table large enough to hold the block and they will be able to erode the studs without any problems at a reasonable cost. The threads will most likely need retapping or helicoiling if they have corroded over the years. | ||
Dave Puttock Experienced User Username: ariel Post Number: 16 Registered: 5-2010 |
Martin, You could have a go at drilling the studs out. The technique would be to get a couple of long series drills, and turn up a bush which is a tight fit in the cylinder head hole. Then bolt the cylinder head back in place using a few of the good stud positions. Use the bush as a quide to keep the drill central in the stud. Plenty of lubricant and patience, until you get through the stud. Progressively open the hole up with bigger drills until you start to see the root of the thread exposed on the top few turns. Clean the last out with a new tap. You will probably find the studs are made of a tough steel, so regular sharpening of the drill may be required. I would recommend getting it set up on a drilling machine, dont try and do it with a hand held drill, as you need to keep the drill slow and biting. Skidding=blunting | ||
Mark Taxis Frequent User Username: mark_taxis Post Number: 55 Registered: 4-2007 |
Martin I have an assortment of valves and valve springs, not sure which is which exhaust and inlet, these are not new but are in good condition (to my eyes anyway) You are most welcome to have them for the cost of the postage. I stress that I do not know which engine they are for but if you can give me any info on what to look for in the way of markings then I will sort through them Regards Mark | ||
Richard Treacy Grand Master Username: richard_treacy Post Number: 2297 Registered: 4-2003 |
Mark, Martin, For a start, the inlet valves are 1 3/4� with 11/32� stems. The exhaust valves are 1 5/8� with 3/8� stems. I can�t remember the overall heights. New they aren�t particularly expensive these days, but of course good secondhand will do. When reaming the new aluminium bronze exhaust valve guides, you can leave them undersize to suit the used valves. Also, I have found bronze inserts for the used inlet guides work very well and outlast the basic cast iron original setup. As to your studs in the block, Martin, given the trouble that you have had removing the head, surely it is best to leave that to a good shop. RT. | ||
Mark Taxis Frequent User Username: mark_taxis Post Number: 56 Registered: 4-2007 |
Richard - thank you for the info, re the measurements the valves I have are definately exhaust valves . Flying spares are advertising the valves for 49 pounds each. These are complete with valve springs, but I am not sure if these springs are for the R type or the Mk6 as Flying spares advertise diferent springs for the Mk 6 and R type 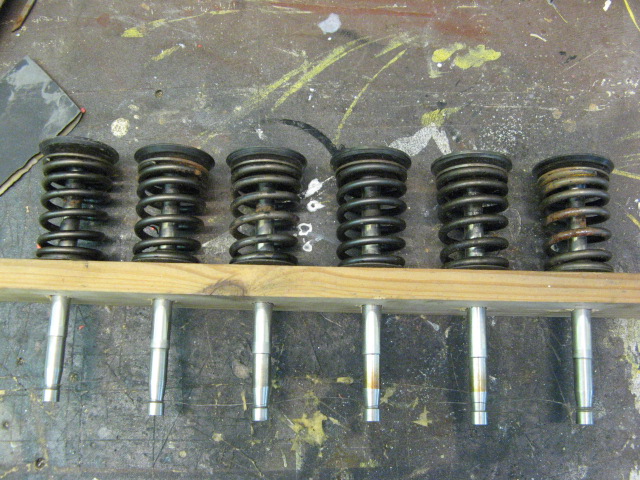 | ||
Martin Cutler Prolific User Username: martin_cutler Post Number: 163 Registered: 7-2007 |
Hi Mark, Didn't get your personal message, but send me an email at martincutler"at"optusnet.com.au and we can converse. Hi Richard, I have been getting plenty of practise removing broken studs and bolts, we have a 2nd year apprentice in the workshop, he is doing a sterling job of honing my skills! Most japanese cars have bolts made out of cheese. Cheers Marty | ||
Martin Cutler Prolific User Username: martin_cutler Post Number: 200 Registered: 7-2007 |
Hi guys, Thanks to Mark, Peter and Miles for their advice on sourcing parts for the R Type at all british day, just got my new water pump housing from tony handler in the US, second hand but almost like new. One more part of the puzzle solved, only 999 to go! also got anew thrust race bearing for the clutch out of melbourne, so rebuilt gearbox can go back in. Cheers marty |