| Author | Message | ||
Cliff Biggs Experienced User Username: cliffy Post Number: 172 Registered: 09-2021 |
Just installed an alternate hood release for if/when the regular cable were to break. I used a standard old gate latch "U' hook and 3/32 wire cable. The gate latch loop hook is bolted (with 2 3/16th bolts and lock nuts) to the underside of the rain gutter at the edge of the opening just in front of the A/C inlet vents, I mounted the hook underneath the gutter channel and pushed bolts and nuts up into the channel to secure it. I looped the cable through the arm on the right side of hood mechanism (the arm that is used for right hand drive cars) and clamped it with a cable clamp as close to the arm hole as I could get and then ran the cable through the gate latch loop and down the inside of the engine compartment to be tie wrapped to the lower control arm behind the right front tire. I can crawl under the car and grab the cable and give it a slow pull and the hood latches release. As this will not be an emergency issue I will be able to jack the front of the car and slide under to pull the cable. This eliminates the need to drill into the a/c vent hole and wrap the cable in there as others have done. Especially nice as I have reinstalled the foam pollen filters in the a/c intake screens in front of the windshield. Hope this helps someone else Easy 1 hr project Id add a picture but its too big | ||
Brian Vogel Grand Master Username: guyslp Post Number: 3409 Registered: 06-2009 |
Cliff, Photos here must be no larger than 640 x 640 pixels square. It's very easy to open any photo in Paint on a Windows PC and use the resize function (pixels option) and take the largest dimension down to 640 pixels. The smaller side will follow proportion. Save that and then post it. I'm constantly having to resize things to post here because the software is so antique. If you need to resize many images at once and save them separately in their size-converted form, then try Bulk Image Manager (which I've used for this purpose for years) or any one of a number of other options. See 6 Free Batch Image Editors for Windows, macOS and Linux Brian | ||
David Gore Moderator Username: david_gore Post Number: 4296 Registered: 04-2003 |
Hi Brian, Re your comment on image size - I always use 800 x 800 pixels maximum for posts on this forum. I have found this to be the most suitable size for both downloading into posts and to allow viewing in a suitable size without having to resize the images first. Regards David | ||
Cliff Biggs Experienced User Username: cliffy Post Number: 173 Registered: 09-2021 |
OK guys Lets see- I've never used "Paint" and don't even know where t find it or how to open it or use it I'm in the Luddite group. I know how to turn on this laptop though :-) I will look into "paint" though | ||
Brian Vogel Grand Master Username: guyslp Post Number: 3410 Registered: 06-2009 |
Here's the Paint main screen (or the upper left corner of it, anyway) with the button for the resize tool highlighted:  | ||
Brian Vogel Grand Master Username: guyslp Post Number: 3411 Registered: 06-2009 |
Click on the Resize button, and this dialog appears: 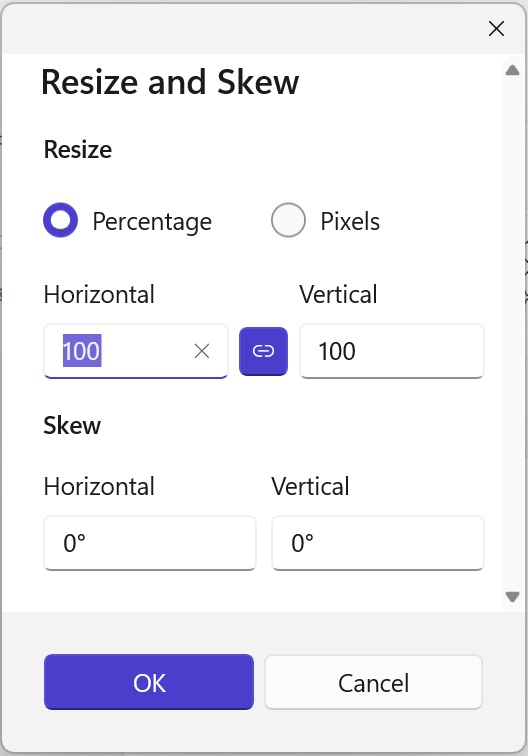 then click the radio button showing Pixels, and make sure that the largest dimension is noted as 800, per Mr. Gore (this must have been increased at some point, which is great): 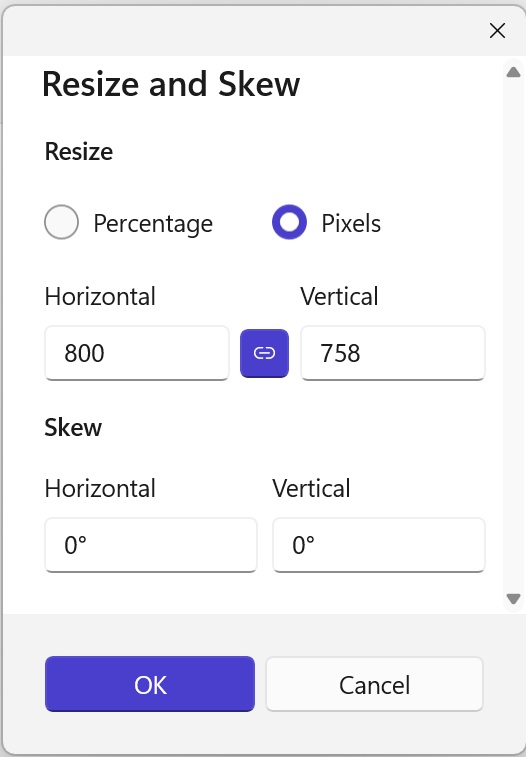 Then hit the OK button. Your image will now be resized to be within the 800 x 800 square pixel limit the forums software requires. | ||
Brian Vogel Grand Master Username: guyslp Post Number: 3412 Registered: 06-2009 |
Make sure you save your resized image somewhere, as you're going to need it to use the \image command to make the forum software snag a photo for posting. 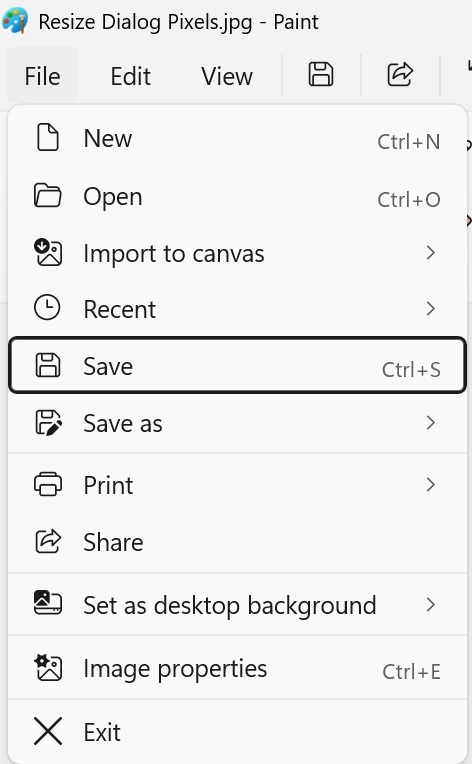 | ||
Brian Vogel Grand Master Username: guyslp Post Number: 3414 Registered: 06-2009 |
Some might find it easier to use Bulk Image Manager whether it's for one file or many. If you are doing many, it's better to do all the ones in portrait orientation separately from all the ones in landscape orientation. This makes it safe to pick the correct value for longest dimension and leave the other at zero (which will be automatically made proportional). Main Bulk Image Manager (BIM) window with button for selecting images circled: 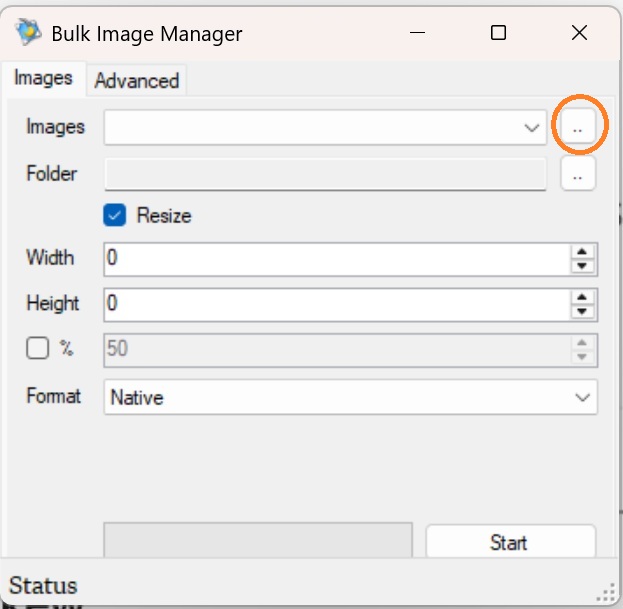 Activate that button and you will get the dialog where you select your images. I happen to be selecting the images I used when discussing Paint that are in portrait orientation, and all of which are starting out life as 800 pixels tall. 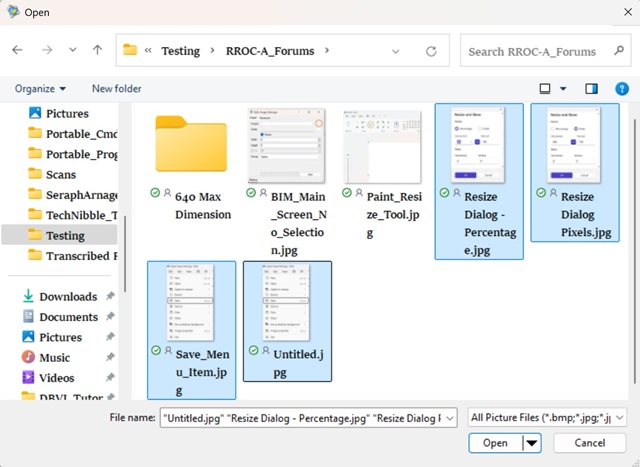 After you hit the Open button, note that these file names are now listed (though some are obscured due to the small size of the window) in the BIM Images edit box. What you need to do next is select where it is you want the resized files to be placed, and here's the BIM Window with the images already selected, and the button to select the destination folder circled:  When you activate that button, you will get a dialog where you navigate to the folder where you want to place the resulting resized files. I tend to create this prior to even starting the process, but as you can see, if you have not done this you can navigate to the parent folder of where you want these placed and hit the Make new folder button instead. 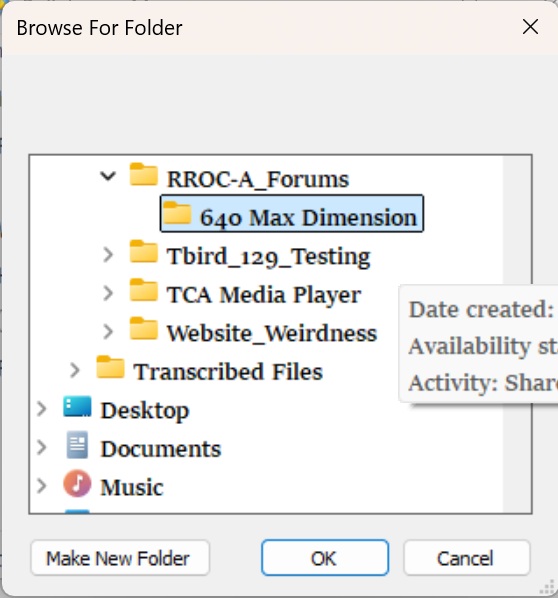 Now comes the part where you specify how many pixels it is that you want for the longest dimension of the images you're resizing. Since I know all of mine are portrait orientation, I'm resizing the height to 640. If they were all landscape, I would instead be resizing the width to 640: 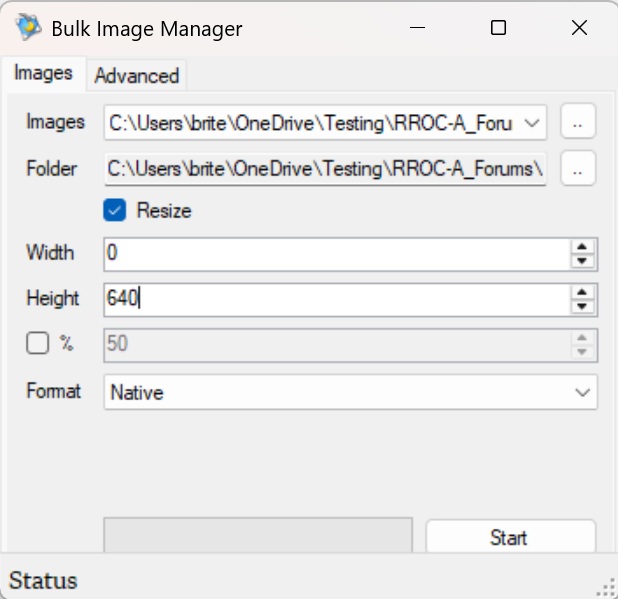 NOTE: If you happen to know that your camera produces images that are either 4000 x 3000 in landscape or 3000 x 4000 in portrait, you might want to use the option for percentage instead. If you wanted the maximum dimension to be 800 you could instead check the checkbox ahead of percentage and set the percentage to 20. This will take both dimensions down to 20% of original, and for 4000 that means 800 pixels. It really depends on what you know about the size of the images you're dealing with. Afterward, you will hit the Start button and the progress bar to its left will go from entirely blank to entirely green as the photos are resized. Once it's entirely green, you're done. The resized photos/images are in the folder you specified. You can close the BIM window. 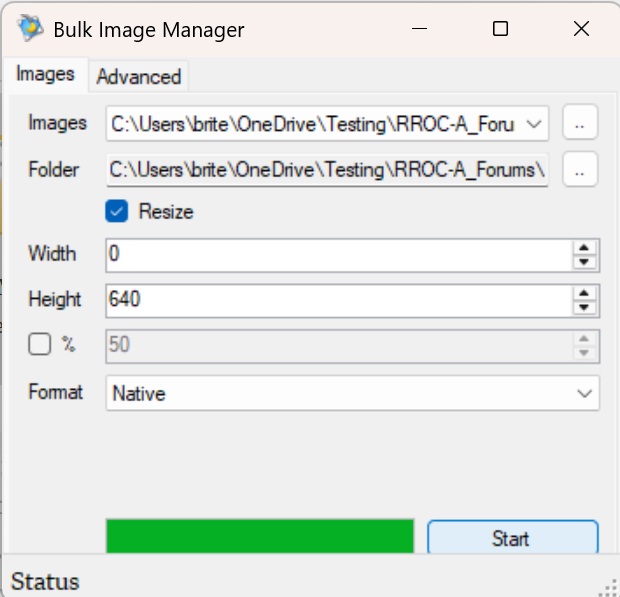 | ||
Cliff Biggs Experienced User Username: cliffy Post Number: 174 Registered: 09-2021 |
 | ||
Cliff Biggs Experienced User Username: cliffy Post Number: 175 Registered: 09-2021 |
Got it figured out but it took a while as it wasn't exactly as described above :-) | ||
Cliff Biggs Experienced User Username: cliffy Post Number: 176 Registered: 09-2021 |
 |