| Author | Message | ||
John McGhee Experienced User Username: jam Post Number: 30 Registered: 10-2012 |
Hi All, I have recently replaced the door speakers in my Spirit III C/N 55208. I found little RR material to guide me in this pursuit and so put a bit of research into the project, which I thought I might write up and share with the RREC Forum. I hope this is of assistance. The Spirit III has an Alpine head unit with a pair of small (25 watts per channel) amplifiers in the boot next to the CD stacker. Sound is delivered via 10 speakers. There are 2 tweeters in the top roll, 2 tweeters in the upper section of the rear doors, 2 midrange drivers in the upper section of the front doors and 4 bass drivers, one in the lower section of each door. The good news is that the electronics of this package are sound and, if you ask Mr Google, you will find favourable comments about the head unit and amplifiers. Whilst 25 watts per channel is hardly news, I assume it is a genuine 25 watts (RMS) rather than the “peak” 25 found in most modern head units which I understand run closer to 10 watts RMS. The bad news is that the speakers (and particularly the bass drivers) are not up to scratch. Following traditional car-making practise they are quite cheap items and are made with paper cones that can deteriorate badly in the door slamming, rain dripping environment of a car door. In my case I had no sound at all from the driver's door (courtesy of a loose wire at the amplifier) and only buzzing sounds from the other three bass drivers. As it turned out (you will see in the photos), all of the bass drivers had perished and I would note that this is a relatively modern (1995) 45,000km car that has never had to lift a heavy weight, much less go out in the rain. The deterioration must be age related and so I assume that other Spirit owners might be having similar speaker failings. 1. Door Trim Removal: This topic is well covered in the manual so I won’t repeat it but rather provide some comments beyond what you will find there. In my case I had veneered door panels which added some stress courtesy of the images floating in my head about what would happen should a screwdriver slip... however, take your time, be thorough and you will be fine. Use a small pick (I purchased a box with four different tip shapes from a car parts store) to gently prise off the escutcheon covers on the various shiny metal pieces to expose the screws. If you have veneered panels, unscrew, lightly tap and then gently nudge the metal bits off to avoid lifting any of that precious varnish. See blurry images below showing escutcheon removal:   Don’t forget the little screws that are hidden in the carpeted section of the door card! They are not visible so just feel for them with your fingers or a flat blade screwdriver (you will see their locations in the schematic in the manual). In my case I had no screws (or screw holes) in the front passenger side door, so read in to that what you may... You will then have something vaguely like this (note that the speaker grilles do not come off separately, they remain attached to the door card): 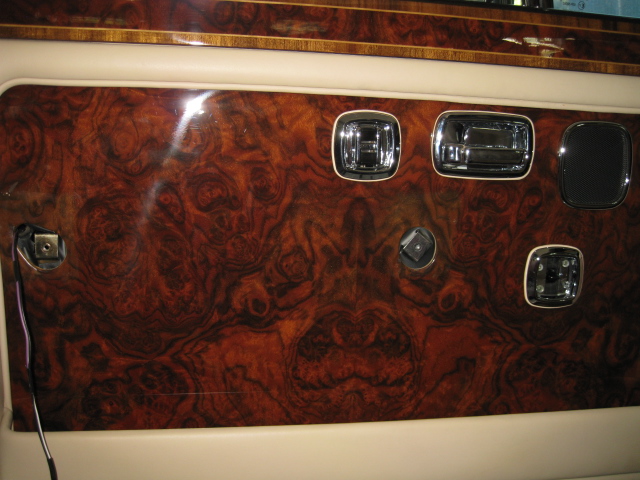 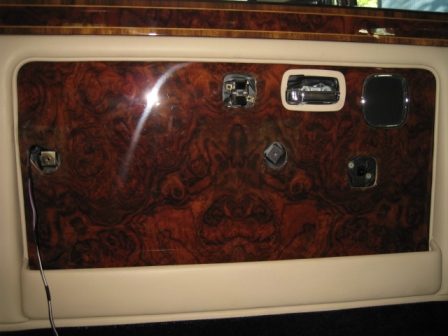 With all screws removed, reach your fingers (or a wide spatula of some description) under the lower edge of the door card and pop the press-in fittings out progressively from bottom to top (there are lots of them and they press in by about a centimetre - they make an encouraging popping sound when released). Once they are all released the whole card (and veneered panel) will come off freely, just tilt it out at the lower edge so the lip at the top comes out from under the timber door capping. Be careful if you have veneered panels as they are NOT permanently fixed to the door card even though the picture in the manual implies that they are. With the trim removed you will see something like this: 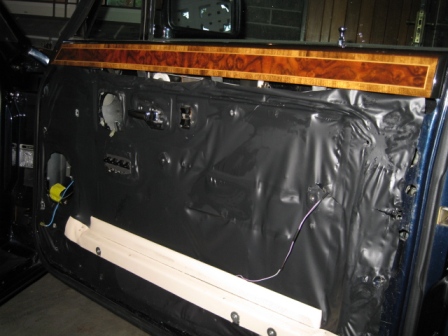 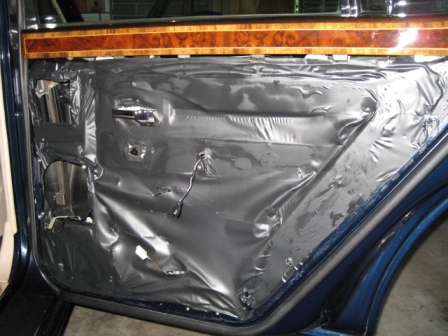 (I have removed the speakers in these photos). Gently peel back the plastic water barrier so you don’t overstretch it when you remove the speakers. You will want to seal this back down again when you are done. 2. Original Speakers: The speakers are each held in by four screws and are carried in little plastic shrouds to fit their respective apertures. As mentioned earlier, the speakers are nothing to write home about... they look like this: 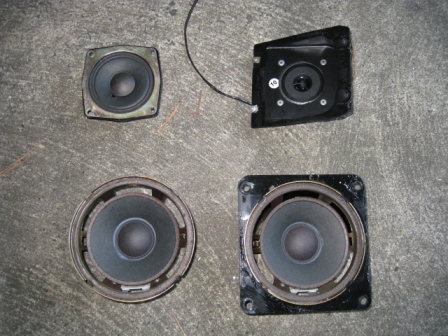 Top left is a front door mid range. Top right is the rear door tweeter. The bottom pair are bass drivers, one of which I have removed from its plastic housing (I left the top roll tweeters out of this experiment). The bass drivers are just over 5 inch (125mm) and the midranges are about 3.25 inch (75mm). They are all 4 Ohm. You will note that the bass drivers above look unusual and that is because the rubber ring that should connect the cone to the body of the speaker has disappeared. Their powdery remains were enjoying one of the many phases of the carbon cycle in the bottom of the door panels... 3. New Bass Drivers: There are myriad options here depending on budget and level of interest. You have PLENTY of depth behind the mounting points, but not very much in front courtesy of the speaker grilles built in to the door cards (the original speakers are very low profile compared to most modern speakers). The original bass drivers sit in a thin plastic shroud which is then screwed into the door frame. If you are of a mind you could search for speakers to fit the shroud but I decided to leave that needle in its haystack and just make up new ones. The actual door frame aperture is large and will accept most 5/5.25 (13cm) bass drivers. In my case I decided to try some economical ($75 per pair) Kevlar cone 13cm bass drivers from Jaycar just to get the ball rolling. I was unsure if the existing system was up to driving high wattage speakers but having now tested it out I believe that the (amplified) system can handle whatever speakers you care to throw at it. The speakers I put in are two way - they have a tweeter device mounted within the cone. I queried whether there would be any problems with this in the front door installation given that there are separate tweeters in the top roll, but I believe the front speaker crossovers take care of the problem as only the low frequencies are pushed to the bass drivers, effectively making their embedded tweeters redundant. I made up frames with 3.5mm hardboard. This shouts ‘temporary’ so I will likely try some other drivers later this year and make better frames from plywood brushed with epoxy. They look as follows: 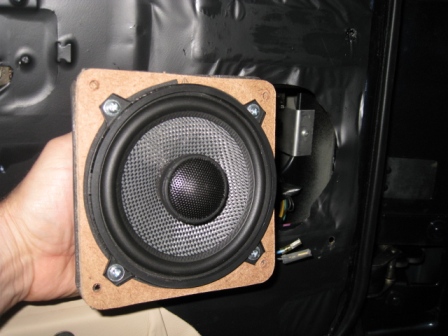 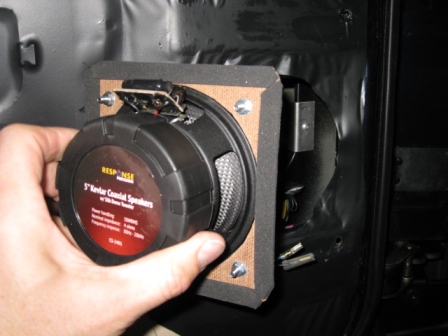 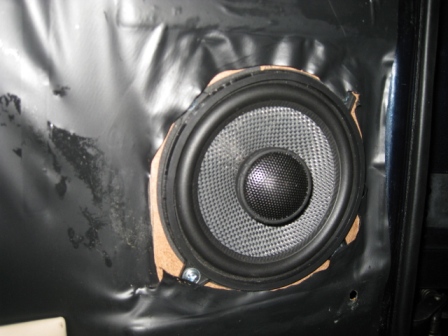 Note the thin rubber seal behind both the speaker and the frame. You want to avoid sound coming back around the speaker as it will negate its performance. The speakers are connected with typical push on connectors, remembering that the black wire goes to the negative terminal of the speaker. 4. Front Door Mid Range Drivers: The mid range drivers are more tricky to source because of their size and shape. Again, depth is not an issue but height certainly is. As per the bass speakers, the existing drivers are mounted in plastic shrouds. They have 100mm screw hole spacing (diagonally across the flat of the speaker). I was able to find some well regarded speakers made by AVI Sound in Canada (www.avisound.com). The model number is MXD-90 and they are labelled as a 3.5 inch midrange. Whilst the speakers are fairly expensive ($150 per speaker) and a bit of a challenge to get hold of, they are a direct fit into the existing cavity and screw holes. They are also a single driver and so do not have any bulging tweeters etc to foul the speaker grilles. Other 3.5 inch speakers will surely fit, but please check the height first as they often have tweeters embedded in them. Most 3.5s also have a round shape that will necessitate some kind of frame to be built to accept them, where the AVIs just dropped right in. The good news is that the AVIs sound wonderful. Truly a case in which the quality will be remembered long after the price is forgotten. I will likely try their bass drivers next. 5. Rear Doors: For the rear door speakers I disconnected the factory tweeter and simply angled the bass driver’s internal tweeter up to the passenger as far as possible. The original connection to the tweeter is a rudimentary affair (not a crossover) so I feel nothing is lost by doing this. If you felt adventurous I suppose you could buy a ‘split’ set and mount the tweeter in the existing shroud, employing the proper crossover that would come with the set. 6. Door Card Replacement As you would expect, the book informs you that replacement is the reverse of removal and, as usual, this is something of an understatement. Remember those press-in fittings I mentioned with the lovely popping sound? Well it turns out they have a large range of movement and are quite fiddly to reinstall. You can do it yourself with patience but if you have the option, have someone hold the top of the door card in under the timber capping while you ferret around with a torch and a screwdriver to help the press-in fittings find their mark, starting from the top. Note that there are some fittings that sit a fair way in from the edge of the card, so be careful of these. If you try to get muscular and press down hard they will simply bend and then the door card will bulge and probably chafe on some other part of the car, which will prevent you from hearing the clock tick... 7. Results? I had no bass sound and very few speakers operating before this project commenced so you know it wouldn’t take much to improve my lot, however I am delighted by the fidelity of this system. I love quality sound and have had many purpose built stereo installations in my cars over the years. The current set up in the Spirit, even with fairly cheap bass drivers, is smooth, strong and warm. There is a tremendous sense of depth, which I believe the marketers call ‘sound stage’, presumably brought about by the spacing of the front speakers. I thoroughly recommend you have a look at your car’s speakers. Even if they are not perished like mine were, the world of hi-fi has moved a long way from cheap paper cone speakers (especially in cars!). Replacements are not expensive, the job is quite straightforward and you will relish the improvement to sound quality. Enjoy! John McGhee | ||
Alistair Riddell Experienced User Username: ariddell Post Number: 14 Registered: 1-2013 |
Nice write up, I recently tackled the same job on my 89 Turbo R to similarly pleasing results although more limited by the reduced number of speakers in earlier cars. My car was fitted with a somewhat different setup, a Pioneer head unit (which is aftermarket as the factory built record stipulated a Blaupunkt unit) running through an amplifier located in some as yet unknown location within the vehicle. Interestingly only the 2 front speakers run from the amplifier with the 2 rear channels running from the head unit itself. This was then connected to just the 4 speakers in the bottoms of the doors which had deteriorated to a very similar level as yours with little left connecting the cones. I replaced all 4 of my speakers with 2-way Polk Audio DXi 525 units having measured the available space and toyed with the idea of enlarging the speaker aperture to accommodate a 6" speaker instead. I would have liked to have gone for a 2 or 3-way split component style of speakers, but alas sympathetic mounting options for these without destroying the door trims and dash of the earlier cars appears limited. Sound is hugely improved, reasonable bass response and the higher frequencies only really let down by the tweeter positioning so low in the doors. Although not an audiophile quality sound it's certainly a perfectly acceptable and pleasant accompaniment to the car's own v8 soundtrack. Next task will be intercepting the audio channel feed from the boot mounted CD changer in order to obtain an AUX input feed for media player connectivity. I've identified the appropriate wires to feed into so just need to plan out the best routing for a cable back into the cabin and get busy with the soldering iron. Cheers, Al |