| Author | Message | ||
Ross Rackham Experienced User Username: rosco Post Number: 12 Registered: 8-2009 |
The replacement of my central locking began when I decided to replace door speakers plus the fact that I have on occasion had to enter the car through the passenger door to unlock the drivers. Now the existing solenoids are well flogged. The units stick, the wiring is falling apart, the coil insulation looks to be beginning to fail and basically the whole system has a mind of its own. To remedy the situation I have decided to replace the entire system with new actuators and wiring. The side benefit of this it that it will now be a simple job to connect key-less entry when the alarm goes in. The only down side (I could correct it but cannot really be bothered) is that now ANY door switch will act like a master and lock/unlock ALL doors. This does not bother me. Some may say this is akin to vandalism of the car, departing from original ect ect. All I can say is that the locks will now work perfectly for years to come using parts you cannot even see, all from the princely sum of $45 for the kit. Well that and alternating between being blind drunk, hungover and a week of my life (fortunately I've taken a week off).  I should have taken more pics but will try to fill in the missing bits with descriptions. First off with the door trim.  Next pop the lower link from the solenoid out of the rocker (no tools required), loosen the lock nut on the manual door knob and unscrew the knob from the upper solenoid arm. Remove the three bolts holding the solenoid to the door skin, unplug the three wires and remove the unit. Now stare in horror at the dodgy repairs others have done in the past. There was no reason for this crappy repair. They could have (as I did later) just drilled another small hole in the brass push-rod (the original had cracked) and refitted the thing. There is more than enough adjustment in the system to allow for this type of repair.  Anyway, using a jewellers screwdriver gently tap out the pins from the yokes at either end of the solenoid push rod and remove the upper and lower arms. Now with a hammer pop off the top plate of the solenoid and remove the push rod with its soft iron slug. Reattach the three rods, bind the yokes tightly with layer about 5mm thick of Nitto electrical tape and secure with a very small hose clamp. This will give you the original actuator rod sans solenoid with very little flex in it. Refit the push-rod and you now have a non power assisted door lock mechanism. Mount the replacement actuator as if you were fitting it to a car that never had power locks, and run the two wires back into the car. 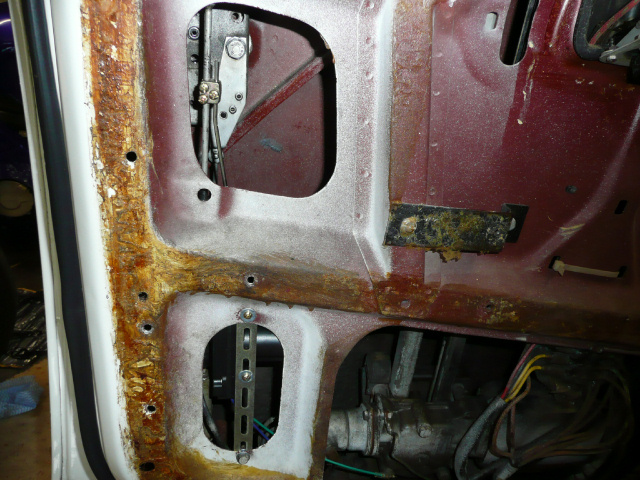 Remove all the wires from the existing door switch, strap the central tap of the switch to earth (door) and run two signal wires (momentary switched earth) back into the car and new controller box. You can use the same power from the existing resettable breaker under the cubby on the passenger side. Replace the crappy speaker, refit the trims and you're all done.  It is a relatively simple task and once you have done one door the others will be a lot easier. Truthfully the most painful pat of the whole operation is getting the wires through the door channel back to the car. This can be made easier by identifying redundant wires and removing them or using them as draw wires. Hope that all made sense for those of you that may wish to try this one day. Cheers Ross (Message edited by rosco on 13 August 2009) | ||
Paul Yorke Grand Master Username: paul_yorke Post Number: 375 Registered: 6-2006 |
Hi Ross, Couple of notes. Did you have four wire actuators fitted in each door, this would give you CDL that works from every door. Two wire ones are usually fitted to the rear, or you can just connect two wires up. (this also means there's no need for the extra wires.) Make sure that the solenoids are low friction type, some make the use of manually opening it with a key dangerously (for key breakage) stiff. ( I know you have keyless entry, but most cars get their battery turned off when stored) Tip for others. If your CDL or button sticks, then deal with it immediately. Just working it up and down is not really good enough. If they are freed out early then they are usually good for another 10 years, but once they stick solid – it's hard to get them back again. Don't use anything thicker than WD40 or silicon spray. (no grease) and make sure it has some sort of condom on. | ||
Colin Silver Frequent User Username: colsilver Post Number: 58 Registered: 8-2008 |
Good tutorial. Not having a Shadow, what is this that's sitting in the door? Looks bigger than my Hyundai Excel motor 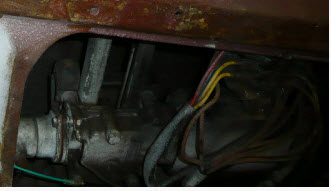 | ||
Paul Yorke Grand Master Username: paul_yorke Post Number: 376 Registered: 6-2006 |
Colin, that's *half* the electric window mechanism, the clutch and the gearbox- the motor is out of sight, and larger again. | ||
Ross Rackham Experienced User Username: rosco Post Number: 13 Registered: 8-2009 |
Ha! As Paul says that's the window mechanism. The 4 wire actuator is in the drivers door, and yes the actuators are the low friction type, no nasty key snapping for me if there's a system failure or flat battery. The other 3 actuators are 2 wire and run back to a small control box that will activate them to match what ever state the master is in (up or down). The controller also has aux up and down trigger wires that I am using with the modified switches in each door as well as the alarm arm/disarm trigger. End result a central locking that will work with either the drivers door key, drivers door manual knob, any of the factory switches or the alarm remote. While the trims are off I'm also giving the window motors a clean, the slides some dry lube and some WD40 on the window lift chains. To think it all started with just wanting to upgrade the bloody speakers. Here's a pic of the tweeter mounting, just some quality double sided tape but it's quiet neat and I think tasteful.  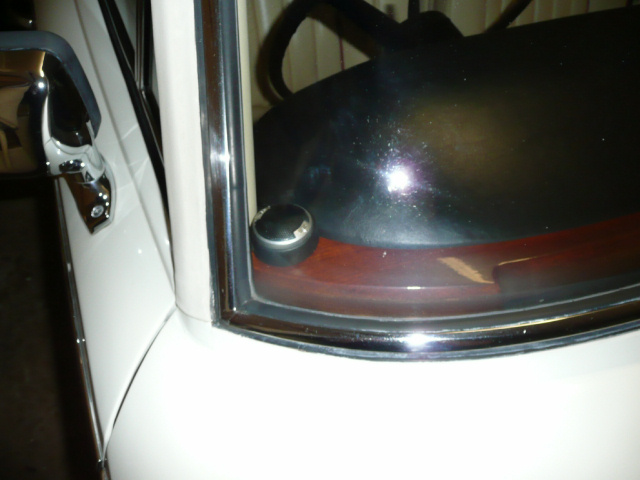 Another day or so and I'll have the front all buttoned up. Then start on the rear doors. Then up on the ramps to try to find some of the damn oil leaks. As I said to one of my best friends today (aircraft engineer and pilot) its painful, annoying and strangely rewarding. I will make an effort to take more pics for the rears if people are interested. Cheers Ross | ||
Dr. Omar M. Shams Experienced User Username: omar Post Number: 32 Registered: 4-2009 |
Ross, I have done the same mod to one of my Wraiths and used the rejected parts to keep the second Wraith alive. Intresetingly, the modified Wraith works better than the original set up. one negative thing about the modification is that the system is now silent compared to that loud KLUNK that we so love to hear when the locks are engaged. | ||
Ross Rackham Experienced User Username: rosco Post Number: 18 Registered: 8-2009 |
One thing I forgot to mention, down here in the ACT at my place, come winter all our bikes and cars usually live on battery tenders. I find when temps get below zero and either myself or my house mate have to be away for sometimes weeks at a time, a batt tender is the only way to go. Not only will it maintain full charge for an indefinite amount of time it will also keep a little temp in the batt to assist in cold morning starts. The manager at Battery World advised me that using a batt tender on his Z1400 the batt still cranked like new after almost 5 years, which take it from me, is quiet a feat from a motorcycle battery. Oh, Omar, you still get the KLUNK if you keep the original rods with that little spring damper omn the lower rod assy. Cheers Ross | ||
Dr. Omar M. Shams Experienced User Username: omar Post Number: 36 Registered: 4-2009 |
Ross, I still have the original rods in my set up and with that comes the relatively quieter KLUNK. Believe me , the KLUNK on the other Wraith with the original solenoids is a fair bit louder. What are those door mirrors doing on your Shadow 1? are they Jaguar ones? | ||
Ross Rackham Experienced User Username: rosco Post Number: 22 Registered: 8-2009 |
Yeah I think Richard said the door mirrors are off a Jaguar (I could'nt say myself). Just about ready to start on the rear doors now, except I have to first fix the pax seat so I can move it enough to get to the centre pillar and wiring. Oh well, one thing at a time, or so they say. Cheers Ross |