| Author | Message | ||
Janne Aittola New User Username: jannea Post Number: 31 Registered: 07-2018 |
Has anyone done this operation by yourself or is it better to leave to experts? Bearing Replacement Kit: https://www.introcar.co.uk/rear-wheel-bearing-replacement-kit-bundle-p274666 Complete Hubs: https://www.flyingspares.com/shop/rolls-royce-bentley-shadow-t1-t2-corniche-mpw/silver-shadow-t-1-2-brakes-pads-discs-fluid/rear-brakes-pads-discs-calipers/complete-rear-hubs.html -janneA, SRH4076 | ||
Robert J. Sprauer Frequent User Username: wraithman Post Number: 593 Registered: 11-2017 |
I have performed this many times. They are Timken cone bearings and races. Why do they have to be replaced? The stub axle has to be removed and the bearings "set". I would highly suggest reading this chapter in the workshop manual. The rear nut has to be torqued to 500ft lbs and a new collared nut has to be used on the inside, it's a use once nut. | ||
ross kowalski Prolific User Username: cdfpw Post Number: 1327 Registered: 11-2015 |
Janne, When I did this job, I bought a set of used hubs with bad bearings ahead of time and rebuilt them, then just swapped them in when I had a chance. I would send you the hubs I pulled from my car, but I suspect the shipping wouldn't make sense. | ||
Mark Aldridge Frequent User Username: mark_aldridge Post Number: 664 Registered: 10-2008 |
Janne, I took the easy route and fitted exchange hubs from Flying Spares, as my discs were poor also. Mark | ||
Janne Aittola New User Username: jannea Post Number: 32 Registered: 07-2018 |
Thank you all for your comments! I have to think if I go the cheaper or easier way. -janneA | ||
Alan Dibley Frequent User Username: alsdibley Post Number: 231 Registered: 10-2009 |
I remember doing this job several years ago on a Spirit, which has similar rear hubs. It needed a BIG hydraulic press to get the tapers apart even with the usual heating, thumping and cursing. And one nut was drilled out - it was the only way. But after that it was a straightforward job. Alan D. | ||
David Gore Moderator Username: david_gore Post Number: 3632 Registered: 04-2003 |
Alan, When I fitted new bearings and the lip seal kits replacing the original felt seals in the rear hubs on DRH14434, removing the drive yoke from the internal drive shafts become a real problem; a 20 ton hydraulic press made no impression neither did my 50 ton hydraulic press. I found a local bus repair workshop that had a 200 ton press and this finally succeeded in separating the yoke from the shafts at an indicated 110 ton loading. The yoke and shaft taper surfaces were heavily corroded most likely from the cars exposure to winter road salt in its initial life in Yorkshire with consequent salt water penetration past the felt seals into the hub leading to wheel bearing rumble and my subsequent decision to install the RRMC lip seal conversion kits. If the 200 ton press hadn't worked, I had planned to try and get access to the 2000 ton hydraulic forging press at the works of my first employer in Newcastle through one of my fellow metallurgists who still worked there - a back-shift "special order" job which would have received special attention for sure.....  | ||
Patrick Lockyer. Grand Master Username: pat_lockyer Post Number: 2275 Registered: 09-2004 |
Over Kill, should have used some heat! Even if a dog of a car used in winter with salt ingress heat would of done the job. Still it makes a good story> | ||
David Gore Moderator Username: david_gore Post Number: 3635 Registered: 04-2003 |
Patrick, I did try some heat with an air/propane torch up to a dark blue temper colour [300deg Celsius] without success plus a brine quench after reheating to see if this would break the taper joint bond. Not knowing the grades of steel used for the yoke and half-shaft; I was being careful to avoid possible temper brittleness from heating in the 300deg/500deg Celsius range. The intense loud noise when the items finally separated was a cause for worry as the press operator was convinced he had fractured one or both components. The separation was done at room temperature [approximately 30 deg Celsius] without preheating. | ||
Patrick Lockyer. Grand Master Username: pat_lockyer Post Number: 2277 Registered: 09-2004 |
[air/propane torch] there in lies the problem. Taking to much time with the above propane heating! The heat would migrate to the drive shaft taper with more or less the same expansion as the yoke. Bad bad practice, should of used oxy acetylene with quick localized heating. BTW no need to get the temp up to dark blue temper colour showing with all the rust removed. | ||
ross kowalski Prolific User Username: cdfpw Post Number: 1329 Registered: 11-2015 |
I used a big pipe to take the nuts off. I used a Kelly Opfar tool for the yokes. I torqued it with math, my body weight and a long bar. 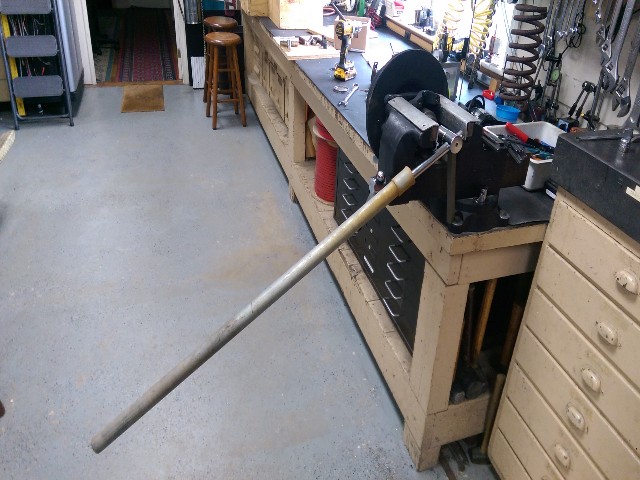 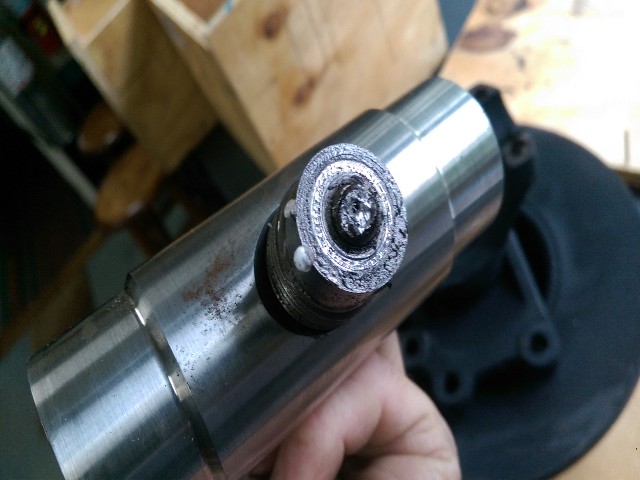 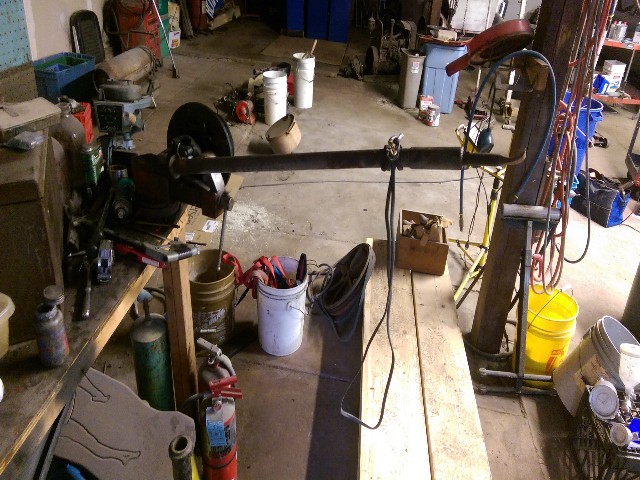 | ||
ross kowalski Prolific User Username: cdfpw Post Number: 1330 Registered: 11-2015 |
I'll try and find that tool tomorrow for a better picture. | ||
Alan Dibley Frequent User Username: alsdibley Post Number: 232 Registered: 10-2009 |
Further to mt earlier post, I think I recall removing one of the nuts with 3/4" drive air spanner at a local garage. It was a huge machine and seemed to do it easily. The other, as I said, was drilled and chiselled. Alan D. | ||
David Gore Moderator Username: david_gore Post Number: 3642 Registered: 04-2003 |
Found some photos from when I installed new rear wheel bearings and the lip seal conversion kits on DRH14434. The "brute force and no finesse" photos are my first and second attempts to undo the yoke lock nut. Note the two human loading on the vice frame required to apply enough torque to loosen the lock nut. One son [the apprentice] loading was not enough to stop the vice frame lifting off the ground when the nut would not budge. Fortunately one son and a friend visiting to watch the removal successfully allowed the nut to be undone. The second set are my "Heath Robinson" contraption to first try and separate the yoke from the half-shaft using a mechanical screw. When this failed, a 10 ton hydraulic press at a local workshop failed so I went out and purchased a 50 ton hydraulic press on the assumption this would do the job with a similar cost to a Sydney RR/B workshop with the added benefit I could use it on other repairs in the years to come. As mentioned elsewhere, the yoke and half-shaft were separated by a 200 ton press with a load of 110 tons. A. How to undo the lock nut.  The apprentice didn't have enough weight to stop the assembly lifting off the ground. 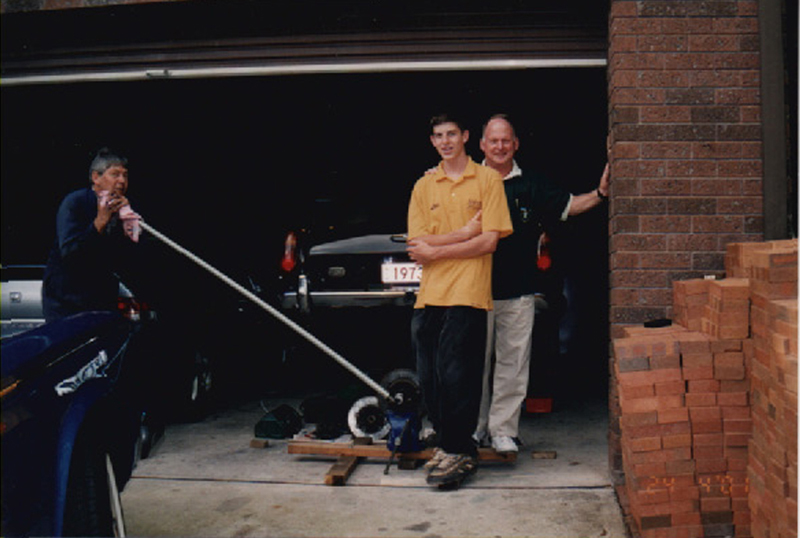 Time to call in the extra help. 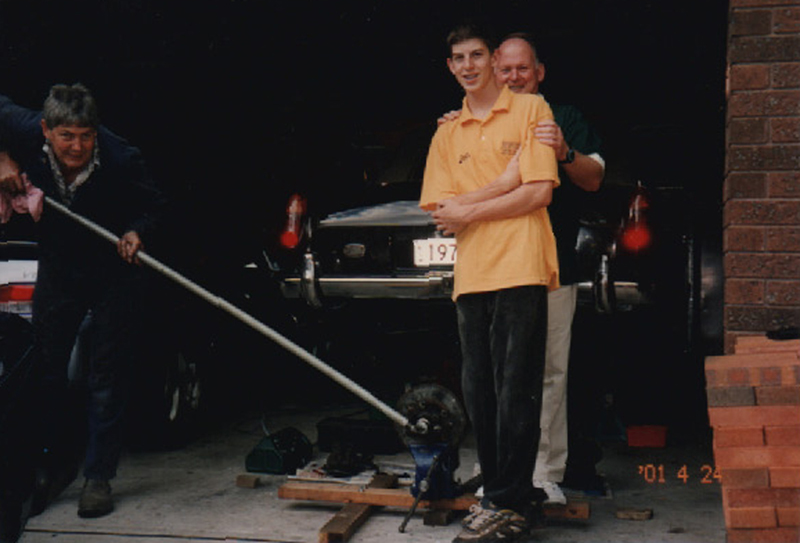 Maybe this will work and it did! B. How to not succeed in removing a recalcitrant yoke 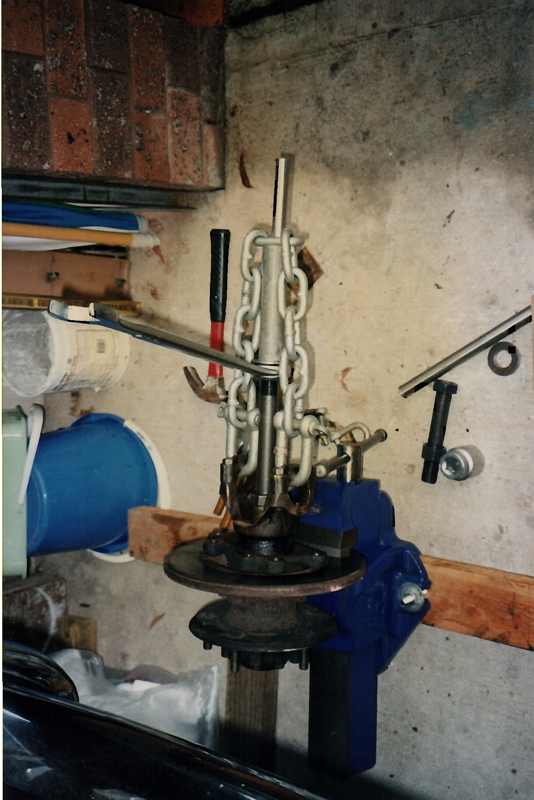 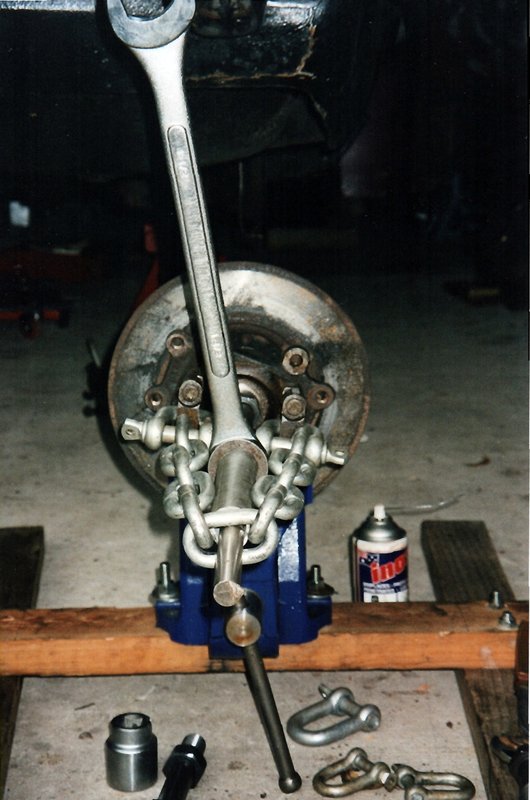 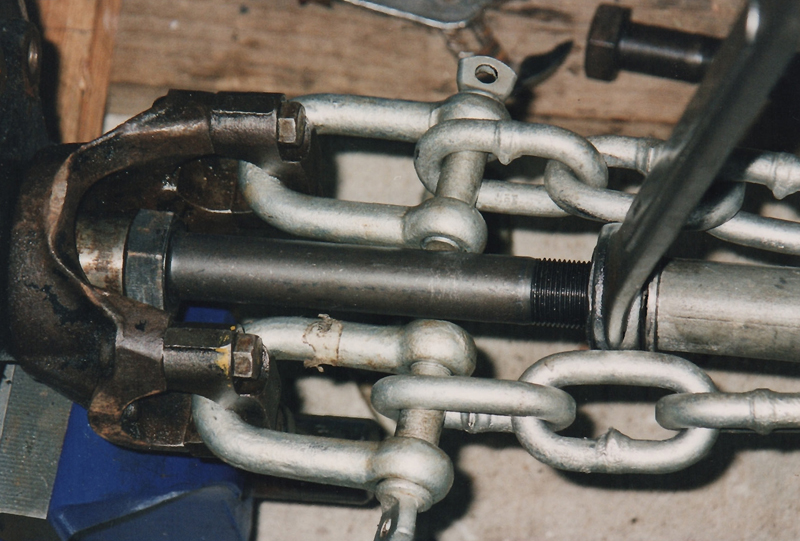  A job for the apprentice - installing the new lock nut with a 1000ft/pound torque wrench applying 550 ft/pounds of torque. } | ||
ross kowalski Prolific User Username: cdfpw Post Number: 1331 Registered: 11-2015 |
David, Hard to believe that screw didn't produce enough pull. | ||
David Gore Moderator Username: david_gore Post Number: 3643 Registered: 04-2003 |
Ross, True - the amount and extent of salt water corrosion on the internal and external tapers had effectively "welded" them together. Notice I used a fine threaded bolt to get maximum mechanical advantage however it certainly did not achieve separation. I had resigned myself to the possibility of having to purchase reconditioned hubs until I found the bus workshop with a 200 ton press that did the job. | ||
Janne Aittola New User Username: jannea Post Number: 33 Registered: 07-2018 |
Does anyone know if there are other companies than Flying Spares that sell refurbished complete rear hubs in Europe? | ||
Omar M. Shams Prolific User Username: omar Post Number: 1960 Registered: 04-2009 |
Dear Janne, All that I have ever read about dismantling the stub axle to replace the bearings has scared me in the same way as you are now scared. If I had to do it, I would neither do it myself nor would I buy refurbished kits. I would remove the part and take it to an Engineering shop where they are used to taking things of this nature apart. They will have all the tools to do it properly without exposing you or your car to risk or danger. Then just replace the bearings and install. Good luck Omar | ||
Vladimir Ivanovich Kirillov Prolific User Username: soviet Post Number: 1695 Registered: 02-2013 |
Janne, Finlander listen to me, the Soviet. Given that Finland has at times Russian type winters and that Finland unlike my town in Russia now called Samara possibly uses salt on the roads Dave and Omar are right. But I would use Omar's method. Seeking out the advice of Jim Walters of Canada or Paul Yorke of UK may also help. Just over your border their would be mechanics especially in Moscow that could assist but unless you speak fluent Russian or have very good Russian contacts at the moment that route is unavailable to you. I have Kelly Ophar's tool for the job but if your parts are chemically welded together using such a tool will only result in the destruction of the tool. Thus Omar's suggestion has to be correct. Good luck - you will need it. (Message approved by david_gore) | ||
David Gore Moderator Username: david_gore Post Number: 3644 Registered: 04-2003 |
Vladimir, Admittedly I had the worst case scenario to contend with however I was able to find a way around it with a staged progression from a "by the manual" repair to "what should I try next" to "absolute desperation". This is a repair that usually is within the capabilities of an experienced DIY owner with a reasonable workshop area and a good set of tools. Just be wary of vehicles that have spent part of their life in areas where winter salt de-icing occurs. | ||
Jim Walters Frequent User Username: jim_walters Post Number: 301 Registered: 01-2014 |
I've done lots of them and have a 20 ton ram puller which I made up adapters for to pull the yokes off the stub axle. Never had one that wouldn't come apart with it but I have had to use some heat on occasion. 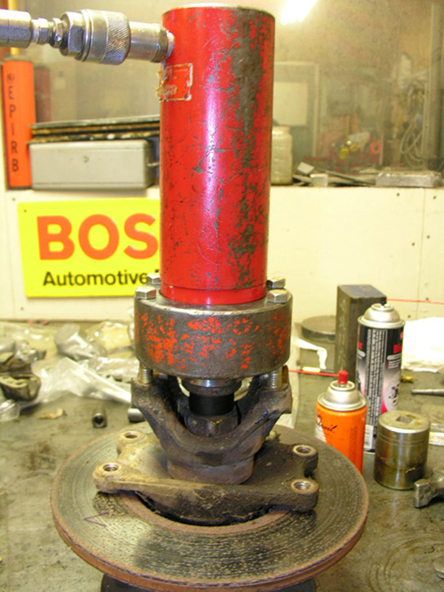 SRH8505 SRC18015 SRE22493 NAC-05370 www.bristolmotors.com | ||
Jim Walters Frequent User Username: jim_walters Post Number: 302 Registered: 01-2014 |
I also do rebuilt exchange ones but it doesn't make economic sense to ship them out of Canada with the weight and cost of shipping. If you're in Europe I would buy them exchange from Flying Spares. You're only going to do it once in your lifetime so unless you already have a 1000 ft lb torque wrench and heavy duty press or proper puller available for use it is better to leave it to the experts. Also, in the picture in my post above the puller is not ready for use. The adapter is shown not bolted down tight to the yoke. To prevent the yoke from distorting, the adapter would be tight on the yoke when applying force to it. SRH8505 SRC18015 SRE22493 NAC-05370 www.bristolmotors.com | ||
Kelly Opfar Frequent User Username: kelly_opfar Post Number: 246 Registered: 07-2004 |
I removed two SY hub yokes yesterday for a customer using one of my newer, improved tools: 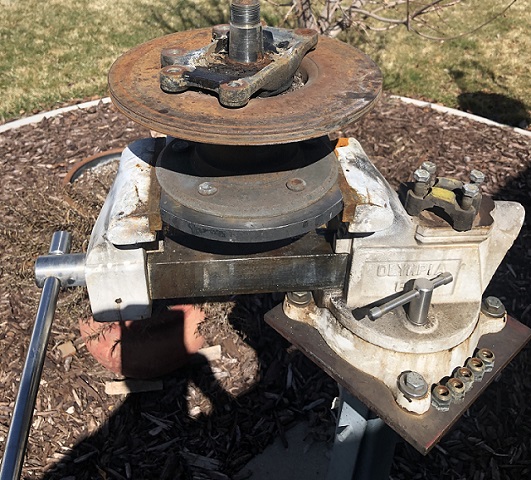 I include this picture only to demonstrate how I held the hub in my vise. I didn't think to take enough pics at the time to show the entire procedure. These particular hubs had sheared the key and spun but they were still very tight. I used a 3/4" impact wrench that made very short work of the extraction. https://www.britishtoolworks.com/product-page/detroit-pot-style-yoke-puller Despite what the pic on my site page depicts, the new pullers come with a Grade 8 bolt modified to accept the tip, not a threaded rod with a hex cut on it. I've removed at least a dozen pairs of hubs with the new tool design and haven't had one I couldn't remove yet. Vladimir and Ross have pullers made from earlier designs. Everything is guaranteed forever so don't be afraid to abuse them. If they break, I'll replace them with the new design. Kelly https://www.britishtoolworks.com/ | ||
Robert J. Sprauer Frequent User Username: wraithman Post Number: 597 Registered: 11-2017 |
I second what Kelly says and not only own the first BTW design but the second one. I can tell yo the workmanship is excellent, simple and gets the job done and in my case no heat. In fact it got the job done in minutes, my 20 ton shop press was no match for Kelly's tool. The hub must be secured into something such as a floor mounted vise. | ||
Janne Aittola New User Username: jannea Post Number: 34 Registered: 07-2018 |
Thank you all for your good advice, I think I go like suggested and contact a flying expert in UK. -janneA | ||
David Gore Moderator Username: david_gore Post Number: 3669 Registered: 04-2003 |
Janne - my apologies - a delayed post for you from Vladimir: "Saw your post to Finlander this morning. One Aussie bought a 1965 Mustang sight unseen and happily shipped it down under ... When he go it out of the container and gave it a good look over from the top it looked okay but then after he got under it... They say he got a bit upset when he noticed the brake drums had rusted through and of course the underneath of the car had passed Destination Stuffed. Now that little pony went straight to the wrecker. AWK" Vladimir | ||
Kelly Opfar Frequent User Username: kelly_opfar Post Number: 247 Registered: 07-2004 |
I broke down a rear hub today and had the presence of mind to take a few pics. My 3/4" impact is rated at 650 ft/lbs. It just took a few short blips. 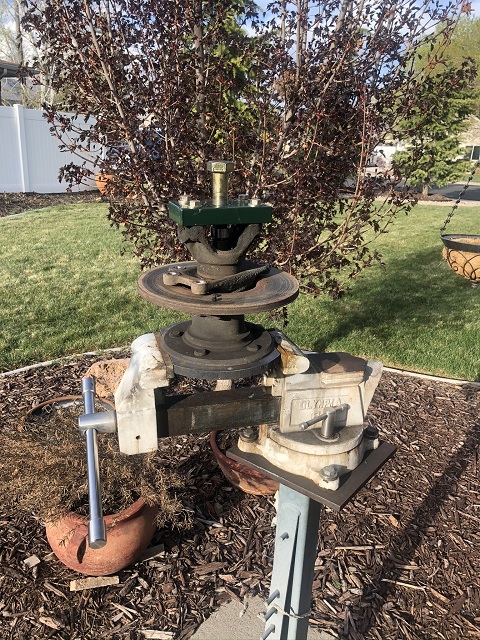  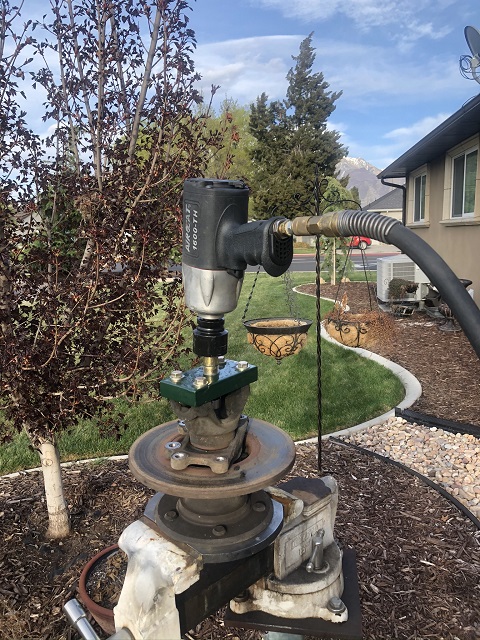  http://BritishToolWorks.com | ||
Omar M. Shams Prolific User Username: omar Post Number: 1994 Registered: 04-2009 |
You make it look so easy Kelly. I was looking at your front spring compression tools. I didn't know that you cant use the same tool to do both Shadow and Spirit front springs. What would it take to make an adaptor to allow the use of the tool for either application? Also does the tool work by applying an air gun to rotate the bolt heads? Thanks Omar | ||
Robert J. Sprauer Frequent User Username: wraithman Post Number: 608 Registered: 11-2017 |
Omar, The socket would have to be almost a 12" deep. The use of the nut handles makes the job easy. It does not take much effort to turn the individual nuts on the rods when compressing, Kelly supplies bearing washers that make a huge difference. The hub splitter tool works great as well. | ||
Kelly Opfar Frequent User Username: kelly_opfar Post Number: 248 Registered: 07-2004 |
Omar, '89 and newer SZ's don't have a flat spring top for the bearing washers and handle nuts to sit. So they require a thick adapter plate that sits on top of the spring top. Everything else is the same. 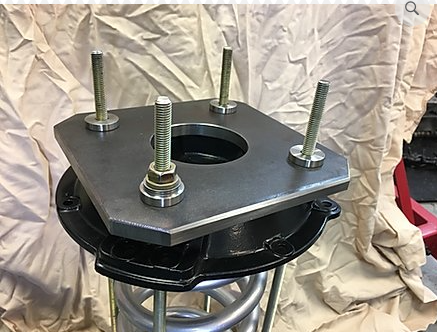 https://www.britishtoolworks.com/product-page/late-spirit-spring-compressor Kelly | ||
Omar M. Shams Prolific User Username: omar Post Number: 1995 Registered: 04-2009 |
Dear Kelly, In the photo above, the four nuts have lots of stud protruding upwards. what is stopping us from inverting these studs so that the stud that pokes out from the nuts are at the bottom and only a bolt head is visible at the top? That way one can turn the 4 bolt heads from the top using an air driven tool. | ||
Omar M. Shams Prolific User Username: omar Post Number: 1996 Registered: 04-2009 |
So in theory - if I buy the 89 and newer tool - it can work for any Shadow and Spirit. Is that correct? | ||
Kelly Opfar Frequent User Username: kelly_opfar Post Number: 249 Registered: 07-2004 |
Omar, the late SZ compressor is exactly the same as the SY compressor except the upper plate is added. It can be used on all SY's and SZ's. I'm removing a set of springs in the next couple of days. I'll take pictures - maybe make a video so you can see why it is done the way it is. I'll start a new topic so I don't hijack this thread any further. Kelly http://BritishToolWorks.com | ||
ross kowalski Prolific User Username: cdfpw Post Number: 1378 Registered: 11-2015 |
Kelly, I love your spring shop. Any shop you can mow or mulch is tops in my book. Great thread by the way. |