| Author | Message | ||
Jeff McCarthy Frequent User Username: jefmac2003 Post Number: 655 Registered: 05-2007 |
For those who has missed it, Tord Samdal who did the wonderful animation showing how the hydraulics system works, has now done a similar thing with the air conditioning system on the Shadow I. http://www.samag.no/silvershadow/ Also: I'm about to change the foam seals on the recirculation flaps - does anyone know how difficult it is to remove them? Will I need to reset the actuators afterwards? | ||
Robert J. Sprauer Frequent User Username: wraithman Post Number: 577 Registered: 11-2017 |
Thanks Jeff, use witness marks and take pics to return parts to their original position. | ||
Geoff Wootton Grand Master Username: dounraey Post Number: 2181 Registered: 05-2012 |
Hi Jeff the Tord Samdal A/C animation is superb. I have used it extensively during the reconditioning of all the flaps in my 74 SY1 and found it is totally accurate. Replacing the foam seals on the recirc flaps is an easy job, however gaining access to them requires removing several parts. Since I was renovating all the flaps and actuators on my car, I had already removed a lot, so cannot say exactly how many/few panels etc have to be removed. It will become obvious when you start work. To do the job properly you will have to reset the actuators, but this is a simple thing to do and is probably worth while anyway in case they have gone out of adjustment. Pics 1 and 2 below show the passenger side flap. My car is a US LHD model so yours will be a mirror image. The flap should be covered by a metal grille, but it was missing on my car. You will see it in the later pics for the drivers side. You can see that the connector rod has to be disconnected to get the new seal in place. Whilst you are doing this job you may want to consider replacing the rubber bushes. These eventually wear/rot out and are worth replacing. To do this just remove the two bolts (one arrowed in the first pic, the other out of shot, behind the actuator). Then maneuver the flap through the aperture. Pics 3 and 4 show the flap off the car and show how big the gaps are when the rubber bushes rot out. This can cause the flap to become displaced and jammed, as happened to the upper temperature flap on my car. Pics 5 and 6 show the drivers side. My car has a foot operated parking brake that had to be removed. You can see the grill that has to be removed to get to the recirc flap aperture. In the last pic the actuator and connecting rod are out of shot. They are to the far left hidden by the wiring. I've included the pic to show what the grill looks like. It is held in place by 4 setscrews. Don't worry about resetting the actuators, it's a doddle. 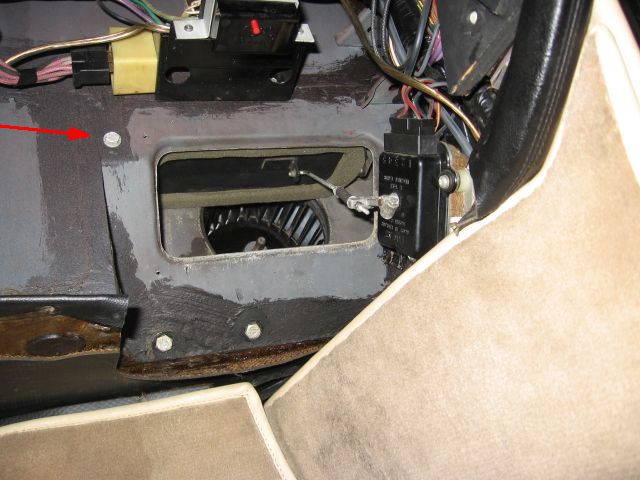 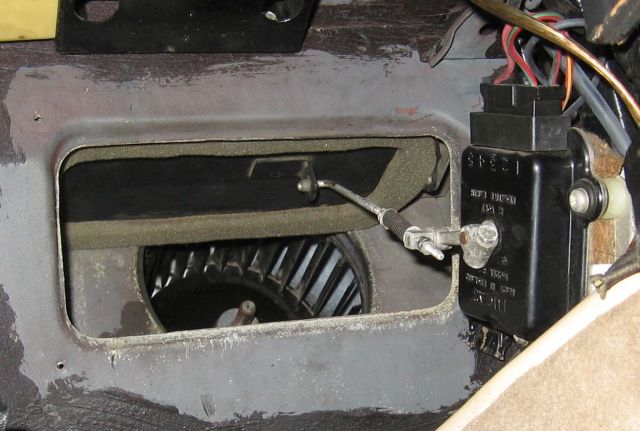 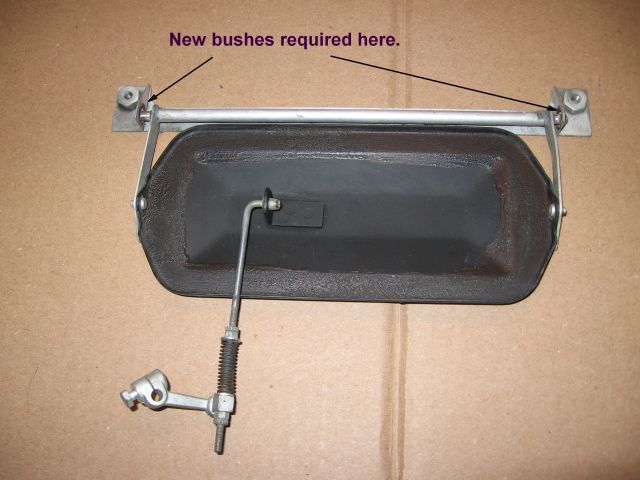 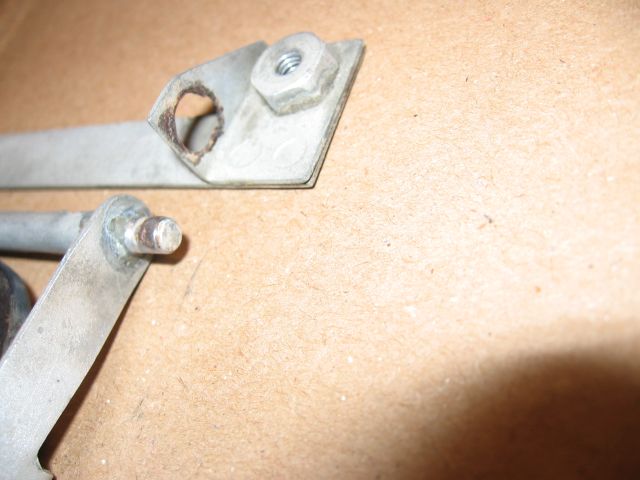  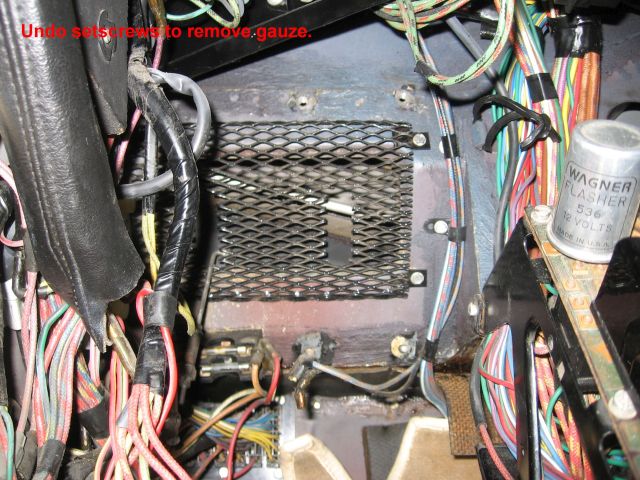 | ||
Jeff McCarthy Frequent User Username: jefmac2003 Post Number: 657 Registered: 05-2007 |
Thanks Geoff, that makes it all clearer. I'm about to remove the engine bay side of the heater box to replace the foam in that too. No doubt the animation will make more sense when I can see more of the system. So far the hardest parts to find have been the spacer washers on the blower motor vibration sandwich mounts! Even China doesn't make them in that size. Luckily I have some aluminium tubestock I can get machined locally. The UK postage has just become prohibitive. I'll post progress reports. | ||
Robert J. Sprauer Frequent User Username: wraithman Post Number: 580 Registered: 11-2017 |
Do yourself a favor and use isolators. The isolators are not used as spacers. The isolate vibration from the fans. The fans are powerful and any imbalance will be felt and heard. | ||
Jeff McCarthy Frequent User Username: jefmac2003 Post Number: 658 Registered: 05-2007 |
Robert, I have the isolators. These spacers go on each threasded end of the rubbet sandwich to prevent the body of the motor projecting into the snail. |