| Author | Message | ||
Glen Poolen Prolific User Username: wgipps Post Number: 144 Registered: 3-2018 |
New powered wing mirrors for SRH17903 from a Spirit. 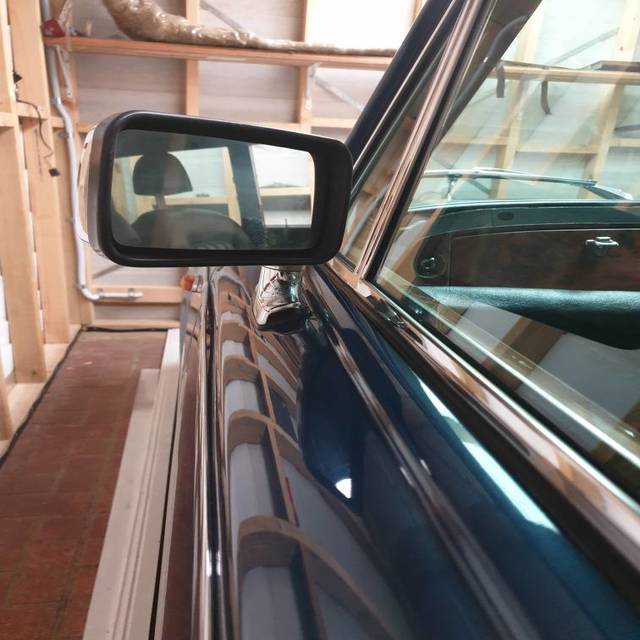 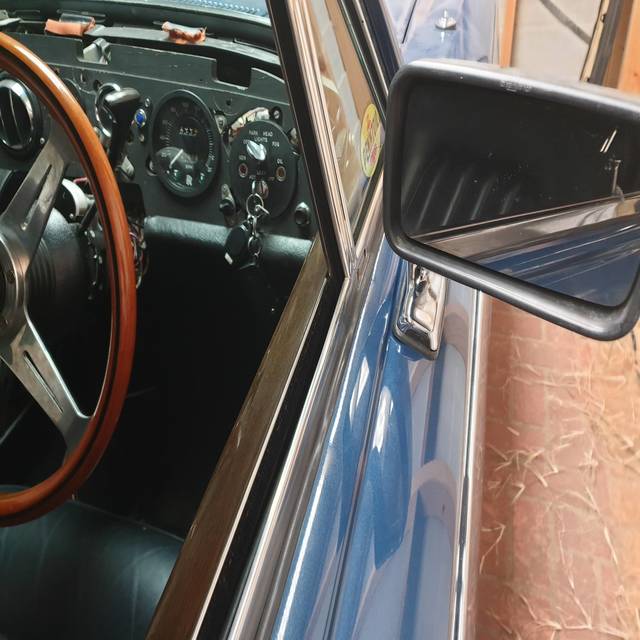 . | ||
Benoit Leus Grand Master Username: benoitleus Post Number: 388 Registered: 6-2009 |
That looks good. How difficult we're they to mount ? | ||
Glen Poolen Prolific User Username: wgipps Post Number: 145 Registered: 3-2018 |
actually - very easy! 3 large holes and 2 small holes. See pic. With the door trim off, theres a bracket that fits through the 2 large holes, is screwed into place with the 2 small holes, and a grub screw secures the mirror to the bracket. The large middle hole is for the loom. The hardest part was running the loom from the door to the interior switches which will locate around the center console somewhere. Sorry - i didnt think to take pics while mounting it. 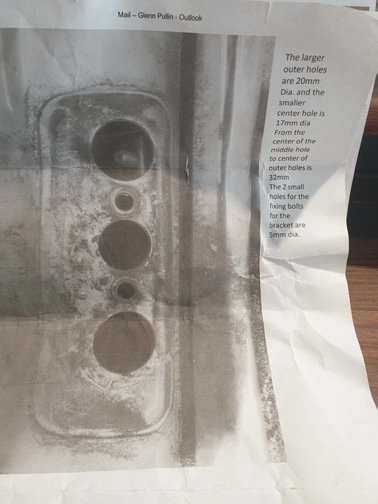 | ||
Larry Kavanagh Grand Master Username: shadow_11 Post Number: 364 Registered: 5-2016 |
Nice work Glen. I must get a mirror for my passenger side door, it's difficult to manoeuvre without one especially when reversing in tight spaces. Can't understand why it was an option to have only a door mirror on the driver's side. | ||
Steve Emmott Prolific User Username: steve_e Post Number: 145 Registered: 11-2018 |
Glen just as an observation I can see you have your facia wood removed yet the lower bolster under your keys is still in place. Behind the bolster which is just attached with the spring clips like on the doors and pulls off there is one screw that holds the wood trim as well as the ones at the top. I have seen many woods get damaged even at garages not realising this screw is there.....how did you get yours off? or have you just put the bolster back for storage. | ||
Glen Poolen Prolific User Username: wgipps Post Number: 146 Registered: 3-2018 |
Steve I found the hole i think youre talking about. I think the bolster doesnt sit as snugly as it should. 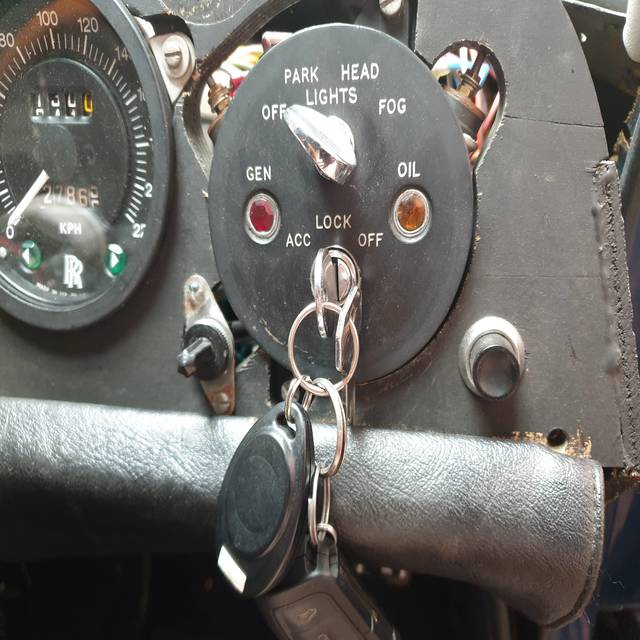 | ||
Steve Emmott Prolific User Username: steve_e Post Number: 155 Registered: 11-2018 |
Glen looks like the bolster has just been forced down on the corner at some time to get at the screw. Main thing you got it out and no damage to the wood. As I said the bolster clips off easily and it may be worth gluing and re-tidy the end and either replacing the clips or expanding them to get the bolster tight again as it will look unsightly to see the lower edge of the wood and that screw head. Small job you can do anytime as I can see you have a lot going on elsewhere with the car. All the best | ||
Glen Poolen Prolific User Username: wgipps Post Number: 148 Registered: 3-2018 |
Thanks Steve Just finishing all the mods i wanted to personalise it for me. From there Ill look at the finer points - like the one you identified. Im sure there will be others when i post more pics. Get it all finished and driving is the 1st goal - not long to go now. | ||
Trevor Pickering Prolific User Username: commander1 Post Number: 104 Registered: 6-2012 |
Great fit Glen I like the wooden wheel! | ||
Glen Poolen Prolific User Username: wgipps Post Number: 152 Registered: 3-2018 |
yeah its nice - Nardi. Painful trying to line it up straight though. | ||
Steve Emmott Prolific User Username: steve_e Post Number: 191 Registered: 11-2018 |
Always an issue getting the steering wheel lined up. One can hardly expect 360 splines on the shaft the engineers used to say. In manufacture with a steering rack fitted we would adjust the tie rod ends each side to get perfect alignment of steering wheel spokes. As long as done evenly +/- turns each side then it does not affect tracking. |