| Author | Message | ||
Alan Scard Experienced User Username: alanscard Post Number: 29 Registered: 7-2015 |
Ref. 1972 Shadow SRH13952 Question � where is the correct position for the cable loom that goes from the rear of the engine to the Alternator? Having had a pin hole leak on the rear high-pressure pipe that goes from the rear pump to the accumulator, I have ended up taking off, cleaning and generally tidying up a lot of ancillary parts, including the rocket box cover that had the paint stripped. Yes, I made lots of drawings and took photos but none showed where the alternator loom went. I have brought it forward of the rocker box and thought I would tie wrap it to the front high-pressure hydraulic pipe, to avoid it getting too hot. Most of the wire terminals that connected to the alternator needed repair, including the main heavy-duty terminal. Re-making the terminals is not a problem for me being a retired cable Engineer, so I will make sure there is enough length. I believe that the loom may be clipped above the rocker box near the inlet manifold, but I am not sure. Any help including photos would be appreciated. Thanks, Alan in the UK | ||
Geoff Wootton Grand Master Username: dounraey Post Number: 2049 Registered: 5-2012 |
Hi Alan In my car (SRX18501) the wire runs along the top of the valley cover, beneath the inlet manifold. It then loops round at the front to the alternator. There are no clips. The problem is, I don't know if this is how it was when it left the factory. At least one of the previous owners of my car was very shoddy in his/her workmanship, so I don't know if any clips have been left off. The routing seems to me to be correct. The first photo shows part of the top of my engine with the inlet manifold removed. The red arrow points to the loom. The silver colored square pieces are duct tape I used to prevent crud falling into the cylinder inlets. The second photo shows how the loom loops round to the alternator, which has been removed. 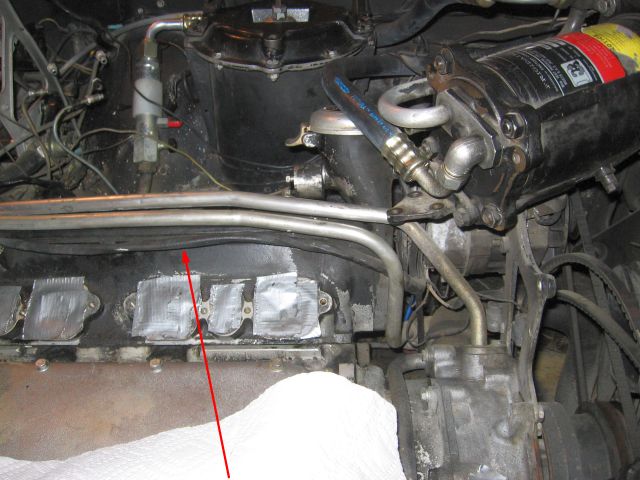 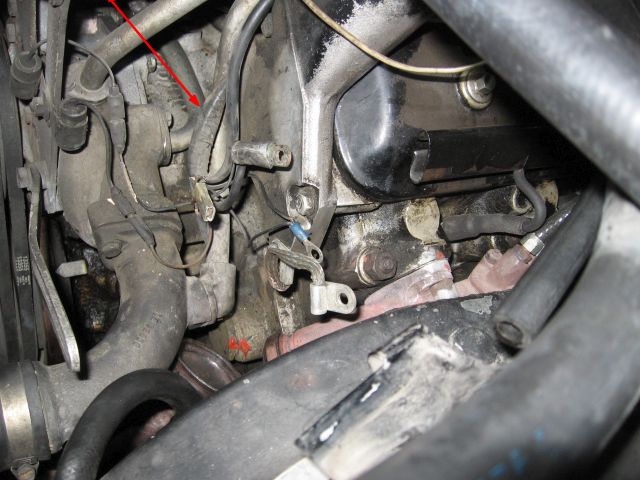 | ||
Geoff Wootton Grand Master Username: dounraey Post Number: 2050 Registered: 5-2012 |
Alan Looks like I have mis-interpreted my photos, taken several years ago. Looking closer it appears the loom is attached to the inner rocker cover, as you correctly speculated. Please ignore my previous comment about the loom being between the valley cover and inlet manifold. It was plainly incorrect. | ||
Geoff Wootton Grand Master Username: dounraey Post Number: 2051 Registered: 5-2012 |
It also appears there is a clip on the rocker cover just to the left of the red arrow. Apologies for making such a mess of my original post. I must remember - more haste less speed. | ||
Alan Scard Experienced User Username: alanscard Post Number: 30 Registered: 7-2015 |
Geoff, Many thanks for the info and the photos. My first job is to splice in a new 60amp (120/0.012")cable for the main alternatot lead. The existing end terminal has a few broken strands and the insulation has gone hard and is cracked. The other smaller leads are easy to splice in. If it all goes well I will send in some photos. I will then decide how to run the cable loom to the alternator. | ||
Alan Scard Experienced User Username: alanscard Post Number: 32 Registered: 7-2015 |
Hi Geoff, I have now spliced in a new alternator cable about 10� long. I achieved this using the following parts all bought from EBay, in the UK with prices including P & P all in Pounds Sterling. 1 meter of red 8.5mm� 120/0.30 (120/0.012�) 60 Amp cable, costing �3.75. 10 x copper butt connectors with a cable size of 10mm� with an internal diameter of 4.5mm, costing �1.79. Crimping tool that can handle sizes of 1.25-16mm�, costing �8.99. I also solder spliced longer leads to all the other minor leads that go to the alternator, compressor and oil pressure switch. All the splices were then covered in heat shrink tubing. The whole cable loom was then covered in black tape and ty-wrapped to the front high-pressure hydraulic pipe. I have attached some photos. On the 3rd photo the black wire is part of the original cable, the red being the new cable, with a butt connector. Alan   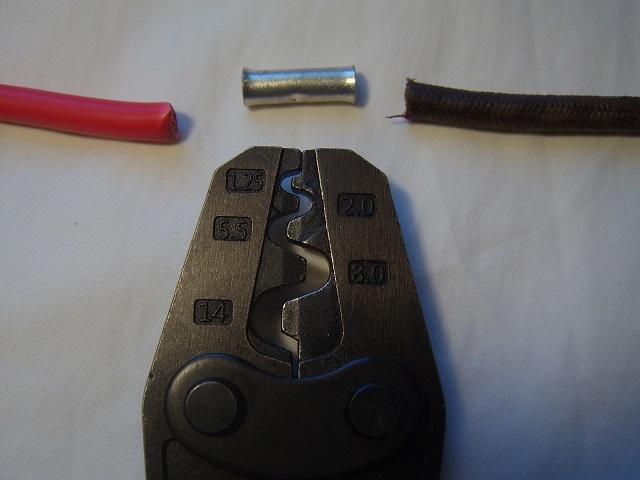 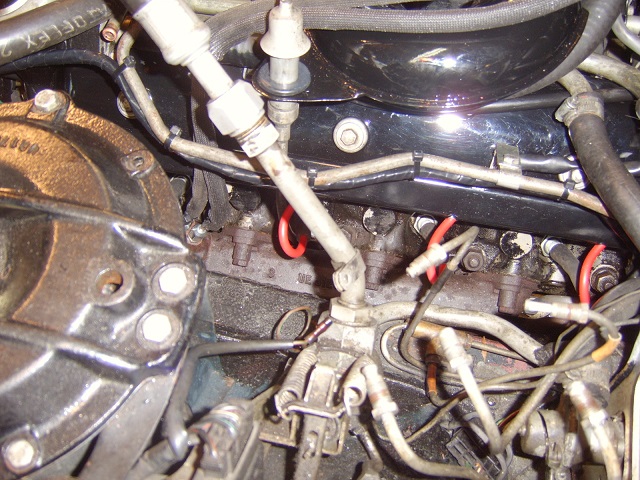 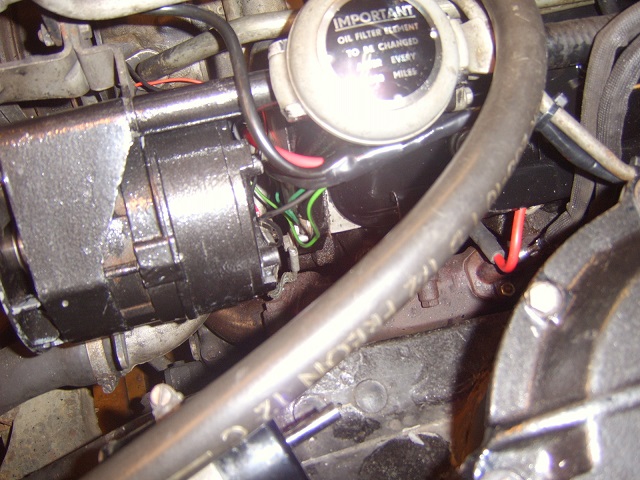 . | ||
Larry Kavanagh Prolific User Username: shadow_11 Post Number: 261 Registered: 5-2016 |
I've been looking at Flying Spares website where there are some very good photos of engine loom routing across the valve covers in their breakers section. You may find it helpful. |