| Author | Message | ||
Glen Poolen Experienced User Username: wgipps Post Number: 15 Registered: 3-2018 |
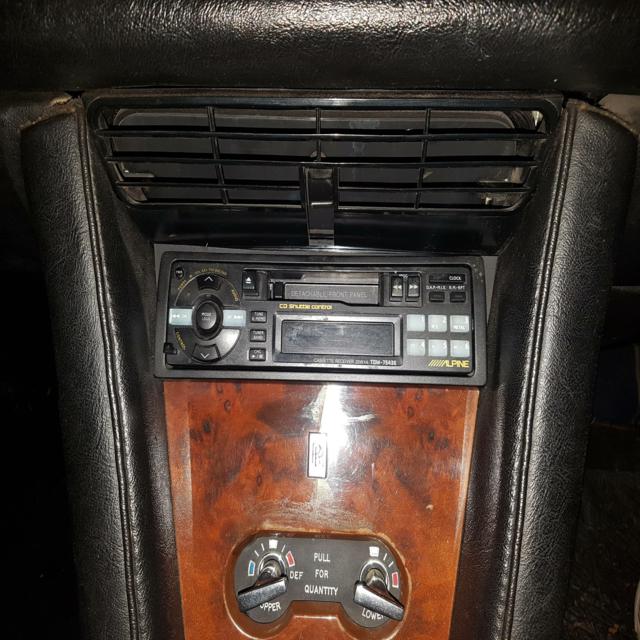
Hello again. Per the pic, i think many people have this mod - a later model stereo unit. Its time for it to be upgraded to a new steroe. Does anyone have any pics of what the space behind that radio looks like please. What should i be seeing when i pull that unit out? Has anyone done anything other that put a radio there? What does it look like when there is no radio there - standard from the factory? Thanks  | ||
Geoff Wootton Grand Master Username: dounraey Post Number: 1953 Registered: 5-2012 |
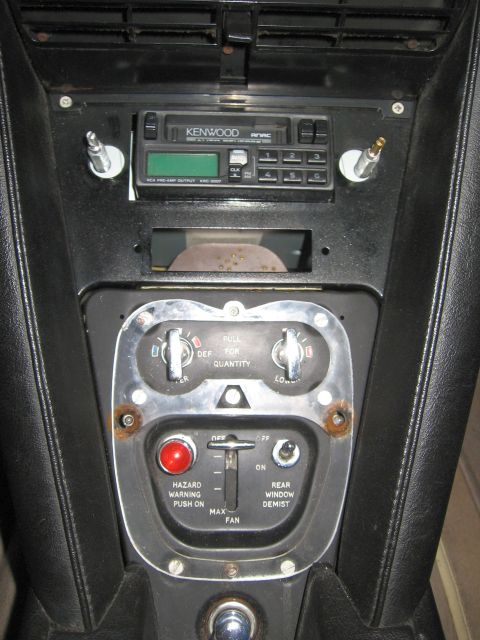
In my car, although the rather awful kenwood unit is obviously non-standard, it looks like it was fitted without cutting the metal beneath the walnut covering panel. This is what it looks like:  On my car it's just a case of removing the stereo knobs and fascia, then carefully pulling off the walnut panel. This is done by easing the top towards the rear of the car and then lifting it out vertically. The stereo is removed by pulling off the triangular side panel and extracting the unit "backwards" i.e. towards the front of the car. Your's may be different. It depends on what modifications may have been made to fit the stereo unit. I would start by seeing if you can remove the fascia. | ||
Paul Yorke Grand Master Username: paul_yorke Post Number: 2060 Registered: 6-2006 |
Glen, your stereo looks like a standard single din unit. On the plus side it means that any single din will go back in there. In the minus side it could have been fitted in just a cage and a slide in rear support - or it may have been fitted with made up support brackets and bolted to various points. Start by googling for fitting instructions for yours. It looks like a face off unit. Remove that. Then ease the plastic surround off. This should reveal if it is fitted in a cage. There should be slots or holes either side to release it from the cage. You may be lucky enough for it to slide out. Chances are you will need to remove the triangular side panels of the console to undo rear brackets. Also check that your speakers have been converted to individual plus and minus cables. New units do not allow common earths. Good luck. | ||
Jeff McCarthy Grand Master Username: jefmac2003 Post Number: 509 Registered: 5-2007 |
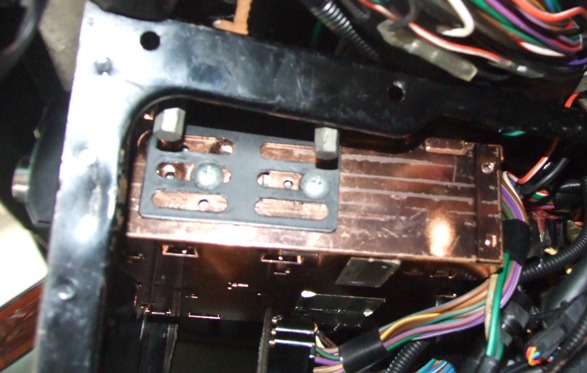
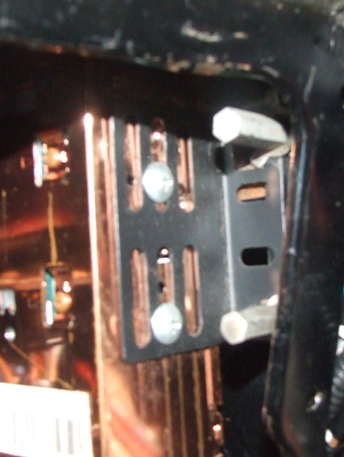
Glen, Some photos. When I replaced mine I didn't use the cage but bought some brackets at Jaycar or on ebay - can't remember which. I found it easier to remove the two black padding pieces and the aircon plastic across the top which surround the wood. I did this because one of the bolsters had been damaged by a previous attempt to replace a stereo headunit. It's also easier to see what you're doing. Once you've removed the side triangles you'll be able to feel for the 4 nuts that hold the bolster sides on - 2 each side. There are usually washers on both sides of the metal frame - if you drop them they'll disappear into the console. Be careful when you remove the sides/top as the plastic aircon bit is bolted to the side pieces and it's easy to break where the bolts go through on each side. Drivers side:  Passenger's side:  If you're lucky you'll have at least 2 of these nuts to hold the radio bracket on - they make it easier to adjust the level, especially at the front of the case where it's a bit of a stretch to get a socket in there.  cheers, Jeff |