| Author | Message | ||
John Beech Yet to post message Username: jbeech Post Number: 1 Registered: 10-2016 |
Tootsie (SRX6816) was running poorly when I acquired her. Unscrewing the dashpots revealed one was properly rising with the application of throttle whilst the other was not. The piston unit was corroded to the point the air piston and the vacuum dome were as one. When separating the two by hand with the aid of rags didn't yield a good result, next I tried the application of penetrating oil. After letting this sit overnight without success, I tried heating the junction with a plumber's torch (MAPP gas) and twisting. Once again, no joy. 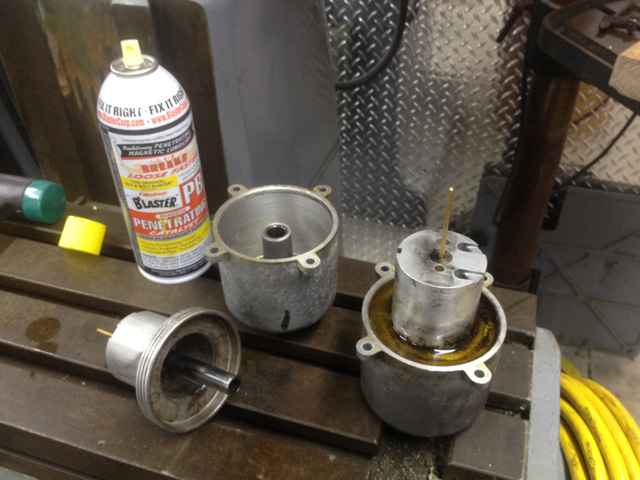 Next, I resorted to the application of brute force through the use of a small press. While I could have measured and returned the needle to it's same installed height, instead I inverted the assembly such that the needle fit between two blocks. I then applied the force squarely at the threaded collar and with a metallic 'clack', the piston quickly gave way within the cylinder. 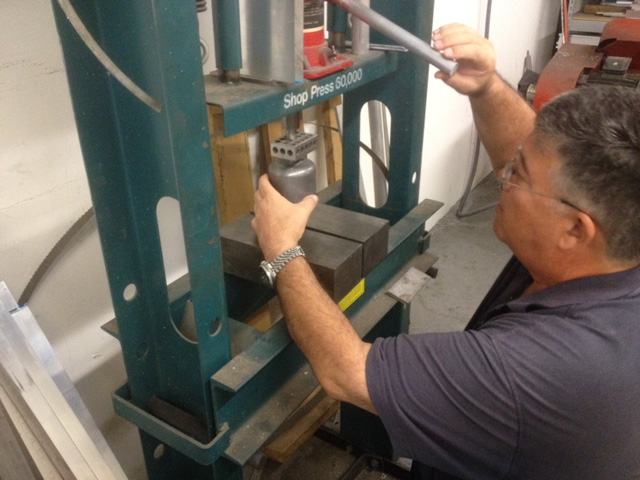 I was disheartened at the sight of the corroded parts and despaired of returning them to service. However, with nothing to loose, I resorted to a lathe, a maroon 3M hand pad (7447 General Purpose, usually used for paint prep) plus light machine oil for cleaning the corrosion off the aluminum parts. The air piston was first. I secured it using a collet (though a 3-jaw chuck would also suffice). Setting the lathe to a relatively low 200RPM because I didn't want to bother with setting up a steady-rest for the needle, which I left unsupported, I very quickly cleaned the surface. The end result was beautiful and didn't remove a much in the way of sound metal. Yes, there remained some small corrosion pits but overall the results were quite satisfactory. Especially as they didn't affect operation. 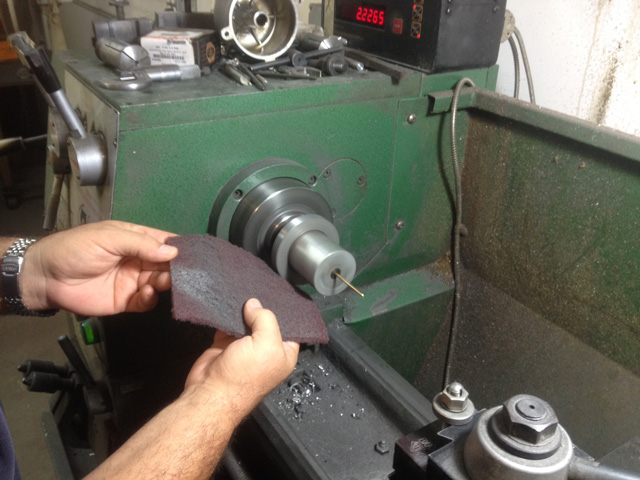 I subsequently turned my attention to the vacuum-dome cylinder wall. This looked very bad as well but also cleaned up quickly resulting in a significantly better surface finish than I expected. 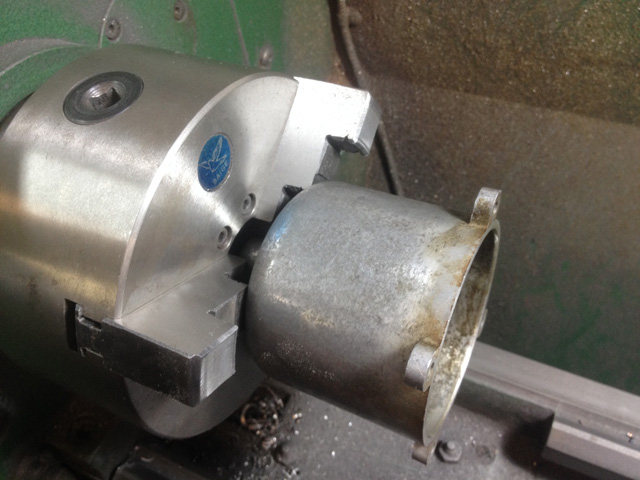 Once I fit the parts together I pushed the piston in and out while trying to discern a deterioration in the fit (as compared to the other unit). Try as I might, I couldn't feel any difference whatsoever - yipee! Thus, with a happy heart I reassembled them to the carburetor body and perfect functionality was reestablished. 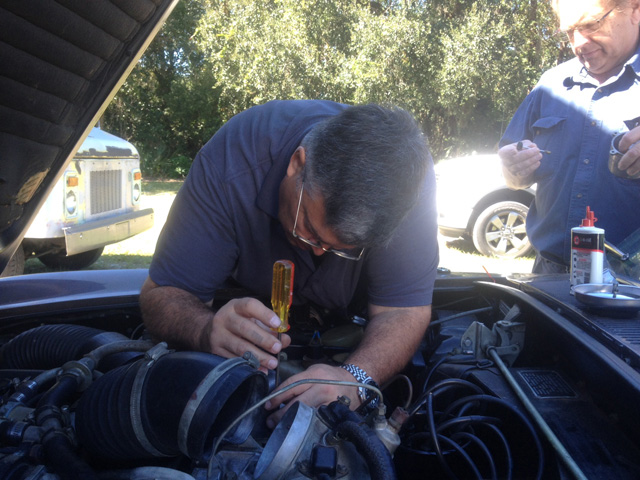 It's said the proof is in the pudding but for me, the proof I'd done a pretty good job of this repair came when both dashpot caps rose and fell equally with the application of throttle. I recently acquired Tootsie and she has not been driven much (39 of her 47 years undriven within air condition storage). However, because in America the political process has resulted in corn ethanol comprising as much as 15% of the fuel volume of our pump 'gasoline' (and as we all know, alcohol is rather hygroscopic) then the effects of time plus water, are predictable. It means corrosion is inevitable if one is careless about what goes in the fuel tank. Fortunately, with a little persistence things can be put right. As for me, while I've read these cars will run fine on pretty much anything called gasoline, as long as I am her caretaker I'll endeavor to source ethanol-free gas (and if needs be, will resort to 100LL from the airport where I keep an old Bonanza). This, in an effort to try and keep the corrosive effects of alcohol and water from further affecting her internals. In closing, I offer this tech note in hopes of helping the next guy presented with this situation . . . and say, "Don't despair overly much because it's an easy repair." | ||
richard george yeaman Grand Master Username: richyrich Post Number: 654 Registered: 4-2012 |
Welcome to the forum John great photos, I think Tootsie has got a good home, Richard. | ||
Jeff Young Prolific User Username: jeyjey Post Number: 278 Registered: 10-2010 |
Nice write-up John. Thanks for posting. Cheers, Jeff. | ||
Robert Noel Reddington Grand Master Username: bob_uk Post Number: 1168 Registered: 5-2015 |
Never seen a SU piston seize that bad. I have released a few sticky ones with a soft hammer. If possible I remove the delicate needle first |