| Author | Message | ||
Jeff Cheng Experienced User Username: makeshift Post Number: 30 Registered: 2-2016 |
Since I'm sure you're all sick of my newbie questions and harping on about the bad paint on SRH23650 by now, I thought I'd show you what I meant. Looks good from 10 feet right? 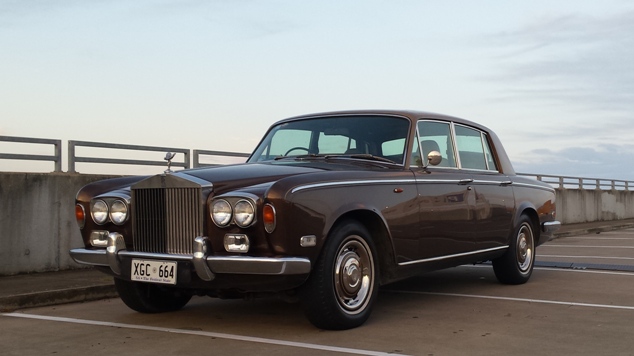 Lets get closer and see what we can find... That's paint cracking above the headlamp.  And again above the front left flare. There'll be no pressure washing here. 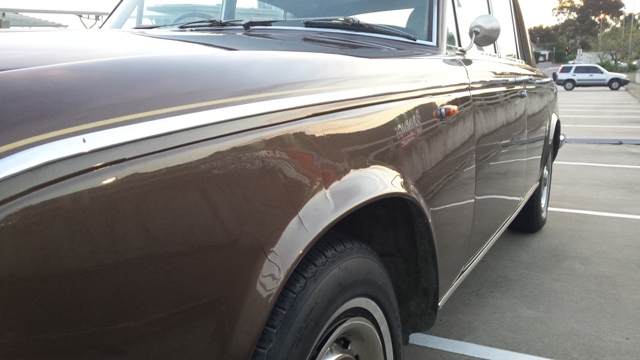 Yup, that's a palm sized chunk of clearcoat missing! 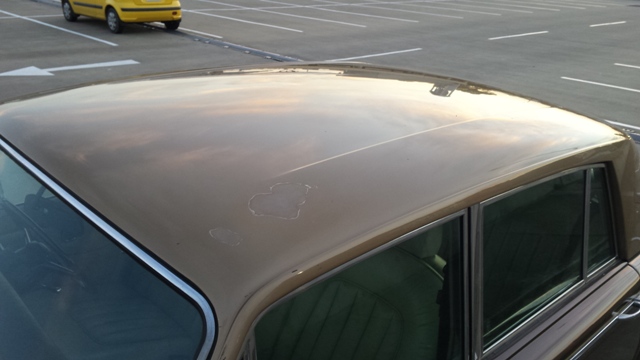 And starting to lift on the C-pillar too. 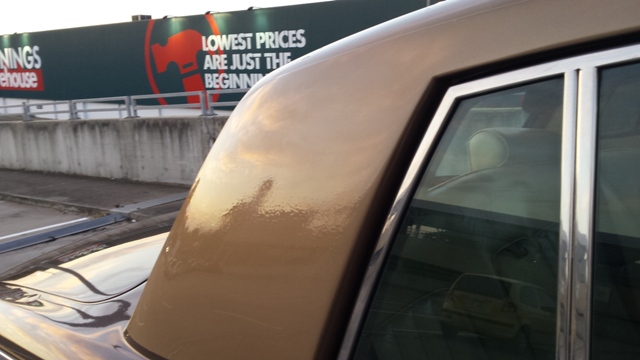 What's that just below? Definitely more paint lifting around the rear flare. 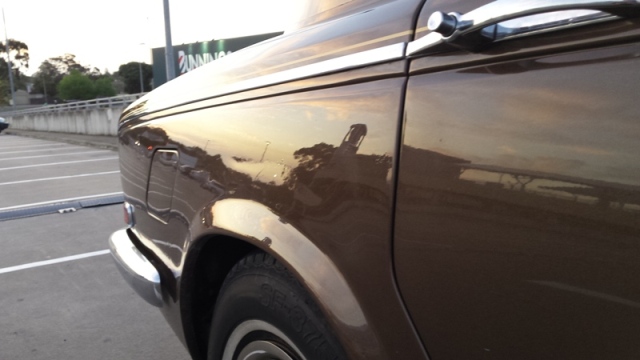 And one more big bubble beside the bootlid. This one's kind of flexes and squishes if you poke it... 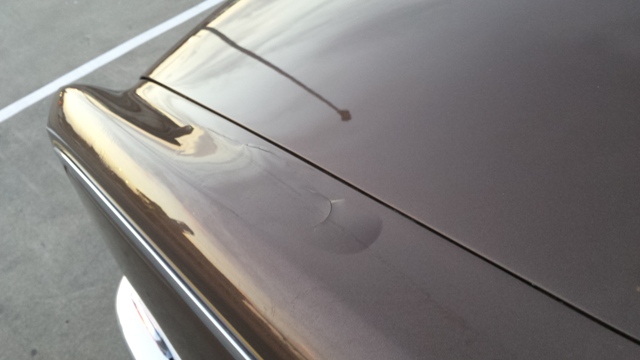 At least it's still shiney, bubbles and all. 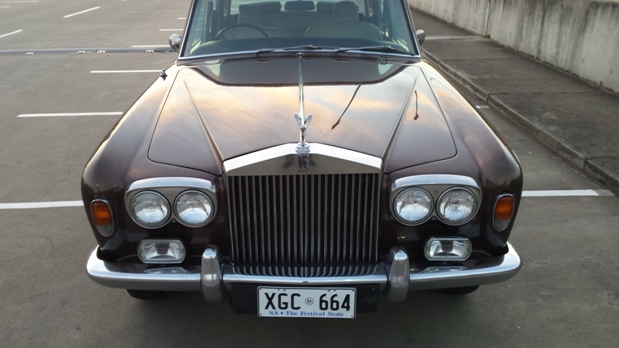 As they say, acceptance is the final stage of grief, so let share and embrace our imperfections. Bad paint, roadside repairs that 'you'll get around to fixing properly one day', mismatched parts, show me whatcha got.  | ||
David Gore Moderator Username: david_gore Post Number: 2245 Registered: 4-2003 |
Jeff, I would not be too concerned with your "defects" [prefer to describe them as "patina"]. Most of them appear to be the consequences of poor surface preparation and heavy build-up of paint when respraying in an effort to rectify poor surface preparation. The secret to quality paint refinishing is preparation, preparation followed by more preparation before you get out the spray gun. If you have the equipment and space to work in, rectifying them is possible for a conscientious DIY owner after some practice on scrap panels from a wrecker to get the techniques and settings right. Will post some photos of DRH14434 over the weekend to give you an idea of what can happen from past neglect. | ||
Robert Noel Reddington Grand Master Username: bob_uk Post Number: 1153 Registered: 5-2015 |
Jeff, Your car is not that bad, your defects cover about the same size as a sheet of A4 paper. The areas with bubbles are best taken back to bare metal and then built back up with filler etc. 1.5mm thickness of filler is about max. Filler is part of the refinishing process not repair. My method of fixing such defect is to carefully scrape out the paint etc with a sharp screw driver down to bare metal and not enlarging the area on the way. The panels that open like doors and boot lid are aluminum the rest is steel. for steel Naval jelly then acid etch primer and for aluminium acid etch primer only. Do not rub the acid etch primer down just spray high build primer over the top after 15 mins. 20c temp. Nowadays aerosols are very good and for small areas esp the primers they do a good job. Don't worry about the newbe questions because we would rather you ask before cocking it up. | ||
ross kowalski Prolific User Username: cdfpw Post Number: 149 Registered: 11-2015 |
Jeff, I'm going to say this in adolescent vernacular as it really characterizes my sentements most properly, " dude, I wish my car looked that good" The paint on my car was so rubish I had to remove it all. What wasn't already falling off was crazed and the chips cupped. That car looks great. I would show some of the sadder points of mine but you would have trouble sleeping. None of those sections look terminal I would drive it until there's a hole then do a total respray. | ||
Nick Adlam Frequent User Username: crewes_control Post Number: 67 Registered: 12-2015 |
Jeff Your car looks fine, seriously. When I was searching for mine, I saw far, far worse- and for surprisingly silly prices. Those paint issues could be fixed by a good on-site paint/dent repairer for surprisingly reasonable money. In my auto-elec/mechanic days I knew several of those guys and was quite impressed by the price/quality ratio. Maybe call around and get a few quotes?. These guys have low overheads, are mostly trade qualified (make sure to check!) and will often cost as little as half of what a regular panel beater workshop will whack you for. Another good thing- you can watch him and learn. I probably wouldn't worry about the roof for now- it's the last part people really see. These cars are tall. At least you can enjoy your nice driver and not fret about stone chips and bird poo, unlike some garage queens out there. | ||
David Gore Moderator Username: david_gore Post Number: 2247 Registered: 4-2003 |
This is what professional R-R/B body repairer David Peterson [NSW RROCA Member] found when DRH14434 was sent to him for what started out as a minor rust repair on the front guards [the car was a UK import and spent its early life in Yorkshire before moving on to what is now evident as hard times elsewhere in the UK before my father-in-law purchased the car and shipped it to Australia. 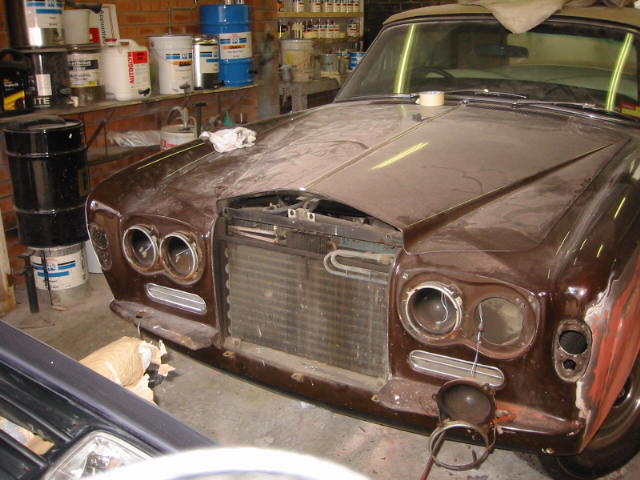 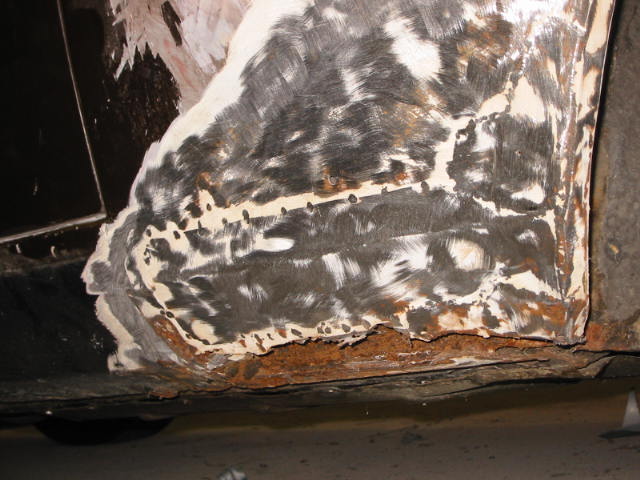 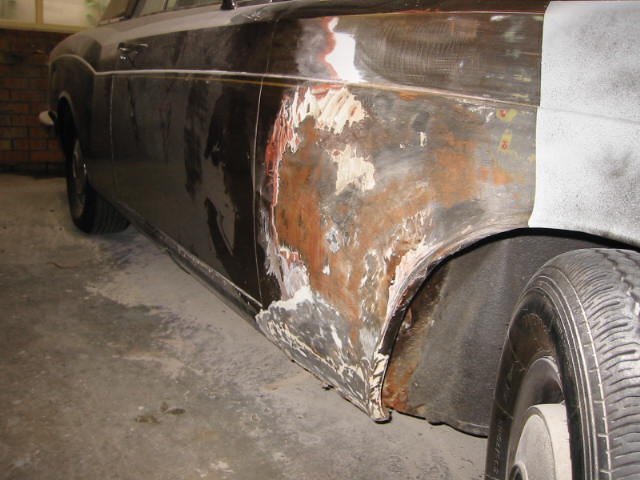 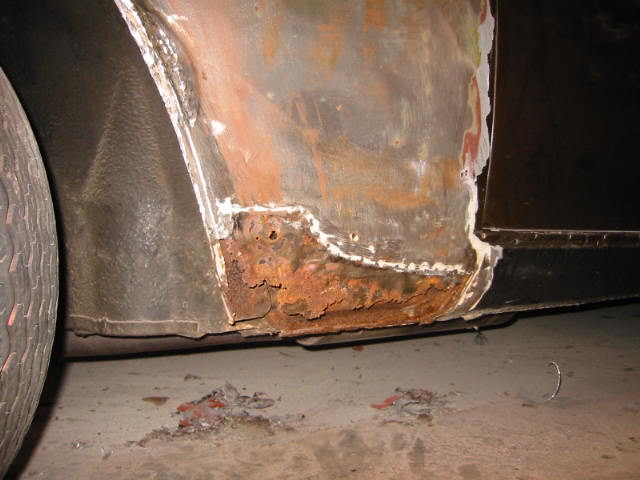 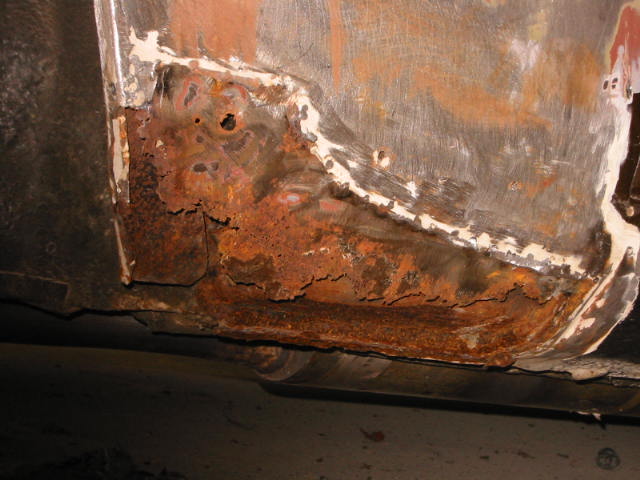 The fill-in panels were reputedly made from recycled metal drums in the UK. David did a magnificent job of restoration to restore these panels. | ||
Jeff Cheng Experienced User Username: makeshift Post Number: 32 Registered: 2-2016 |
I know the defects I've shown are really not that bad in the grand scheme of things. I just thought it would be a bit of a light-hearted contrast to the various inspiring (and somewhat intimidating) concourse and resto/fabrication threads here. David, those pictures are morbidly fascinating. I've never heard of drums being used as a patch. You'd think if whoever did that could shape and weld well enough, making an appropriate patch from sheet would be easy enough for their skills. I'm not planning to do any repairs to my bodywork. It was painted in the 90;s and the rest of the paint looks to be a good standard with no orange peel, so I'll stick with preservation until chunks actually start falling off. They say bodywork follows the 80/20 rule; where it takes 20% of the time to get it looking 80% good, but that last 20% of quality will take 80% of your time. | ||
Mark Aldridge Grand Master Username: mark_aldridge Post Number: 354 Registered: 10-2008 |
Jeff, similar experience to Davids with my S1 recently. I went to repair a small area of blister on the bottom of the n/s front wing, and discovered the delights of earlier repairs to the sill end. James and I ended up fitting a complete sill, and bottom 1/3 wing to eradicate all previous repairs ! He is now back to the Shadow project, waiting for some panels to be made for the rear lower quarters. Mark | ||
David Gore Moderator Username: david_gore Post Number: 2248 Registered: 4-2003 |
Mark, The only thing supporting the paintwork on the bottom section of the guards was the copious layer of body filler used to recreate the original body profile. The photos show what was left after the filler was removed revealing the ongoing corrosion that had occurred behind the filler. Jeff, Others more knowlegeable than I have told me the recycling of metal cans to fix corroded body panels was common practice by shonky body repairers in the UK. The state of DRH14434 when father-in-law purchased it indicated it had fallen on hard times. At that time, a substantial import duty had to be paid in Australia on the market value of imported second-hand cars so it was common practice to buy a cheap vehicle requiring restoration to minimise the amount of tax payable and then use the savings to pay for restoring the car after it arrived in Australia. Unfortunately, my father-in-law did not complete the restoration before he died and I subsequently continued the process however this work was not completed at the time the vehicle was no longer my responsibility. | ||
Mark Aldridge Grand Master Username: mark_aldridge Post Number: 355 Registered: 10-2008 |
David the repair on your car is sadly common. A thin plate is welded over the existing rust, and filled to shape. Also "cover " sills were common to cover over rotten sills; these were generally just tack welded on. James Shadow has these delights, again rotted through with the original corroded sill remains underneath and the plated over and filled front wing bottoms. The whole of the sills will be cut off and replaced together with the lower 1/2 of the wings.. Mark | ||
David Gore Moderator Username: david_gore Post Number: 2250 Registered: 4-2003 |
Mark, If it is possible to source POR 15 rust prevention products in the UK, applying these to the inside surfaces would help minimise future corrosion: http://www.por15.com/Rust-Preventive-Coating_c_11.html Otherwise, I would spray the internal surfaces with the traditional deodorised fish oil - an "oldie but a goodie" as far as I am concerned. | ||
Patrick Ryan Grand Master Username: patrick_r Post Number: 561 Registered: 4-2016 |
Jeff, I too think your car looks awesome. I hope you have been enjoying it. The issues can be rectified in time. As long as you enjoy the driving experience go your hardest mate. Here are a couple of images of issues with SRH12255. The bubbles were noticed during build, rectified before delivery, then surfaced again in the 90's but have never got worse than this. The flat patch near the rear of the side white clearance lamp was noticed by a mechanic many years ago as well. 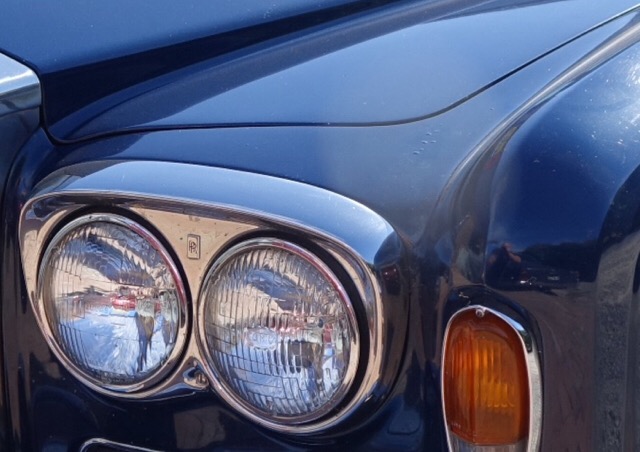 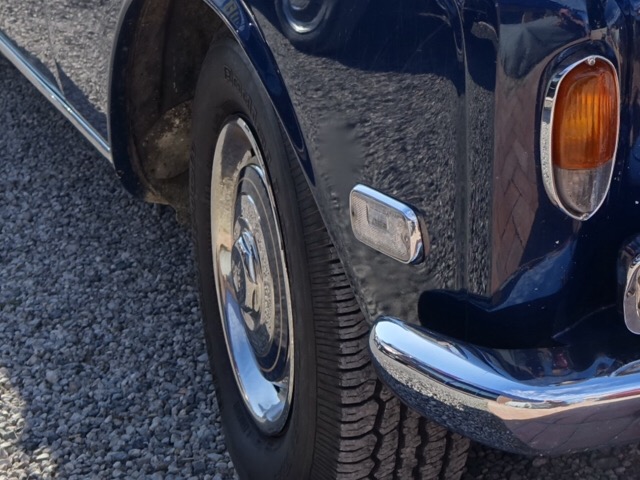 |