| Author | Message | ||
Chris Miller Grand Master Username: cjm51213 Post Number: 403 Registered: 5-2013 |
Hi Folks, The �72 ride-leveling system had been dormant until the dogs got out one day and I had to buy a few 60 pound bags of concrete to fill the holes they dig under the fence. That�s our agreement; they dig the holes, and I fill �em up with concrete. I put four bags in the trunk of the '72 and realized that this was the first opportunity to test the ride leveling system, and it worked! It leveled up about an inch. I was pleased, as you might imagine, but it didn�t last long, since the next day I had a puddle of fluid by the rear passenger tire. So, I rebuilt the ride-leveling control valves, and I realized that the car was not level port to starboard. I concluded that the springs probably needed to be replaced. (I was probably wrong about that) and while I was there, I should replace the shocks. My list to starboard became clear when I put the springs in and one side fit and the other did not. I had all kinds of theories, but they all came down to removing the ride leveling rams. I read some articles and I called my local shop to get some advice. The shop told me that he uses a punch on the teeth of the ride-leveling ram and if that didn�t work, he had used an impact wrench and he�d never had any problems. Briefly encouraged, I embarked on this odyssey. I started with the passenger side and a few taps and Voila! The ride-leveling ram came right out! This is going to be a piece of pi$$. I noticed that there was anti-seize on the threads, and that should have been a clue. I immediately started to work on the driver side. I tapped the punch quite a bit. No dice. I tried more aggressive tactics. I have an air drive impact tool that I used to break up a 3�x3�x3� concrete block in the crawl-space of The Katie Cottage: 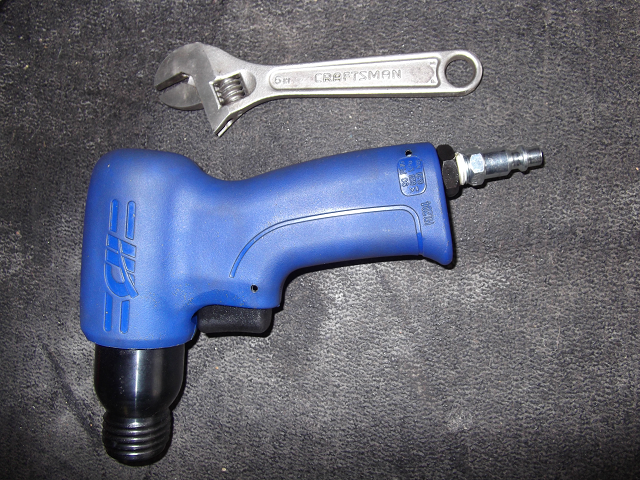 I though maybe I could use that to vibrate the punch enough to knock the ride-leveling ram loose. No dice. I was going to need more power! Next I tried my channel locks. My grip is nowhere near strong enough, but if I wrap a bicycle inner tube around the handles, I can develop a crushing grip. Then there is the torque necessary, and I maybe strong, but levers are even stronger, so I pulled the channel locks with a tie-down strap. 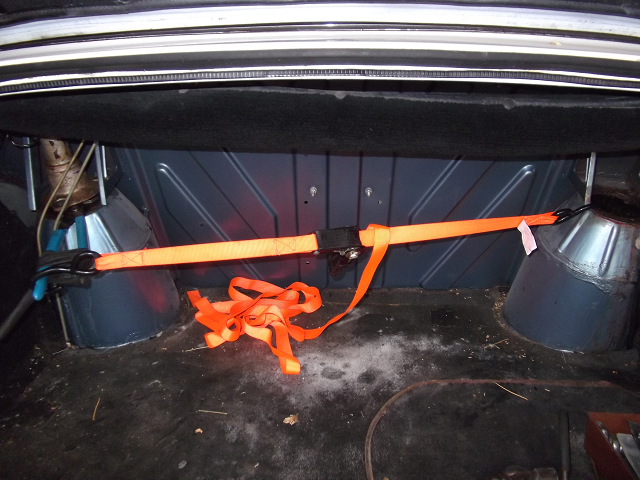 They moved! But, the movement was not between the ride-leveling ram and the sprint pot; it was between the spring pot and the spring� I needed a way to anchor that spring pot, and the weight of the car. I looked at the one I had successfully removed and I saw a hole� Then I looked at the body and I could see a glob of JB Weld, and I realized that I was not the first person with this problem. I drilled a hole in the driver side spring pot and pinned it with a #4 Phillips screwdriver. I think it had a shaft 3/8� diameter.  With the spring pot pinned against rotation, the jaws of these channel-locks were not sufficiently large to maintain a grip, and the tie-down would pull them from their purchase. I got bigger channel locks, and a bigger tie-down. The bigger channel locks had sufficient span, but not sufficient rigidity. The grip introduced a torque against the sliding joint and these also slipped. I thought was that if I had a proper wrench, then I might be able to use vibration to unlock these pieces. So, I built a wrench: 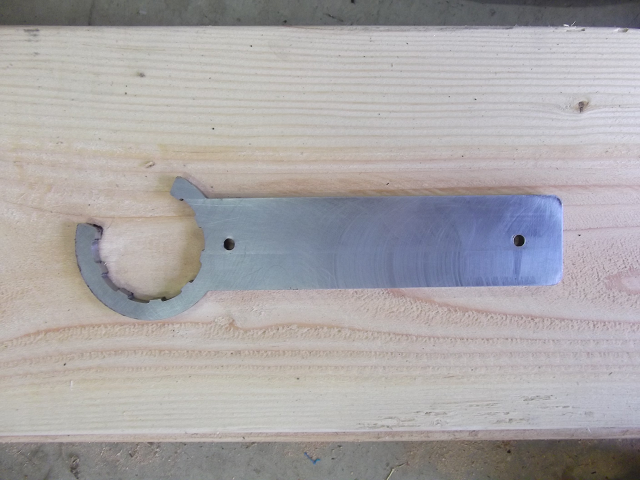 This worked brilliantly. Additionally, the handle exactly fit the diagonal measurement of 2�x2�x.250 square steel tubing, which gave me an excellent cheater bar. I bent the screwdriver and tore an inch and a half rip in the spring chamber� This clearly was not going to work. I needed to �anchor� that spring pot. I designed a clamp and now I needed to show it to someone that would understand what it is and how it works. That's you lot. After I removed the spring, the shock was still in place. I realized that was a tension member and I could use that tension to force a friction fit against the spring pot, if I could clamp onto the shock. This is how I did it:  Above the flexible shock boot, you see a round disk with four small bolts. Those four bolts are drawing that disk toward the square plate. The square plate has a hole just slightly larger than the diameter of the shock, but the round disk has a larger hole, which permits the wedges you see, held in place with the small loop of bicycle inner tube, to be compressed against the shock as I draw the round disk to ward the square plate. This is the base of the clamp and gives me significant purchase on the shock. 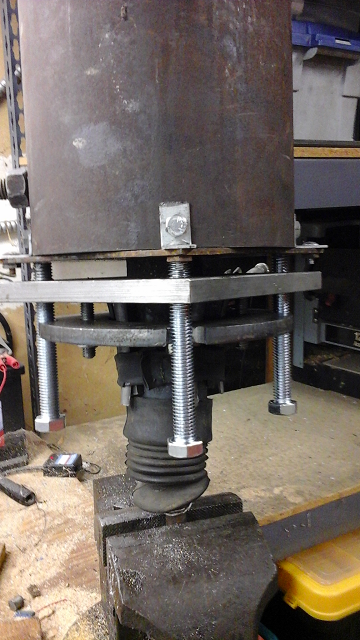 Now notice that four longer bolts that thread into the corners of the square plate. These are the elevators that push the pipe segment up. This elevator gives me a friction fit against the bevel of the spring pot, so the entire shock, spring pot assembly is now one fixed unit, and I now had a handle.  Notice the hole that didn�t work and the hook at the bottom of the pipe segment. I hooked a chain and anchored the chain so the entire unit would not rotate. Then I used the tie-down strap like a come-along winch. I tightened and then there was a mighty snap and the wrench moved, like it had come lose, but the ride-leveling ram had come lose! That was a pretty good Friday. This project took my an inordinately long time because I was apprehensive that it was not going to work, and then what was I going to do? Well, I was going to have to cut the ride-leveling ram and replace them both with a perfectly good set I got from the �66 cadaver car. But I really didn�t want to do that. So, I didn�t work on this as diligently as I should have. It took me from last August to overcome my anxiety that I might be forced into a strategy that I wanted to avoid. But, once I heard that snap of the ride-leveling ram coming loose, I immediately reversed my position, with �Of course, it was going to work! Why would it not? Why did I wait do long?� So, if anybody else is struggling with this problem, my solution cost about $100 for the wrench and another $100 for the clamp. And a lot of anxiety wondering if it was going to work. You can now proceed knowing that it does work.  |