| Author | Message | ||
Barry Brears Experienced User Username: turney_2009 Post Number: 27 Registered: 8-2009 |
Re my T1 Bentley SBH 17291 can anyone tell me where the flasher can is situated for the hazard lights, I beleive it has its own separate from the indicators. Regards Barry | ||
Jeffrey McCarthy Prolific User Username: jefmac2003 Post Number: 208 Registered: 5-2007 |
Barry - it is located on the driver's side just above (and behind) the parking light switch on a right hand drive car. You will need to remove the black dash cover around the handbrake first. There are 3 screws to remove on this piece of casing around the handbrake that will make it easier to get at: one at the back of the handbrake that is easy to see and 2 that are vertical above - basically straight up from the 2 end points of the handbrake handle. Laying with your head on the floor pan looking up you will then see a black triangular metal bracket. The flasher can is the most forward (that is to say towards the driver's seat not the motor) of the attachments to this bracket. Having just done this recently I'll post some photos for you tomorrow. You may need to not use the small attachment bracket that is there -my new unit didn't quite fit. I replaced it with a standard tool bracket. All of the screws are inserted to maximize the frustration and confusion for the owner trying to replace the part. Good luck till tomorrow. Jeff (Message edited by jefmac2003 on 24 May 2010) | ||
Barry Brears Experienced User Username: turney_2009 Post Number: 28 Registered: 8-2009 |
Thanks Jeff,Now I need the location of the hazard light relay. Barry | ||
Jeffrey McCarthy Prolific User Username: jefmac2003 Post Number: 209 Registered: 5-2007 |
Barry, I Couldn't take the photos today - our camera is out on loan. I'll check the location of the relay tomorrow - I know that I labelled it when I was tracing the circuit. From memory it is close to the flasher unit, possibly on the same triangular bracket. | ||
Barry Brears Experienced User Username: turney_2009 Post Number: 29 Registered: 8-2009 |
Thanks Jeff,Youv'e been a great help,I actually had these lights working but I accidently shorted out 2 terminals on the switch which blew a fuse so I changed the fuse but still no lights.I then pulled out the flasher can (thanks no need for photo it was where you said)I then used the flasher can from the main fuse panel alas no lights now this could mean wrong flasher can ,bad relay or dud switch so am eliminating all possibilitys.Your thoughts on where the relay should be seems to be correct after me reading the workshop manual which is some what descriptive of location | ||
Jeffrey McCarthy Prolific User Username: jefmac2003 Post Number: 210 Registered: 5-2007 |
Barry, my problem was the same - I had disconnected everything to paint the floor and then blew a fuse: it indeed turned out to be the flasher; I got a replacement on ebay but I imagine they are stock standard 2-pin flashers. One thing I did learn is that you have to plug the 2 back wires in correctly (i.e not back to front) Also, unfortunately it is easier to remove the relay bracket by disconnecting the wires first. This means some mind bending focus on the wiring diagram to connect them back up again. If you can remove them one by one and note where on the relay they are connected (top left, centre etc) and write down the colour: make sure you don't turn the relay upside down when you remove it and note the pin names. To make things even better one of the wires on the flasher can is the same colour as one on the relay - mark it with a piece of tape when you disconnect. Hope this helps. Jeff | ||
Jeffrey McCarthy Prolific User Username: jefmac2003 Post Number: 232 Registered: 5-2007 |
Just for future reference here are a couple of photos of where to find the Hazard Light Flasher unit. They've probably been replaced more than once on most cars given their age. Buy a little 'OMEGA" shaped tool bracket to fit whichever unit you buy - it bolts in with the nut where the white arrow is pointing. The red arrow is the flasher unit seen from below in relation to the handbrake. 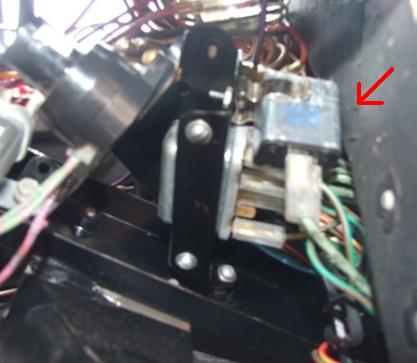 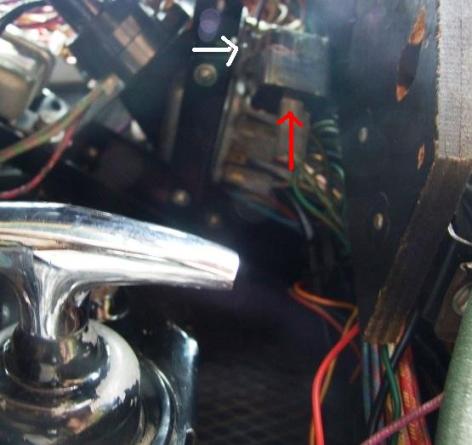 (Message edited by david_gore on 12 November 2010) |