| Author | Message | ||
Patrick Lockyer. Grand Master Username: pat_lockyer Post Number: 520 Registered: 9-2004 |
I stand and stare more so as it progresses with all the new found probs. First the wiper motors are fitted and by others fitted in my time they are back but upside down. They must be correct from the slots in the wood finisher for the wires.Pix no one.  The next that may be not well known is the battery connections to -earth. I seem to remember that it was to do with less terminal corrosion but also the less corrosion with rotor cap etc. The old brain is slipping at the mo i cannot remember what the right curled knob is for, turned for on/off. pix no two.  | ||
Stephe Boddice Experienced User Username: stephe_boddice Post Number: 31 Registered: 2-2005 |
Pat, You never told us the car's chassis number and coachbuilder. The wiper motor positioning is unusual - ideal for getting a headache if you brake quickly. The knurled knob on the switch box is to operate the instrument panel lights. It should be spring loaded so that you can press-and-hold for a quick look or press-and-turn if you want them to stay on. SB | ||
Patrick Lockyer. Grand Master Username: pat_lockyer Post Number: 521 Registered: 9-2004 |
Stephe,The chassis no is GXO14 engine is S7M. Original Launderlete, coatbuilder Mann Egerton The more the car is refitted etc the more strange findings are apparent. Thanks for the info on the knurled knob i thought is was for magneto. To-day has been busy with the wireing. The standby magneto does not work and has not any wire or a switch to opperate. As for the regulator the whole thing has been altered. The headlights have lost there dipping selonoids and have twin fillament bulbs fitted. For the rear passengers to communicate with the driver did they have a megaphone or bell if so electric or whatever? Thanks for your help on this. | ||
Stephe Boddice Experienced User Username: stephe_boddice Post Number: 32 Registered: 2-2005 |
Pat, The standby magneto is not switched in the conventional sense. To swap onto magneto ignition requires the following steps (with the engine switched off): - 1) Exchange the king HT leads, coil for magneto, into the distributor 2) Remove the low-tension ignition circuit fuse (#3) from the fuse board. The should be a spring clip inside the fuse box lid to hold the redundant fuse. 3) Mechanically connect the magneto to the rear of the dynamo. There should be a drive shaft mounted between the components: the shaft is disconnected for driving with coil ignition engaged. Connection is by depressing a lever in the shaft shank; the shaft being spring loaded to press against the rear of the dynamo. The shaft is then rotated until the internal teeth mesh: there is one double-tooth to ensure that the ingnition timing is correct. 4) Set the timing lever on the steering wheel to full retard and leave it there. 5) Start and drive as normal. On this chassis series, the magneto is wired through the #2 terminal in the switch box (whereas the low-tension circuit is connected to terminal #3). If you need a copy of the GXO series wiring diagram then let me know. WARNING - Having just checked through the wiring diagrams for various series of 20/25 it would appear that the switch box in the photograph, above, is from a later series. The O series chassis (ie GXO) did not contain the auxiliary power socket, which was introduced with the later part of series T. There is a fundamental difference in the wiring set-up and how the switch box operates. The later coil ignition circuit contained a field resistance to restrict output to low charging when the lights were off. When the lights are turned on there is a connection inside the switchbox that bypasses the resistance to increase the charge. The dynamo output on 20/25s is restricted by a cut-out rather than the more efficient voltage regulator. Twin-filament headlamps are a better bet, in my opinion. The dipping solenoids draw too much current; particularly when there are two. I don't know whether the Mann Egerton build records still exist. I'll post a question on the RREC site. Communication with the chauffeur was down to the owner/coachbuilder. It could be anything from a poke with the walking stick to a proper two-way intercom. If there are no tell-tale holes/wires/tubes I would assume there was nothing. E-mail me if you need more info or copies of all of the wiring diagrams (4 off). SB | ||
Patrick Lockyer. Grand Master Username: pat_lockyer Post Number: 522 Registered: 9-2004 |
Stephe that is a great help. Buid records for Mann Egerton on the body would be of most interest if still available. Be in touch. Pat. | ||
Patrick Lockyer. Grand Master Username: pat_lockyer Post Number: 523 Registered: 9-2004 |
Electrics completed and tested. Time for the engine to fire up. All oilers toped and primed. Fuel system cleaned and the wise tip of the lemon juice used for cleaning the fuel filter disc's. The autovac and carb primed. Hot water filled in the cooling system. Pressed the starter and fired up straght away. Oil pressure rose to about 35lbs fast idle. Staying at 30lbs ticking over the engine as quiet as a mouse. Great excitement, Time to give it a run and find any probs before the next part,"trimming" Only two found,one prop rear joint,two the slight sound of the clutch release bearing when the pedal is slightly pushed. Pix of the first short quiet run and i stalled it but started instantly for the return. Picture of the bonnet less car.  | ||
Patrick Lockyer. Grand Master Username: pat_lockyer Post Number: 528 Registered: 9-2004 |
Forward and on. Glass partition fitting up and working in the slides. Keep looking at the hole in the drivers rear seat could it be for the walking stick prod as Stephe has mentioned, there is a plate fitted on the passengers one. What will be best? Window winder shafts [six] are all square and welded in place.[mig] 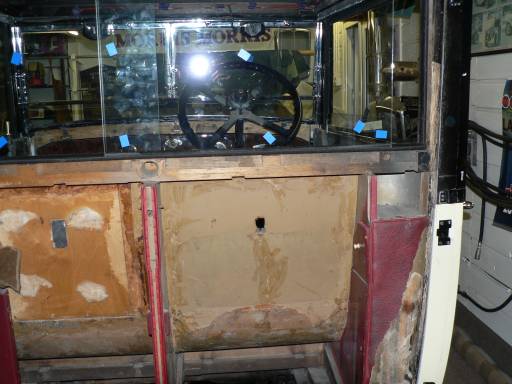 | ||
Patrick Lockyer. Grand Master Username: pat_lockyer Post Number: 529 Registered: 9-2004 |
Brass knobs are the order of the day turned on the lathe drilled and threaded. The sliding partition now has the original handle fixed and slides well. The rear floor is going in with the removable and hinged section for battery and maintance etc. 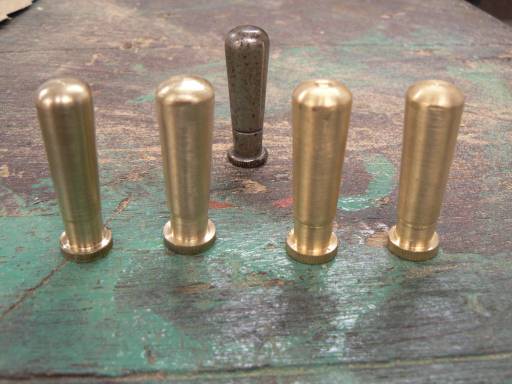 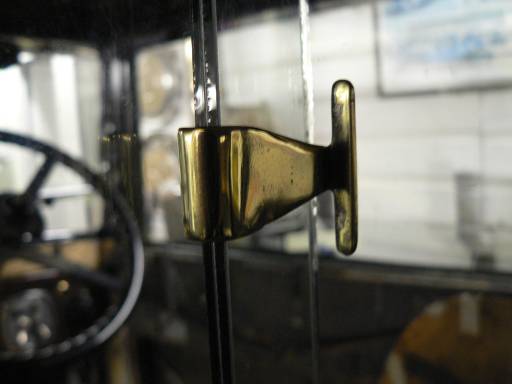 | ||
Patrick Lockyer. Grand Master Username: pat_lockyer Post Number: 530 Registered: 9-2004 |
There is no time to stand and stare! This is the West of England wool cloth going in front and the front rear section. Note the taught effect that is fit for a King. Wood finishers just help with the over all effect. All screw heads standing to attention. Things are going well so far. Tip of the day, better not!another time.  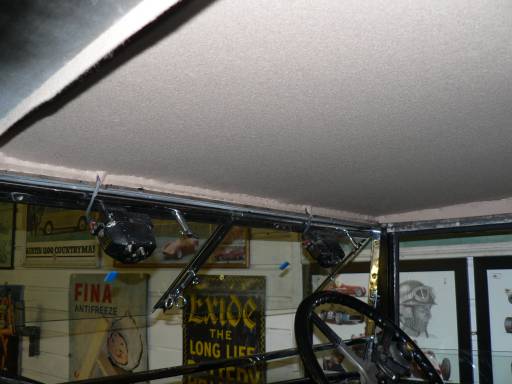 | ||
David Gore Moderator Username: david_gore Post Number: 550 Registered: 4-2003 |
Hi Pat, Great series and the photos suggest you are doing a restoration in the true R-R/B tradition. My only concern is how do you find the time to do all this especially with a new grandchild? You must have a very understanding wife to allow you to do this without domestic intervention  . . | ||
Patrick Lockyer. Grand Master Username: pat_lockyer Post Number: 531 Registered: 9-2004 |
David. Keep Sunday for the wife and cherrish and pamper her as we do with our cars. As for the time with the grandchild this is delt with and returned at the appropriate time don;t i just love it when you can hand them back. Now back to rear roof section a prob in more ways than one but we will win. | ||
Patrick Lockyer. Grand Master Username: pat_lockyer Post Number: 532 Registered: 9-2004 |
Great news today. The rear seats were stripped of the red velour. The centre arm rest was stripped last,below the velour revealed the only piece of original leather was found on the car, not quilted as thought but fluted. Picture one of the leather type and armrest.  And now we know the contour of the seat back. This armrest has a spring steel plate that assists in the operation of it.picture two with plenty of tack holes not woodworm so far. 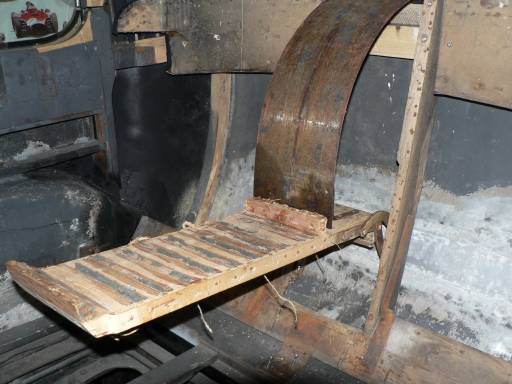 Today i think i have worked out the correct way for the screw heads to be,i think they are all to "attention" vertical not horisontal. Any ideas? | ||
Stephe Boddice Experienced User Username: stephe_boddice Post Number: 36 Registered: 2-2005 |
Pat, A lucky find with your leather arm rest. Given the number of nail holes in the wood frame it is possible that this car has been retrimmed several times. Upholstery was, obviously, the choice of the original owner so one cannot make categorical statements without evidence from the coachbuilder's records. It was more common, in this era, for the front seats to be in leather and the rear compartment to be trimmed in some type of material such as West of England cloth or Bedford cord. I thought I would just throw in that googly to keep you wondering. If there are only 2 sets of nail holes in the armrest then you know that leather was the original. As for screw alignment - again it was down to the coachbuilder. My choice (and it is nothing more than that) is to have the slots following the line of the grain, which usually means the slots are lined up with the 'length' dimension of any wooden trim item. For instance, it would mean that the slots were horizontal in the edging strips around the head lining in the last but one photograph and would be vertical on the cappings on the B posts. Hope that this helps more than it hinders... SB | ||
Patrick Lockyer. Grand Master Username: pat_lockyer Post Number: 533 Registered: 9-2004 |
Thanks for your interest,yes there are two sets off tack marks,first the leather then the velour. I'm going with the leather as original. Now the screw heads in there day i take it that they were zink coated if so would it not be that all interior heads were horisontal and the out side were all vertical. Being vertical on the out side all the wet and dirt would run off thereby not the starting any corosion. Inside would look better horisontal and would not hurt to much if dust were to settle within the slot. Picture of the mohogany top facias in place.  | ||
Stephe Boddice Experienced User Username: stephe_boddice Post Number: 37 Registered: 2-2005 |
Pat, External screw heads on the bodywork were usually hidden. Your comment regarding vertical to avoid water retention would make sense, however. SB | ||
Patrick Lockyer. Grand Master Username: pat_lockyer Post Number: 534 Registered: 9-2004 |
Stephe,external i was thinking of the scuttle vents to name but one. did they not have screw heads, of course could use Philips then it would not matter! | ||
Patrick Lockyer. Grand Master Username: pat_lockyer Post Number: 535 Registered: 9-2004 |
Doors F/R one side fitted up with new and some of the original sections before removal for trimming. Window winders handles look good with the cappings temp in place. Hum, fill the phillips heads and make like rivets. 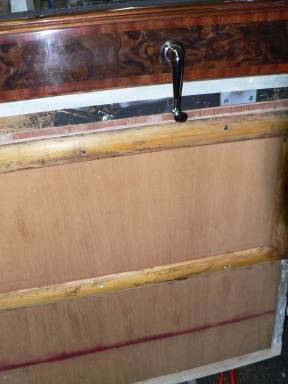 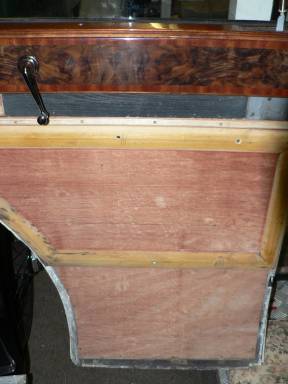 | ||
Patrick Lockyer. Grand Master Username: pat_lockyer Post Number: 539 Registered: 9-2004 |
The first of the trimming soft to the touch below the drawer. the n/s cubby is for the whisky and above the glasses. o/s for the gin. The folding seats to operate are in true coach builders style,more to come on them as it progresses. 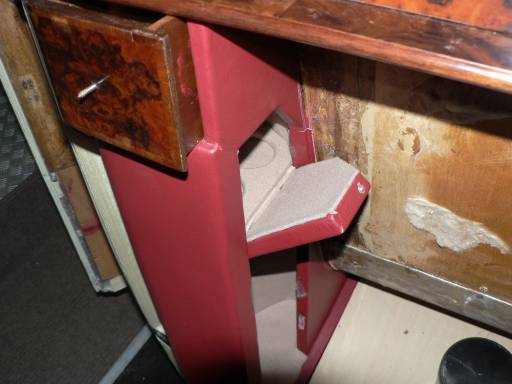 Second pic of the folding rear and cappings. 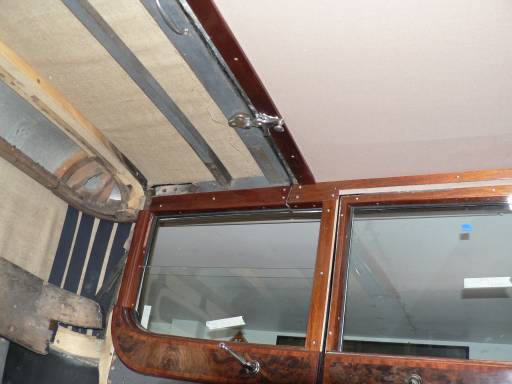 | ||
Patrick Lockyer. Grand Master Username: pat_lockyer Post Number: 544 Registered: 9-2004 |
In all my years i have never seen one of these fitted in a car. We use a brick with the Cuban Havana delights in the local. Crumbs in a car of class never but it will be returned. 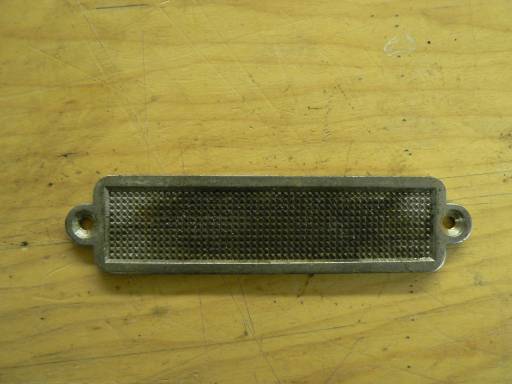 The seat cubbys are looking good. Inside floor and seat inside back is in the finest Wilton. The colours are giving the correct effect. The cubby door has a gap in the lower part for the finger to open as the door cannot have any knobs as the seat panel would hit. 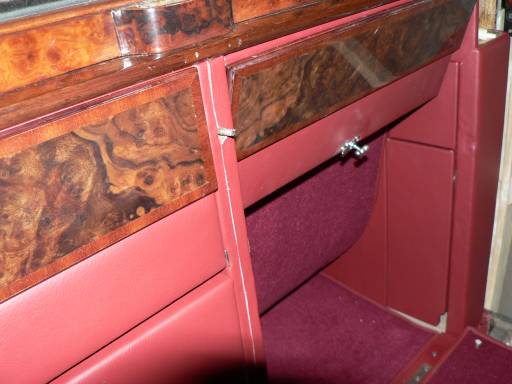 | ||
Patrick Lockyer. Grand Master Username: pat_lockyer Post Number: 545 Registered: 9-2004 |
Today the striker and finisher is fitted. Next is the furflex around the door shuts. 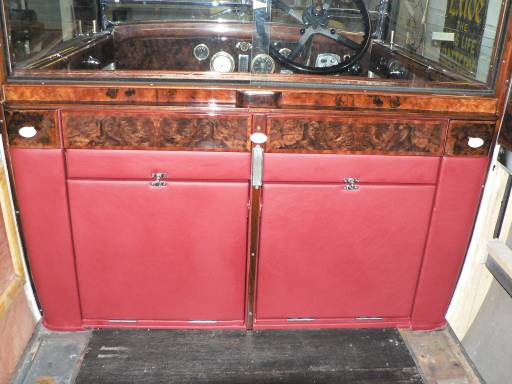 Picture of the Coach Builders plate.  | ||
David Gore Moderator Username: david_gore Post Number: 554 Registered: 4-2003 |
Hi Pat, I think the download time for dial-up connections on this thread has reached a reasonable limit. We would all appreciate you starting Part Three of this very interesting and motivating topic with your next post. I have set this up for you. Kind regards David (Message edited by david_gore on March 26, 2006) |