| Author | Message | ||
Mark Glanville Experienced User Username: mark_glanville Post Number: 28 Registered: 5-2008 |
My indicator switch either needs to be held on in one direction to work, or it doesn't time out in the other direction. As we all know there is a timing device buried in there somewhere that switches off the indicator after a short period if time. So after taking the device out of the car to have a Captain Cook, hmmm how does it come apart? Has anybody been down this path of fixing an old indicator switch and how do you take off the back plate to get inside? Cheers Mark | ||
Chris Browne Prolific User Username: chrisb Post Number: 227 Registered: 2-2010 |
Hi Mark, I have carried out this work on our 1958 Silver Cloud 1 and believe that the switch is the same or similar on your car. If you have removed the wires from the terminals, you will see a tight fitting fibre board cover which fits over the terminals. Carefully lever this up and off the terminals. You will need to be patient as it is a tight fit. Once the fibre cover is off, you will see the screws which hold the spring terminal plate onto the case. Removal of further screws will reveal the clockwork mechanism. It is a very delicate but may just require cleaning and light lubrication or water or condensation may have collected over time and contaminated the mechanism. This had happened on our car but with careful cleaning and lubrication, the mechanism now works perfectly in each direction and self cancels after about ten seconds each way. Hope the photographs help.   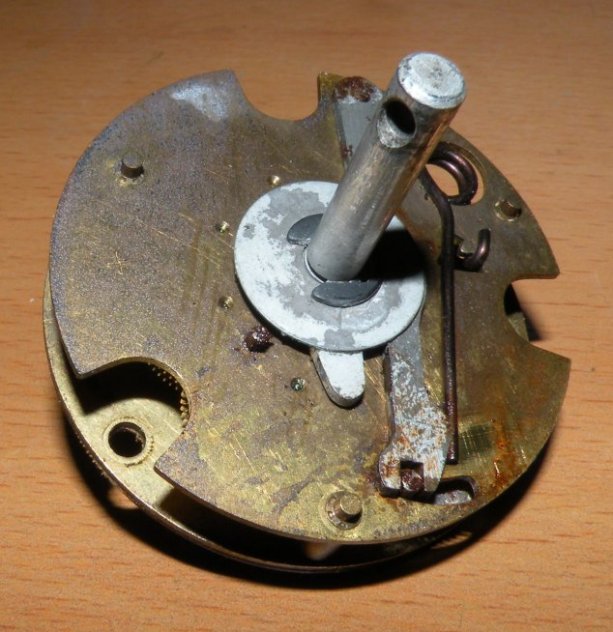 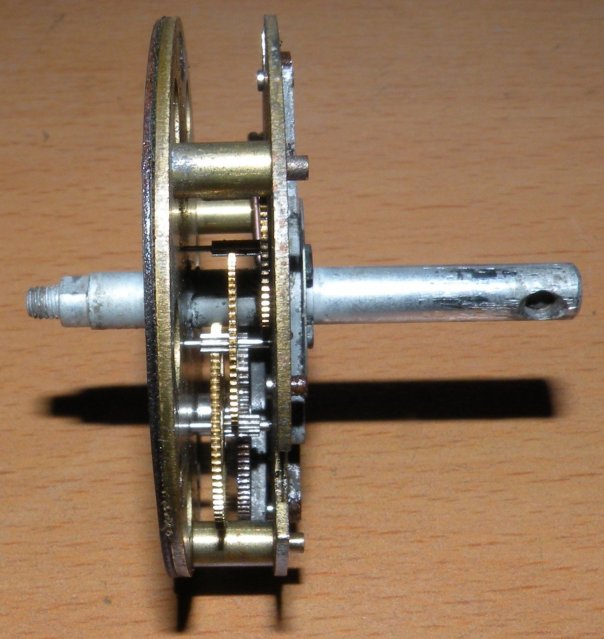 Kind regards, Chris | ||
Christian S. Hansen Experienced User Username: enquiring_mind Post Number: 47 Registered: 4-2015 |
Chris... Wonderful photos. Very Rolls-Roycean. Totally illustrative of why I love the PreWar and Early PostWar models. Mechanically driven wind up clockwork mechanism. Built to last indefinately with care. From the "Pre-Modern Era", before the advent of electronically controlled gizmos. Disassemble, clean, lubricate, adjust as required, good to go. Genius. The occasional problem is simply how to disassemble. Thanks for the guidance! | ||
Mark Glanville Experienced User Username: mark_glanville Post Number: 29 Registered: 5-2008 |
Thanks Chris, I appreciate the feedback and the time you took to reply, including photos. The older model switch is slightly different, but it seems the principle is the same, the backing plate needs to patiently levered, that was the part I Was unsure about. May be copious amounts of WD40, because mine wont budge. I can see a circlip holding the main shaft to the bottom plate, so I will stop trying to wriggle and turn hoping something will drop. I have also a partially dismantled one, which for interest is slightly different internally, but was unsure how the backing plate was removed. Thanks again, lots more information than i had. Cheers 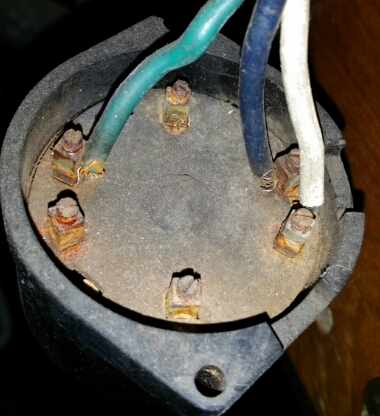 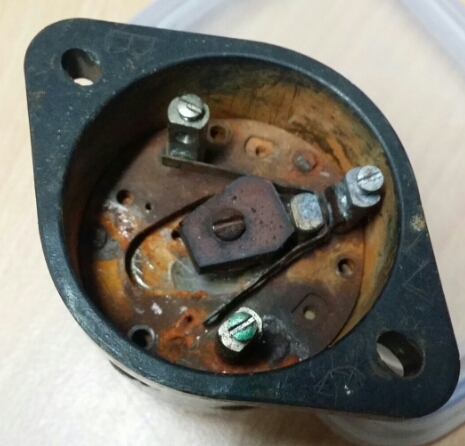 | ||
David Gore Moderator Username: david_gore Post Number: 1727 Registered: 4-2003 |
Mark, A good "home brew" penetrating oil for situations like this is a 50/50 mixture of automatic transmission fluid and acetone. Works beautifully if you allow time for the fluid to penetrate properly. For severely rusted ferrous components, the rust can be removed without affecting the base metal by soaking them in a solution of cattle feed molasses and water as shown in the following link - you have to be patient as heavily rusted parts need to be immersed for a couple of weeks for the solution to do its work: http://www.aulro.com/afvb/projects-tutorials/115028-rust-removal-molasses.html | ||
Chris Browne Prolific User Username: chrisb Post Number: 228 Registered: 2-2010 |
Hello Mark, The lay out of the terminals in your left photograph looks the same as mine but on mine there were two (I think) rectangular holes through which you could see the screw heads which hold the mechanism into the case. The switch in you right hand photograph looks completely different-both the terminal layout and the visible mechanism. Kind regards, Chris |