| Author | Message | ||
Chris Gillings Frequent User Username: chrisg Post Number: 77 Registered: 4-2001 |
This is driving me mad... I'm trying to solve two problems with Bess: rich mixture and exhaust popping. So far I've
Overall it seems to me that the engine itself has no major problems. I borrowed a Gunson Colortune and have utterly failed to get a bunsen blue at idle (~600rpm) even with both SUs set to full lean (mixture screws wound fully upward). Only at 1500 rpm does it start to go blue. This explains why the car is fine for continuous running but loses it (i.e. plugs start to foul) when we get caught in stop-start traffic. Apart from the mixture what I can't figure out is the spark. Watching the Colortune flashing I see that quite frequently it misses a beat and I see no spark, followed closely by a pop from the exhaust. It's very evidently not firing consistently. Switching over to the backup coil and/or condenser gives no improvement. My guess is that what I'm seeing is weak spark failing to fully ignite the charge, which could mean it shows as yellow despite being fully lean. But I'm guessing and hope that others can tell me. Might the Lucas B12 coils be the culprits? They have the legend '4 51' and '5 51' on them respectively. Does this mean they were made in 1951? I've ordered 4 metres of new copper-core HT cable and will be rebuilding all the ignition leads using the set of original new Champion bakelite plug caps I bought more than ten years ago. What about the condensers? And what's with the third one mounted on the firewall, connected to the inlet (negative terminal) of the coil? | ||
norman geeson Unregistered guest Posted From: 81.98.143.251 |
Chris You missed four very important points. What is the chassis number? What carb needles are fitted, SC by any chance? What type of carbs are now fitted,two bolt or four bolt fitting? Does the car have oil bath aircleaner? (Message approved by david_gore) | ||
Chris Gillings Frequent User Username: chrisg Post Number: 78 Registered: 4-2001 |
Oops. Sorry. Chassis No.: B290MD (4.5 l) Carburetter needles: I must assume standard 0.1". (What's 'SC'?) Carburetters: four bolt (HS4?). Air cleaner: wire mesh (English delivery). | ||
Martin Cutler Prolific User Username: martin_cutler Post Number: 173 Registered: 7-2007 |
Gidday Chris, Your problems are very similar to mine on B256MD, which is the same configuration as Bess. My exhaust pops through the right hand pipe, and not all the time. I had thought the problem was the dissy cap, but a new one did not change anything. Just recieved the new valve stem seals from Introcar, and going to look into fitting them this weekend. When you say set the float bowl levels to 7/16", how did you do this? I set my float bowl level by looking for the fuel in the jet with the needle out, and seeing the level at 1/8" to 3/16" below the bridge. How does the 7/16"work? I have 2 strobe lights at the workshop, I am going to use Richards method of synchonising the points, sounds easier than setting up with the lightbulb, and turning the back wheel to see when the light goes out. Might have to get you out to the workshop and we can look at both cars together. What are you doing on Sunday? | ||
Chris Gillings Frequent User Username: chrisg Post Number: 79 Registered: 4-2001 |
Float bowl setting: take the top off, flip it upside down and slide a 7/16" drill bit between the lid and the lever. Bend the lever to a sliding fit. This is what the workshop manual tells me and which has been confirmed by Andrew Gibson (once of Crewe and York Motors). One bowl had a 31/64" clearance and the other around 9/16". I would love to know how they got so far from the standard. As to my availability on Sunday, well... It's obvious you've let your NSW RROCA membership lapse, as that's the date of our annual Concours! But it's kind of you to offer. Perhaps the following weekend (if I can get there without being slowed by traffic)? | ||
Norman Geeson Unregistered guest Posted From: 81.98.143.251 |
Chris Unfortunately I am away for 4 days but will respond when I return. Meantime I suggest you find out which carb needles are fitted by removing them from the dashpots. They should be SN, or maybe SP marked on the side of the shank. In any event they must NOT be either SC or SF (Message approved by david_gore) | ||
Martin Cutler Prolific User Username: martin_cutler Post Number: 174 Registered: 7-2007 |
Hi Chris, Yes, very slack, still in BDC though, does that count? :-) Sunday after sounds fine. 0408 808 206. | ||
Chris Gillings Frequent User Username: chrisg Post Number: 80 Registered: 4-2001 |
The carburetter needles are both marked 'SP'. A big thanks goes out to Richard 'Two-Gun' Treacy for his brilliant method of synchronising the points with two timing lights: it works a treat! (I feel I should be wearing a Stetson whilst doing it, though.) I'm starting to suspect the coil(s) and will experiment tomorrow with what Repco has offered as a Lucas B12 replacement. I've found widespread agreement that using a negative-wound coil in a positive-earth system is not going to pose a problem. Voltage across the coil is only 11.5v so maybe the feed cabling needs checking. (The battery is A-OK and is normally on a maintenance trickle-feed charger so that's not giving low voltage.) I removed the distributor rotor and cleaned it out: there's an odd little carbon bridge inside it which has a resistance of 6.5k ohms. It looks like a tiny cartridge fuse. Can anyone shed any light on this? I've all but given up on advice from auto-electricians because it seems all they have to deal with now is plug-in electronics, so they've forgotten all about our type of ignitions. Would you believe that no-one even knows what condensers are rated at? I show people the original 0.25Mf condenser and just get blank looks. | ||
Chris Gillings Frequent User Username: chrisg Post Number: 81 Registered: 4-2001 |
Today I installed new copper core HT leads and a new coil. The FuelMiser CIC32R coil seemed to be the closest replacement for a Lucas B12. I chose the 'needs external resistor' (R) coil based on the discovery of the 6k ohm carbon resistor in the distributor rotor. The new parts resulted in a slightly less yellow reading in the Colortune at idle but still not what I believe to be ideal. To at least get the same colours on cylinders 2 and 5 I have set the front (123) carburetter still on full lean and the rear (456) on five flats from lean. Plug fouling has been reduced but not eliminated. I still get popping from the exhaust at idle and what looks like intermittent spark, though less frequent than before. The popping goes away altogether under mild or heavy load: like when I'm driving very slowly along my driveway. At idle the intake vacuum gauge showed a steady 18" Hg but upon returning from a suburban run of about ten km the vacuum gauge now flickers rapidly between 17" and 19" Hg at idle. It settles down to 18" as RPMs increase past 1500. My (Dixco) vacuum gauge guide offers two diagnoses for such flickering. The first is 'Faulty Carburetor Adjustment' but twiddling the mixtures up and down several flats doesn't make a difference. The second diagnosis is 'Vibrates while idling - steadys [sic] as engine speed is increased: Valve guides are worn', which I can readily believe. I am now very interested in learning more about Richard Treacy's in-situ valve guide replacement technique. I am not in any position to take the head off this old girl! | ||
Paul Yorke Grand Master Username: paul_yorke Post Number: 812 Registered: 6-2006 |
Have you checked tappet gaps? Any too quiet. Are you missing a spark , or are you getting a spark but the cylinder is not firing? Tried a new condenser? any wear in distributor spindle bushes? Try bridging out the resistor in the rotor arm & make sure the carbon stick is tight. Usually a coil that 'needs external resistor' refers to a ballast resistor on the low tension side of the coil. (cuts voltage to about 9v when running, but by-passes the resister when cranking the engine). Depending on use, the carburettor needles can wear in different areas. So it may be worn where the needle sits when the engine is idling but be unworn further down. The jet's wear affects the whole range but will be less noticeable at higher revs. Rich / weak lever going off all the way on both carbs? Air filter cleaned and oiled? | ||
Chris Gillings Frequent User Username: chrisg Post Number: 82 Registered: 4-2001 |
Have you checked tappet gaps? Any too quiet. I haven't checked that. I'm not that clever (or desperate) enough yet. Are you missing a spark , or are you getting a spark but the cylinder is not firing? Good question. Attaching a timing light I see regular spark so I guess it's a firing failure. Tried a new condenser? If I knew what to use I would. No-one seems to know what to use. any wear in distributor spindle bushes? I have no idea how to check that. Try bridging out the resistor in the rotor arm & make sure the carbon stick is tight. I tried that (with a rod of soft iron) and it makes no difference that I can notice. Usually a coil that 'needs external resistor' refers to a ballast resistor on the low tension side of the coil. (cuts voltage to about 9v when running, but by-passes the resister when cranking the engine). So I have the wrong coil? It does run quite hot. Depending on use, the carburettor needles can wear in different areas. I can't tell if they're excessively worn. Here are some photos. Front  Rear 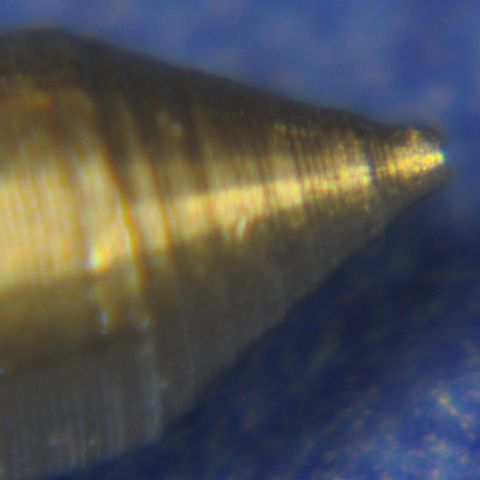 Rich / weak lever going off all the way on both carbs? As far as I can tell, yes. Air filter cleaned and oiled? I can't see how that would help: it's the original wire mesh and would probably let mosquitoes through! | ||
Paul Yorke Grand Master Username: paul_yorke Post Number: 813 Registered: 6-2006 |
Have you checked tappet gaps? Any too quiet. I haven't checked that. I'm not that clever (or desperate) enough yet. Are you missing a spark , or are you getting a spark but the cylinder is not firing? Good question. Attaching a timing light I see regular spark so I guess it's a firing failure. Have you tried the tining light on all cylinders? Tried a new condenser? Buy any for the time being, just as a test. As long as you can connect it up it should be fine. If I knew what to use I would. No-one seems to know what to use. any wear in distributor spindle bushes? I have no idea how to check that. Grab and try to move it in all directions. Try bridging out the resistor in the rotor arm & make sure the carbon stick is tight. I tried that (with a rod of soft iron) and it makes no difference that I can notice. Usually a coil that 'needs external resistor' refers to a ballast resistor on the low tension side of the coil. (cuts voltage to about 9v when running, but by-passes the resister when cranking the engine). So I have the wrong coil? It does run quite hot. It would run hot a 12v. so sounds like it  Depending on use, the carburettor needles can wear in different areas. I can't tell if they're excessively worn. Here are some photos. The tips do nothing, as the piston rise up the tapered needle increases the gap between the needle and jet. Adjusting the mixture jet raises and lowers the jet on the needle which changes the gap. Larger gap, more fuel. Tiny adjustments make big changes in mixture. If the sides of the needle or jets are worn, then richer mixtures, Have you checked for air leaks including heater taps etc? (this would normally weaken though) | ||
Mark Taxis Frequent User Username: mark_taxis Post Number: 61 Registered: 4-2007 |
I am following this thread with interest. My Mk 6 special has always has a slightly uneven idle, more like an intermittent misfire. Last year I installed a new engine (4.5l) and the same symptoms are present. I used the manifolds from the old engine, the distributor has been rebuilt, new plug leads and caps installed, together with a new coil. I have to conclude therefore that the problem lies with the fuel or the vehicle electrics. I have not checked for the correct needles, nor have I checked the fuel levels in the carburetor bowls , I will do this next time I am home. | ||
Martin Cutler Prolific User Username: martin_cutler Post Number: 175 Registered: 7-2007 |
Hi Chris, Good to talk to you on sunday. I will be trying the "two guns"technique on saturday arvo, so will report any findings. Checking the inlet tappet clearances is fairly easy, checking the exhaust clearances is a little harder, but nothing that can't be done at home. Have you got your vacuum gauge set up on the tube that was originally designed to run the windscreen washers? Cheers Marty | ||
Norman Geeson Unregistered guest Posted From: 81.98.141.215 |
Part 1 Chris Sorry for the delay in returning to the problem, I have been experiencing problems transmitting the reply, so I have now split it into three parts. I see that you have tried out a few ideas to overcome your troubles. Although it is hard to accomplish long distant diagnosis I will offer you a few ideas that may help, and I have experienced each and every one on MKVI 4.25 or 4.5 engines at some point. With odd exceptions I think you may have covered most of the other likely troubles and I apologise for this long spiel. Firstly, I would renew the rotor arm and fit one without the radio resistance. R-R used both types and the solid rotor is common to the English Vauxhall 4 cylinder engines fitted to the Vauxhall Viva HA, Vauxhall Chevette and Bedford HA van, if that helps. Both these rotors types do fail especially when they get hot and of course the resister carbon is subject to centrifugal force. Although the ignition coils do get hot it is usually because they do not have enough resistance, the original ones were over 4 ohms, nearly impossible to obtain today. It is possible you have more than one fault and I suggest you get the fuel side correct because you seem to have disturbed the settings in any event. Normally I would initially select the ignition system. First, ensure that the windscreen wiper vacuum connection at the front end of the inlet manifold is disconnected and blanked off, don�t use it for any sound vacuum gauge readings. Run a mirror over the underside of each of the four inlet connections between the manifold and cylinder head. Check that each gasket is in place and that one has not been dislodged. These gaskets get displaced when owners are trying to replace the two nuts on the centre water connection and they often fall downwards months after the event. Either fault will give you an air leak, sometimes on an intermittent basis when the gaskets start to move out of position under the influence of heating cycles. Next remove the air intake horn that is the casting that bolts to the carburettor intakes. Disconnect the small throttle link running from this casting pivot to the main throttle shaft. Make a temporary bracket to support the throttle return spring. Remove the carburettor dashpots and pistons, whilst doing so check that each of the dashpot dampers is identical to the other. Look through the dashpot apertures at the throttle disks, place a finger lightly on each and work the throttle to check they are operating in unison and that one of the connecting couplings has not slipped. Adjust the throttle stop so you can just place a 0.004 inch narrow feeler gauge under the front throttle disk. This is the throttle adjacent to the front throttle return spring. In the case of very early Bentley MVI the return spring is on the rear carburettor, and the situation will need reversing. Once the 0.004 inch feeler gauge is in position on the front carburettor, then check, using a very narrow thin feeler that the rear throttle disk has actually fully closed. The front and rear throttle disks will need this positioning variance at the idle condition too combat throttle shaft torque/positioning under the influence of a single spring acting against only one throttle stop. Setting this position as described will ensure synchronisation of the throttle positions under actual running conditions and it will be seen that as soon as the 0.004 inch feeler is removed the front throttle will close. Adjust the throttle shaft torque adjuster just forward of the rear throttle to meet the specified condition. (Message approved by david_gore) | ||
Norman Geeson Unregistered guest Posted From: 81.98.141.215 |
Part 2 Chris You confirm both needles as �SP�, now make sure their shoulders are level with the inner section of the dashpot piston. Invert each dashpot and with the piston at the open end check that the time for it to drop to the bottom of the dash pot is identical in the case of each unit. Disconnect the choke linkages at each jet base, note there is no choke return spring on the front carburettor. Adjust the jets to the fully up (weak position) replace the pistons and dashpots. Through the intake aperture raise each dashpot with a screwdriver and let it drop. Each should fall to the bridge in the same time span, and each should give an audible click as it contacts the bridge. If you do not get an audible click at the lower end then that particular carburettor jet needs re-centring (see manual). Remove the dashpots and pistons again, using an electronic vernier set each jet 0.035 inch to 0.037 inch down from the jet bridge. Check the measurement a number of times; you will not need to alter this more than 1/4 of one turn on any of these engines if they are otherwise in good condition. Moral here, do NOT play with this dimension, if the engine runs rough the problem is elsewhere. At this position, with throttle adjustment, the engine should idle between 420 rpm and 485 rpm, adjust throttle stop to suit. Forget the finer points like fuel levels for a while these carburettors are more tolerant of levels than any other carburettor. Doubt that...... so how do you think they manage to idle on an incline with one float bowl forward of the front carburettor and one bowl rear of the rear carburettor? Some fuel level variance eh! Top up the dashpots, with ATF if you must. Set the choke steering wheel hand control lever 3 notches from fully closed, couple the front carburettor choke linkage and then the rear making sure the front one is pushing the jet fork hard up against the carburettor bottom and the rear one is returning fully closed under spring pressure. Note this positioning ensures that the chokes stay closed under all operating conditions. Replace the carburettor intake horn and adjust the throttle linkage to take out the slack. Remove the float bowl retaining bolt and check to see that each float lid is fitted with the special �three cut� out fibre washers so that the chamber can breathe correctly. Remove the floats and check them by shaking to ensure that they are not full of fuel, caused by a leaking joint. Unless you have carburettor gasket leaks on the flanges, or an internal manifold crack into the water jacket, these units should now operate correctly. Next, remove the rocker cover and check each outer valve spring to ensure it is not broken; they usually break about one coil from their ends and normally at the top. Set the inlet tappets, I find the best way is to set them all 0.002 inch cold. Carry out this exercise by turning the engine on the handle until each valve is fully open then rotate the engine one full turn and then the tappet will be exactly on the back of the cam. (Message approved by david_gore) | ||
Norman Geeson Unregistered guest Posted From: 81.98.141.215 |
Part 3 Chris I would suggest you at least remove the side covers, (possible on a MKVI without removing the manifolds, not on an R type) and check the exhaust tappets. You will at the least know they have clearance. Yes, I am aware you have checked compression pressures, and you will get good pressures even when the top rings are missing! Whilst the side covers are removed use a mirror and ensure that the later bottom valve spring washer is fitted. These late bottom washers are a mandatory fitment if late type exhaust springs have been fitted, the underside of this late washer is flat with no recesses and the collet ends come about level with the bottom of the washer. On the early type the collets are recessed quite considerably. Many of these M, N and P series Bentley MKVI do not have the correct bottom washers. The trouble arose as the later springs were issued automatically without bottom washers when the springs were listed, the washers were not. When the springs were eventually listed in the R type parts manual only the washers were still not linked as a mandatory item. If the correct bottom washers are not fitted when new exhaust springs are fitted the valves will tend to lift off their seats when cylinder gas loads are low, that is at idle and on overrun. This also happens when the intake valve springs are broken. The exhaust valve lift off will depend on how much spring tension is applied, this in turn depends on how low the valve sits on the seat. Symptoms of incorrect springs can normally be diagnosed by what appears to be tappet noise / rattle at idle, intake noise through the air cleaner on overrun cause by a pressure wave developing through the intake system, and difficulty in obtaining a good idle. The last thing I would suggest, I am sure you want me to finish, is the possibility of internal water leaks. These normally take the form of head gasket coolant leaks or worse fine cracks around the spark plug hole. They can be difficult to locate, even by cylinder pressure testing and often open up right after the engine is fired up. The pressure and slight heat being enough to promote the leak and the amount of water loss is such that it is not detectable. I hope some of the points may be helpful. (Message approved by david_gore) | ||
norman geeson Unregistered guest Posted From: 81.98.88.161 |
Chris Reading through this thread again, I see there are some doubts about the condenser rating on the MKVI. It might help to know the original rating was 0.18 - 0.25 MFD, the Delco part number was DRH 8850, the T.M.C part number was S 112670 and the R-R part no RD 5881, although the R-R part RD 7774 is rated the same it would need a small bracket to attach to the distributor. I understand that Ristes of Nottingham, England have recently re-manufactured the parts. I trust the information may be useful to someone. (Message approved by david_gore) | ||
Martin Cutler Prolific User Username: martin_cutler Post Number: 176 Registered: 7-2007 |
Hi Norman, Very interesting to read your information, thankyou for spending the time to put it together. My M series motor has not been apart. Do you know the spring free length for the exhaust springs. Interesting to read about the valves could float open, that is very likely to be the problem with mine. I have done the tappets a few times over the years, they don't move very much, which is good, but I have never dissassembled the valve springs to check if they had lost their tension. I checked my points synchronisation on saturday, it was fine, pop in the right hand pipe is still there. I have a very long side valve spring compressor, might come in handy! Cheers Marty | ||
Norman Geeson Unregistered guest Posted From: 81.98.88.161 |
Martin/Chris One point I had meant to cover on the MKVI carburettors was the importance of using a RE 7297 fibre washer between the float chambers and overflow pipe. This special internally serrated washer is part AUC 1928 from any S.U agent. If this washer is not used the float chamber breathing is severely restricted. It is frankly better to use two washers glued together on each carburettor and in any event do not over tighten the chamber bolt and crush the washer, so restricting breathing. It will long be forgotten now but originally some of the top bolts and chamber tops were faulty having small cut outs restricting the breathing. There are other points on these particular carburettors but unless you have flooding problems you should have enough data to sort these units. Keep in mind during any carburettor tuning with these engines that exhaust spitting and/or bad idling is often caused by oil. Whilst this is usually down the guides it is far from unknown to be the result of a slightly seized piston, or even complete top and second rings missing. I would be extremely surprised if your � M� series has not been apart, even for a decarbonise. The original exhaust springs on an �M� series Bentley MkVI were RE 3954. They were 2.060 inch long (slight variance here with the bulletin BB217, see later) free length. When in the valve closed position at 1.700 inches the load was 46 lbs +3 -2. In the choc position they were 1.250 inch long approx at a load of 160 lbs -30. These springs had RE 976 bottom washers. The above springs were changed to RE 15959 and only to be used with different style bottom washers. These had a free length of 1.860 inches. In the valve closed position the length is 1.545 inches and the load 51 lbs +3 -2. With the valve fully open the spring length is 1.170 inches and the load 114 lbs +4 -3.These springs were only intended to be used with RE 15960 bottom washers, top washers stay the same. You should be aware that these springs were only fitted to 4.5 ltr engines but I see no reason why the later valve spring and bottom washer could not be fitted to the 4.25 ltr engine. Perhaps it is because at least 15 years ago Crewe had 4950 valve springs in stock for 4.25 ltr engines! Beware of the 4.25 ltr RE 3955 spring having been fitted; this had a free length of 1.940 inches. The spring and bottom washer change over was covered in Bulletin BB 217 on 7th June 1955 shortly after the later spring / washer had been standardised on the Siam engine fitted to the Bentley SI / R-R Silver Cloud I. Hope that provides the data you needed on the exhaust springs. One addition small point is that if you are brave enough to take off the exhaust manifold, and run the engine you will quickly see exactly which cylinder(s) are causing your exhaust pop. (Message approved by david_gore) | ||
Martin Cutler Prolific User Username: martin_cutler Post Number: 177 Registered: 7-2007 |
Hi guys, Update on my problem with B256MD. Plug # 1 is fouling after 30-40 miles of driving. Running NGK plugs BP5ES in pots 2-6, and BP4ES in #1. Numbers 2-6 beautiful coffee colour. #1 is dry black soot. Have checked carbs thoroughly, have changed cap, rotor, leads, have new NGK 5K ohm resistor caps, checked these as well, OK. Compression is fine, all within 110 to 120PSI, #1 at 115 PSI. The vacuum pipe for the washer bottle is blocked off. Peering inside the piston crown is dry and sooty, (#3 is a bit oily). I have not been able to pull the exhaust valve springs yet to check their free length, but have checked valve clearances, and they are fine. Motor has 127000 miles on it, believe not to have been apart, I have owned it since 99000 miles. I have not changed condensor, points or coil, but I reason that if these where faulty I would be getting different symptoms. I am starting to think I may have an obstruction in the inlet manifold? Once the plug fouls, no amount of cleaning will get it running again, the plug is "poisoned". I am running on premium unleaded. Cheers Marty | ||
Martin Cutler Prolific User Username: martin_cutler Post Number: 178 Registered: 7-2007 |
Hi guys, Update on B256MD. Just swapped out the inlet valve springs on #1 piston, no change. Will be swapping out the exhaust springs next, will keep you posted. Cheers Marty | ||
norman geeson Unregistered guest Posted From: 81.98.138.227 |
Martin I note your comment about the inlet manifold obstruction. Many years ago I came across one of these engines with a massive chunk of carbon broken away from the inlet valve head. This caused idling problems. Blockages caused by old rags sucked down the intake usually result in low power and bad running. I have come across many exhaust blockages in the main and rear silencers, including two occasions on my own car. The last time it would run quite well but engine speed dropped down until the engine stopped after 4 minutes of idle, however before that it would not tolerate certain plugs, they would foul on a particular cylinder. Reading your last two listings, two more suggestions for you. Bent push rod on No.1 cylinder OR Inlet cam lobe worn down on No 1 inlet. The inlet lobe normally wears on No 5 but the company certainly had many on other cylinders. Worth checking the rocker lift on No 1 compared with other cylinders? (Message approved by david_gore) | ||
Martin Cutler Prolific User Username: martin_cutler Post Number: 179 Registered: 7-2007 |
Hi Norman, Have the exhaust spring out on the bench, quite a different design to the replacement ones I have. The spring is "progressive", ie, more tightly bound at the top end. The top washers are different, as the diameter of the spring is different. The free length of the old spring is 1.93", the free length of the replacement is 1.91". I cannot find a part number on the springs, but the new bottom washer has RE 5892 engraved on it. The design of the bottom washer places the collets further away from the spring, efectively lengthening it. I will put the new spring in just to see what change if any it makes. Thanks for the info on the pushrod, I will check this as well. Would a worn cam lobe foul a plug, or just reduce the power? I would have thought a worn lobe equals smaller lift equals smaller delivery of mixture. Cheers Marty | ||
Martin Cutler Prolific User Username: martin_cutler Post Number: 180 Registered: 7-2007 |
Old spring is parallel, new spring is conical. The old top washer fits into the recess in the block, the new washer fits over the hole, altering the length of the spring when it is fitted. We shall see........ | ||
Martin Cutler Prolific User Username: martin_cutler Post Number: 181 Registered: 7-2007 |
New exhaust spring in, still popping....... Will leave it in for a while and see if anything changes after driving a few miles. | ||
Martin Cutler Prolific User Username: martin_cutler Post Number: 182 Registered: 7-2007 |
The exhaust manifold at # 1 is running around 60 degrees C lower temperature than the other 5 ports. Spark plug still sooting up straight away. What would cause # 1 cylinder to burn cooler? Too much mixture. Why is # 1 Cylinder getting more mixture than #'s 2 & 3 that are fed from the same carby? What about a big dose of carby cleaner down the inlet manifold? I rechecked the compressions with another gauge, still all OK. All too much for one day, retiring to the fridge! Marty | ||
Patrick Lockyer. Grand Master Username: pat_lockyer Post Number: 841 Registered: 9-2004 |
Martin have not read all the postings, have you checked the dwell angle,and to see how much variation is present. A dial guage would help to use on the valve lift on number one valves. Running cold on the front nuber one cylinder can on some cars be down to not haveing a thermostat fitted,the main of the water flow then cirulates round the pump area with the cooling fan putting air to that area as well. Will read up and get back to you when all the festive jollys have taken place. Happy new year to you all. | ||
norman geeson Unregistered guest Posted From: 81.98.138.227 |
Martin Re-read my post of 10th November on the data for springs and washers.Your new bottom washer RE 5892 is clearly wrong, as it was intended for late 4.25 engines only. I also suspect that your replacement springs may also be wrong.Whilst this may not be a cure it is important not to cause a further problem.If the exhaust springs are to be changed to RE15959 the bottom washers MUST be RE15960. The only times I have witnessed No 1 cylinder exhaust running cool is when a fault is present in the cooling circuit.Either by blockage in the water pump output block gallery, worn or loose water pump rotor, or the water gallery has been pushed rearwards away from its front location.These faults result in the main water pump output being directed to No 1 cylinder combustion chamber exhaust deck whilst other cylinders are under cooled. A worn inlet cam will result in all sorts of odd problems, particularly if you also have another fault like overheating. (Message approved by david_gore) | ||
Martin Cutler Prolific User Username: martin_cutler Post Number: 183 Registered: 7-2007 |
Hi Norman, I reused the original bottom washer with the new spring, but as you said, I don't want to create another issue. Now that I have changed the spring with no result, I will change it back to the original spring. The car is running a thermostat which is operating correctly, car will warm to 75 degrees within a couple of minutes and stay there. Sydney summer has been cool, and I have not needed the thermo fan yet, engine is running nicely these days on the temperature front. The temperature readings I took with the laser thermometer where with the pointer in the centre of the exhaust port of each cylinder, not on the block or head. The temp rose quite quickly from a starting point of around 100, (motor was warm), to around 260 - 270 deg for each port, except # 1 which was around 200 deg. I will check block temperature at different points to see if I have a water flow issue, but I am fairly confident I have a very healthy cooling system after years of diligent work. A cylinder running cooler exhaust temps from my experience of motorcycle racing is only effected by one thing, the amount of mixture entering the cylinder. This is the same for light aircraft. I do appreciate everyones input into this problem. Cheers Martin | ||
Patrick Lockyer. Grand Master Username: pat_lockyer Post Number: 842 Registered: 9-2004 |
Martin could you do a quick test, if you could take out and use a clean plug with the plug gap reduced to 18thou. Then use a clothes peg or something on the plug so you can position the plug lead 3/16th away from the plug centre electrode. Run up the engine..... Or holding the lead away will do and just see if the miss fire popping stops also if the spark jumping becomes intermittent if the miss fire is still there. David, I cannot correct the "e" in use above[preview] have we got a bug in the works. Hi Pat, no bug - you have to scroll down from the preview screen to the text box below to edit then refresh preview and submit message. If you do not refresh the preview, your original unedited message will appear when you post/save message. Have corrected your typos. Regards David | ||
Martin Cutler Prolific User Username: martin_cutler Post Number: 184 Registered: 7-2007 |
Hi guys, Thanks Phil S for your phone call, and the encouragement. I changed out the rotor, no difference. Put back the original exhaust valve last night, and tonight I have dropped the sump and looked at the cam, was a good excuse to drop the sump as I had not done it to this car. Sump and pickup where fairly clean, gets oil changes every 1000 miles or so. Sump was leaking at the timing case joint, so that is now fixed. I have a set of spark plug testers, can adjust the gap that the spark jumps, jumping good. Fitted another type of spark tester that fires a little light when connected between lead and plug, all the colours where the same. I have a rotor button without the carbon suppressor - fit that? Next idea is?............. | ||
Patrick Lockyer. Grand Master Username: pat_lockyer Post Number: 843 Registered: 9-2004 |
Thanks David for the corrections please do at any time with my spelling! Martin, test dwell variation, what is it? then>>>>>>>>>>>to be continued. | ||
Patrick Lockyer. Grand Master Username: pat_lockyer Post Number: 845 Registered: 9-2004 |
Ok lets assume the dwell is in the working spec 45 + or - 1 degree and all things are correct and the front carb float level is correct. Looking at the design of the inlet system with a cold to warm engine there are failings IMO. First we have the air silencer cleaner positioned with the intake to the front of the engine where all the cold air rushes around [fan and grille area]. Also the water pump making number one cylinder run the coolest. Cross flow head, exhaust manifold on other side. Twin carbs, front number one inlet positioned to get more of the cold air. This IMO is the problem. What is needed is a temporary ducting from the rear exhaust manifold to the inlet silencer air cleaner to collect warm air. This will stop the start of the plug fouling if this is the problem at start up. Well worth a try as winter is on its way. | ||
Patrick Lockyer. Grand Master Username: pat_lockyer Post Number: 847 Registered: 9-2004 |
And just to add, having inlet ovh and exhaust sv is another sure problem with cooler running for no 1 cylinder with failings with the no 1 inlet set up. |