| Author | Message | ||
Geoff Wootton Grand Master Username: dounraey Post Number: 933 Registered: 5-2012 |
Does anyone know how to check/replace the coolant level warning bulb on an SY1 (74 SRX18501). I have checked the usual sources (Tee-one, workshop manual and handbook) but the information is not specific enough. I have removed the veneered panel and the two screws that affix the warning bulb unit to the dashboard, but it is rigid. I thought I might be able to remove the front cover, or maybe the entire unit to get access to the bulbs. I really don't want to force anything. 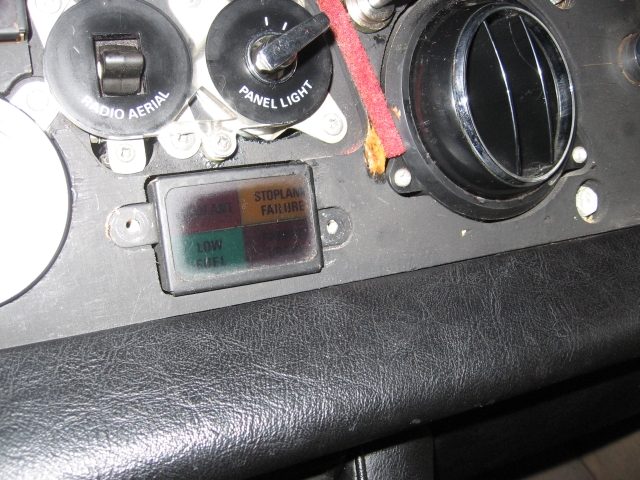 I realize the reason for this bulbs failure to illuminate is probably due to a faulty coolant amplifier, but I wanted to check it first, as per the advice in Brian's paper. Geoff | ||
Brian Vogel Grand Master Username: guyslp Post Number: 1629 Registered: 6-2009 |
Geoff, Remember that the coolant level warning lamp is odd in that it's arranged to come on when the circuit that switches it is open (no continuity due to the probes not being submerged) rather than closed. The amplifier is because the current is so very small when both probes are submerged. The simplest "first test" is to remove one of the wires attached to either one of the probes on the header tank and see if your lamp illuminates. If you have a faulty amplifier the usual state is that the lamp stays constantly illuminated rather than constantly extinguished since it's the amplifier's job to detect that tiny bit of current and signal the lamp itself. It could fail otherwise, too, but that is less common based upon historical reports. I seem to remember that there is a lamp test button on at least some of the SY1 cars. Does it illuminate when that's pressed or you do whatever it is that your model year requires for the warning lamp test? I ask only because if the bulb itself is dead during a lamp test you'll have to replace it no matter what. Brian | ||
Geoff Wootton Grand Master Username: dounraey Post Number: 934 Registered: 5-2012 |
Hi Brian I have just carried out the two tests you've just described. On disconnecting one of the wires on the coolant probe and turning the ignition on, the bulb did not illuminate. When I carry out the lamp test it does not illuminate either. Lamp test on my car is to move the gear selector to R or D and turn the ignition fully on, as if to turn the starter motor. All bulbs illuminate except for the coolant level bulb. I remember reading earlier that the lamp test is also an amplifier test. i.e. if the lamp does not illuminate, it could be either the bulb or the amplifier. I can't remember however whether this information was speculative. I'm removing the top roll in any case in order to remove the speedo cable ready for replacement. I will check out whether the lamp cluster is fixed at the back, before resorting to chisel and lump hammer to remove it. If I can get at the bulb I will be able to rule it out and concentrate on the amplifier. Geoff | ||
Brian Vogel Grand Master Username: guyslp Post Number: 1630 Registered: 6-2009 |
Geoff, Just based on your test results I suspect the lamp is burned out. When you remove the top roll you could always jumper the correct slots on the receptacle for the amplifier in an attempt to illuminate the lamp before hacking at the dash. After all, you'd just be completing the same circuit that the amplifier does. I'd have to look at my own paper again to remember which pins are which. Thank heavens I recorded this stuff for posterity! ;-) Brian | ||
Geoff Wootton Grand Master Username: dounraey Post Number: 935 Registered: 5-2012 |
Hi Brian I took some pics to see if I could see the other side of the warning lamp cluster, but it is buried beneath the aerial and dash lamp switch. I will see if I can gently free the unit, as it certainly looks like it should just pull out. It would be logical for this to happen, rather than having to dismantle half the interior of the car, just to change a bulb. Although, maybe not, this is a Rolls Royce we are talking about. Failing that, I will take up your suggestion of jumping the wires from the amplifier, however as you said, it is looking at this stage to be the bulb (or both), so I will probably need to remove it anyway. Thanks for your help (and also for the amplifier doc). Geoff | ||
Robert Noel Reddington Grand Master Username: bob_uk Post Number: 457 Registered: 5-2015 |
The arms where the screws go have probably glued themselves via the black matt paint to the dash. Suggest gently lever the arms. WD40 might dissolve the "bond". My coolant probe wires fell off. So I have fitted male spades to the 6BA terminals. And female spades with dainty boots. The rubber cap which is from a Japanese starter motor has split. So I have sourced a bit of plastic out of which I will turn on the lathe into a cap which will be glued on with silicon. | ||
Bob Reynolds Grand Master Username: bobreynolds Post Number: 329 Registered: 8-2012 |
The lugs on the metal cover are just digging into the wood. Just lever them out carefully. The recesses in the wood are not cut out fully. The warning lamp test circuit does not test the coolant lamp bulb directly. What it does is to disconnect one of the coolant probes from the amplifier (the other probe is earthed) so that the bulb comes on. So this tests the complete coolant probe circuit. If the bulb does not come on during the test, the fault could be anywhere in the coolant probe circuit (most likely the amplifier). Test the bulb by swapping it with another one. | ||
Robert Noel Reddington Grand Master Username: bob_uk Post Number: 459 Registered: 5-2015 |
Bob. A handy bit of onfo that the test button disconnects one probe leg thus testing the whole circuit. Typical Rolls Royce refinement. | ||
David Gore Moderator Username: david_gore Post Number: 1729 Registered: 4-2003 |
Bob, Re using silicon sealant on electrical components - during my time in the pump industry, the cable splices for multi-stage submersible pumps were water-proofed by filling the heat shrink sleeves with silicon sealant before heating to shrink them onto the splices then another larger and longer sleeve was placed over the splice, filled with sealant and shrunk on. We regularly encountered complaints about failed splices and these invariably involved the use of sealants that generated acetic acid during the curing process instead of the specified neutral cure sealant. I think certain people are addicted to the smell of vinegar............ The acetic acid would corrode the actual splice which would fail completely or burn out under load from its inability to carry the load current when the pump was started. Just a precautionary "heads up"for those using silicon sealants on electrical connections. | ||
Robert Noel Reddington Grand Master Username: bob_uk Post Number: 461 Registered: 5-2015 |
Dave. The plug to the gearbox motor under the car is silicon packed. One of my wires inside the plug broke. I wonder why because I thought the silicon would hold the wire steady and most likely any breaks would be outside of the plug. Now I know why, the silicon rotted the copper wire. Vinegar will damage copper if left for years. I shall redesign the cap so its a tight push fit over the probe boss. | ||
Geoff Wootton Grand Master Username: dounraey Post Number: 936 Registered: 5-2012 |
Many thanks for all the help. I will be digging the lamp cluster out tomorrow. One thing of real interest that has dropped out from this discussion (and previous reading of other threads) is there should be a rubber boot that covers the terminals on the probe. I always thought it looked incomplete on my car - one will be ordered along with the new speedo cable. Geoff | ||
gordon le feuvre Frequent User Username: triumph Post Number: 85 Registered: 7-2012 |
to test the lamp bulbs, turn on ignition DO NOT START ENGINE. Select reverse, hold key over as if starting engine, bulbs should illuminate. if side lights turned on whilst key held over fuel level warning light should dim as well as if night driving. | ||
Hubert Kelly Prolific User Username: h_kelly Post Number: 174 Registered: 3-2012 |
Hi, a few months back, I replaced the hazard warning light switch on my '68 shadow things went well for a time. The old symptoms have reemerged, ie the indicators work perfectly and had done so prior to fitting new switch,but the hazards won't flash they just stay on constantly. Yesterday I managed to get them to work by Turing switch off and on several times. Any advice most welcome Many thanks Hk PS went I say they stay on constantly that is of course with the switch in the on position. | ||
Brian Vogel Grand Master Username: guyslp Post Number: 1692 Registered: 6-2009 |
Hubert, It sounds like your flasher unit has gone bad. See also the thread entitled, Relays, on this forum for a potential other option or two in the wiring for the flashers (among other things). I'd suspect the flasher itself has gone bad first, though, and that's very easy and inexpensive to replace. If your turn signals work you can do a swap of the turn signal flasher for the hazard flasher just to see if that fixes the problem. It's not exactly the same unit, but it works just fine for testing purposes. The only real difference I noticed is the flash rate. If you're really lucky the SY1 cars will use round can flasher units that are as common as dirt rather than the tiny rectangular units that were used in the SY2s and where there's not enough room on the fuseboard to plug in a round can unit. Brian | ||
Hubert Kelly Prolific User Username: h_kelly Post Number: 175 Registered: 3-2012 |
Hi Brian, thanks so much for your advice, the fact each unit has a separate flasher unit explains a lot as I assumed the one flasher unit did both jobs. I have a console in shed from scrapped RR, so hope that flasher unit is good Many thanks Hk | ||
Brian Vogel Grand Master Username: guyslp Post Number: 1693 Registered: 6-2009 |
Hubert, You're quite welcome. Even if the flasher from your "scavenger collection" is dead this is one of those rare instances where a brand new unit will not break the bank. Do report back on whether this leads to a successful fix of your issue or not. Also, if you can, post a photo of the flasher unit once it's in place so that "future generations" will have a visual context of where to look. For stuff like this a simple picture giving the lay of the land is worth a million words and quite a few location diagrams. Brian | ||
Hubert Kelly Prolific User Username: h_kelly Post Number: 176 Registered: 3-2012 |
Hi Brian, I fitted the spare flasher unit to the flip down fuse compartment, it looked pretty new, but not working, just got hot.. so I replaced old one again and she is working ..well for now. Thanks again Brian. I'll keep an eye out for a new on,.. its circular in shape. Hk | ||
Robert Noel Reddington Grand Master Username: bob_uk Post Number: 561 Registered: 5-2015 |
These flasher relays work on load. There is a bimetallic strip. The strip gets hot and bends away opening the contacts. The strip cools and shuts the contacts and so on. If a bulb blows the load is less and the strip won't get hot enough. This is required by law to inform the driver that there is a indicator fault. Modern ones flash fast instead. Hence the rating. The normal unit has 2 x 21 watt bulbs as load and is 42 watts. The hazard one is 4 bulbs and 84 watts or 4 x 21. Ignore the repeaters and dash indicator warning bulbs. The units are often mounted on a sound board which amplifies the click. A bit of a tin can works. These units are quite reliable. A get it going bodge is to add another bulb to increase the load. Also revving engine to get circuit voltage up. | ||
Hubert Kelly Prolific User Username: h_kelly Post Number: 177 Registered: 3-2012 |
Hi Robert, thanks very much for your advice. Hk |