| Author | Message | ||
Robert Howlett Experienced User Username: bobhowlett Post Number: 42 Registered: 9-2010 |
After doing the front end up to stop the "shakes rattles and Rolls"as oil dripping over the bearings bushes disolved them over 42 years..Many thanks to Mr Bill Corburn for the great Tee-One subject on front spring removal.I must admit, this was one of the simplest jobs l've done. But now its time to do the rear.Has any one got an idea of the required tools?Im told that only "One" spring commpresser tool is needed' is it a simple or very difficult job.I belive the placement of the lifting jacks is imperative. I'm planning to get new rear springs from Bob Chapman. cheers rob 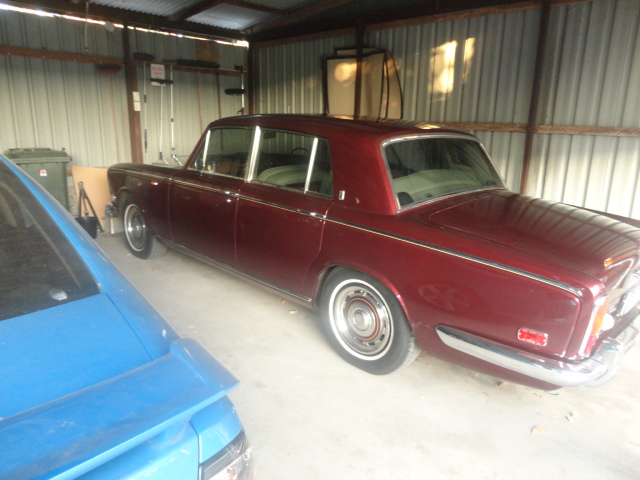 | ||
Hubert Kelly Experienced User Username: h_kelly Post Number: 23 Registered: 3-2012 |
Hi Robert I tried to remove the rear spring from a 1973 shadow this year. This is my translation of the manual. The rear drive's need to be dislocated in order to drop the swing arm enough to remove the spring. The steel retainer strap also needs to be removed (this is attached to the body preventing swing arm dropping to low). The manual mentions care with the drives not to let them hang down while carrying out the wok. Now the problem I found was the shock got in way of removing spring. I removed the "cup" holding the lower end of the spring to the swing arm. The big problem I had was no lift, I was working with a 3 tonne jack from ground. I eventually abandoned ship. I got this info on the site in the manual section. Im sure someone else will enlighten you ever more. Car looks fab. hk | ||
Brian Vogel Frequent User Username: guyslp Post Number: 93 Registered: 6-2009 |
I attempted this job (and still have my replacement springs in their original box) several years back and also abandoned ship. In my case the b�te noire was getting the height control rams to come out of the car. Perhaps I was too gentle, but I doubt it. I had a lift available to do this job, but when I couldn't get the rams to budge that pretty much precluded removing the shocks, which must be done. In the end I used rubber coil spring spacers, two per spring if memory serves, to adjust the existing springs to get the correct standing height. They worked perfectly and the car still stands at the correct height in the rear. Brian | ||
Robert Howlett Experienced User Username: bobhowlett Post Number: 43 Registered: 9-2010 |
I was all set to jack her up and have a go at removing the springs.I'm sure glad I asked for advise first before attempting the job.It might be prudent to leave it alone as the hight control works and dosn't leak.I do like the idea of the rubber spacers I'll try a set of those, didn't know spacers even existed. many thanks rob | ||
Barry Brears Prolific User Username: turney_2009 Post Number: 120 Registered: 8-2009 |
I have recently replaced my rear springs on my T1 Bentley bought from Bob Chapman.Crawling around on my back using a jack' outside in the cold wasn't my idea of fun so took it along to a well known suspension workshop and got them to do the job 3 hours later I was back in my car with a smile on my face. NUFF SAID!!!!! | ||
Jan Forrest Grand Master Username: got_one Post Number: 384 Registered: 1-2008 |
I did the rear springs on my Shadow 1 a couple of years ago and the basic advice is much as has been written already and also can be found somewhere in the T-One Topics. If all else fails ... RTFM! I wouldn't say that it's simple, but I managed the job with just a standard set of tools, a pair of car ramps and a 2-tonne hydraulic trolley jack. The first side took a couple of days. The second side was quicker at a single day. Returning to the first side (cocked it up on the first go, but the other side showed me where I went wrong) I put it right in a couple of hours! Just be carefull with the inner Detroit joints as it's all too easy to have the slippers and needle rollers (and any remaing HP oil) end up all over the floor! DO NOT ask how I know this  Ps. Like others, I 'cheated' by not replacing the springs, but simply added a couple of thick rubber 'spring assistors' (1 each at top & bottom) to take up the loss of ride height. Oddly I found that all the bottom steel spacers as fitted at the factory had rusted away completely, but the fabric liners they sat on were pristine!  HUH? HUH? | ||
Bill Coburn Moderator Username: bill_coburn Post Number: 1430 Registered: 4-2003 |
Perhaps those interested might like to look at various issues of Tee One Topics in the Technical Library and a few other web sites! The ones that come to mind are issues 11, 12, 34, 71 and 83. The spring removal is not difficult it does require thinking ahead including the 'what ifs' and unlike the front units apart from having the car fall on you because the short kitchen stools collapsed while holding up the car or you were greatly inebriated or arrested for foul language at the behest of neighbours, it really is plain sailing. | ||
Robert Howlett Experienced User Username: bobhowlett Post Number: 44 Registered: 9-2010 |
Thanks for the great posts gentalmen.I'll have a go at the spring removal.I'll take my decanter filled with 12 year old scotch to give me Inspiration and courage. cheers rob  | ||
Bill Coburn Moderator Username: bill_coburn Post Number: 1431 Registered: 4-2003 |
Robert/ Sorry but you may need a bigger decanter. A suitable 4 fingers of the liquor is a marvellous diagnostic tool applied to the throat while sitting down, breathing carefully and resisting the temptation to hurl equipment!! Co-incidentally I have a Shadow identical in appearance to yours that has an articulated rear end in that after traversing a bump the noises from the rear suggest mechanical action and reaction normally only seen in Hollywood gangster movies! Some years ago I attempted to remove the rear levelling rams as step one to replacing the shock absorbers, all my efforts were in vain including a reversion to prayer, renting my clothes and contemplating conflagration.. The last two days having approached the task calmly, I have unbolted the ram bodies and subjected the piston and spring holder threads to incredable heat from a heat gun that is cabable I am told of roasting a haunch of venison in time for dinner. Followed that up with copious doses of WD40 the idea being that as the assembly cooled it contracted and 'sucked' the fluid into its corroded entrails. The problem is that though you may get a marvellous purchase on the notched rim of the ram piston with an appropriate 'C' spanner there is little room to turn the spanner given that you will need handle extensions but worse, the spring holder into which the piston screws will turn round as you turn your spanner. Where I live there is a man and his truck full of goodies who could unbolt one of the propellers on the Titanic while it was sinking and it is he who is going to be consulted. Piston bases are exposed, are very clean absolutely marinated in penetrant and perhaps his impact driver will be the answer to my prayers! Further reports will be issued. PS Robert I just noticed from the picture that the decanter is apparently empty! No doubt a warming up tipple!!! | ||
Robert Howlett Experienced User Username: bobhowlett Post Number: 45 Registered: 9-2010 |
Bill.. you hit the nail on the head,most times l have the the decanter sitting on the wheelie bin. I look up and thats what keep's me going,. I'm always worried that the persaueder thats needed, you know the one with four foot handle?then and she decides havining her fat backside slip on the jacks and chrush my face.Hense the scotch.Lots of WD40 will help as will lots of heat cheers rob | ||
Brian Vogel Frequent User Username: guyslp Post Number: 94 Registered: 6-2009 |
Bill, Please do issue further reports whether you're successful or not. You sound like you're at precisely the stage where I had been when I finally had enough, though I hadn't gone the route of heating/cooling. The use of a zip gun (AKA air impact chisel) on the "teeth" of the bits that hold the ram in did not do the trick, nor did application of blows with a hammer (though I now think I was too gentle and should have used a larger hammer. It seems that my 3-lb hammer should be renamed "the persuader" given its history of success. but I failed to employ it then). Brian | ||
Bill Coburn Moderator Username: bill_coburn Post Number: 1432 Registered: 4-2003 |
Brian / I certainly will and at the moment I am waiting for my laconic slightly shy very helpful screw man. I don't bother to explain the last term as it usually gets peoples' full attention! The problem as I see it is locking the spring mount so that when you belt, hammer or zip the piston flange the whole caboodle doesn't simply spring away and back again. To do this I have found a chain wrench which will go around the spring mount and lock. This can be 'counter screwed 'with standard spanners. My guess bit is does the chain wrench fit in the tunnel where the spring mount lives. If all else fails it is a case of cutting the piston and replacing it from another from a wrecker! This idea is not original and has been done as a last resort by a number of 'professionals'!! Stand by for further bulletins. | ||
Bill Coburn Moderator Username: bill_coburn Post Number: 1433 Registered: 4-2003 |
Robert/ I just read your note again about replacing the springs. If that is all you want you should be able to remove them with the shocks still in place. I use a large trolley jack. They are Australian made and very serviceable. The aim is to lift the car until it is about waist high at the bumper. With the limiting strap removed, the outer universal axle joint disonnected and tied up (tape the bearing caps if necessary) the bottom of the shocker can be released and the cone mount for it removed also. You should then be able to push the whole control arm hard down and the spring can be lifted out! The Chapman springs are excellent and among other things improve the cornering. They apparently have one more coil that the original. Back to lifting the car. This is the most dangerous bit and really requires focussing. First the front wheels have to be chocked. Then get yourself at least two heavy duty jack stands (I use 6 ton units). Buy yourself a full size trolley jack and have slabs of hardwood to put on the jack head. Jack under the differential as high as you can go. Put jack stands under the sills as far back as possible otherwise the car seesaws and you lose working height at the back. Check that the front wheels are still firmly chocked, lower the car onto the jack stands. Lower the jack put a block or blocks of wood on the head (the jack's not yours). and re-jack the car this should lift the car to the required height. Extend the jack stands to hold the car at the new height and lower the car on them. As it looks as though I will be doing all this when my screw man arrives (it is now after 3.00PM) I will photograph all this and put out a quick Tee One Topics. | ||
Robert Howlett Experienced User Username: bobhowlett Post Number: 47 Registered: 9-2010 |
thanks Bill cheers rob | ||
richard george yeaman Frequent User Username: richyrich Post Number: 53 Registered: 4-2012 |
Hi all. I do wish i hadnt read all the above posts!! i have been buying parts to do both front and rear suspensions over the winter and was banking on some help from you guys (dont like it when Bill is down beat) some more information on those rubber spring helpers would be usefull where to get them etc. Looking forward to the next episode should be interesting!!! | ||
Jan Forrest Grand Master Username: got_one Post Number: 388 Registered: 1-2008 |
Tackling the rear suspension on a Shadow or derivative is a daunting task not made less so due to the many warnings of dire consequence if done incorrectly. Fortunately it's just one of those tasks that seem almost impossible until you've done one side. After that you wonder what all the fuss was about. Skinned knuckles and inventive swearing is optional, but definitely de rigeur ... The only couple of tips I can give are: Access to an hydraulic jack and a suitable balk of timber can make removing the drive shaft rebound straps easier. Squish them upwards so that they expand laterally giving more room to swing the spanner/socket drive Lifting the rear seat squab will give access to the ends of the rebound strap bolts so that you might want to make a little coffer dam around the exposed threads which can be filled with freeing oil a couple of days in advance to make them easier to unscrew. The rubber spacers (spring assistors) can be obtained from almost any 'good' car spares outlet and, IIRC, the Range Rover ones are an ideal fit/size. However the front springs are a different kettle of fish! Without the correct tool (Tee-One Topics Issue 74, page 1032) the task shouldn't be even considered as a DIY proposition! On the other hand, replacing the shocks (dampers) at each end is the reverse of the above with the fronts being relatively simple, while the rears can be an absolute nightmare (both also covered in Tee-One Topics). On my Shadow 1 these are even worse as there's a 100 litre LPG tank in the way which would have to be removed to gain even the slightest degree of access!!! | ||
richard george yeaman Frequent User Username: richyrich Post Number: 54 Registered: 4-2012 |
Thanks Jan. All information and advice is very much apreciated and i hope it inspires others to tackle this awsome task. Cheers. Richard. | ||
Peter Talbot Prolific User Username: squerryes Post Number: 147 Registered: 7-2010 |
Bill says: Back to lifting the car. This is the most dangerous bit and really requires focussing. Our cars weigh in at about 2.5 tonnes and lifting safely prior to any service is a must. Whilst DIY compromises might seem adequate, a better option might be to see local garage and ask to rent out their lift facilities etc.for a day (try a weekend). Several of us do just this(the Owner is a friend)and we have access to a "state-of-the-art" facility /all tools / etc. from 5.00pm on Friday till 7.30 on Monday. We each chip-in a few �s for the rent but can't afford a fancy decanter so just each bring along a few tinnies to keep us going. | ||
Robert Howlett Experienced User Username: bobhowlett Post Number: 48 Registered: 9-2010 |
Hi Richard.I've been doing the same thing,stockpiling parts for when the holidays start"if anyone gets them theses days"Bills posts are invaluable when it comes to this sort of thing.My tools just arn't up to the task.and Peter's idea of a garage is on my radar.After 2 days of struggling with seized bolts and corrosion ,no doubt from deiceing when the car was in England."Is it true that salt is used?.Anyway back to the subject.I got 1/2 Pi$$ed while under the car and decided to have another go when when more parts arrive. However I rang my son who sells spare parts and opted for the spring spacers only as a makeshift solution as bits of rubber jammed in really dosn't fix the problem."Band Aid" What I did was cut a Landcruier spring spacer and fitted it.It gave 20 mm of lift, probably a waste of time but it felt good. The spring spacers are from Nolathanc Suspension Bushings.part number 47332 0D=158mm lD=98mm h=30mm.www.nolathane.com.au 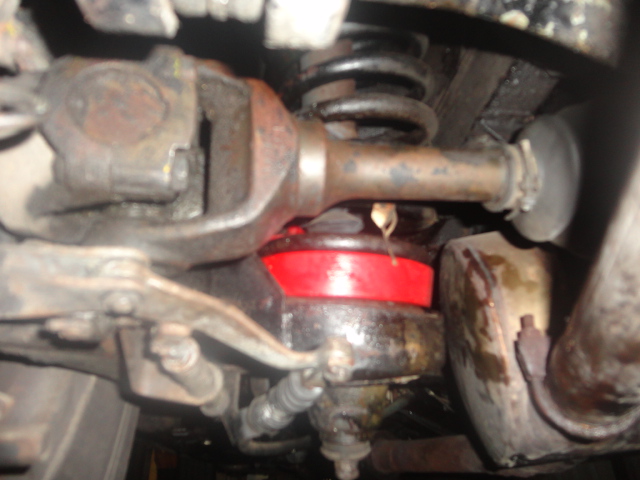 cheers Rob | ||
richard george yeaman Frequent User Username: richyrich Post Number: 55 Registered: 4-2012 |
Hi Rob. Thank you for info much appreciated good photo!! Cheers. Richard. | ||
Robert Howlett Experienced User Username: bobhowlett Post Number: 50 Registered: 9-2010 |
Hi Folks Banging around trying to get those springs out I hit the inner rear guard with a hammer "bad aim". and a huge panit chip fell off. The rear panels are full of rot.A quick phone call to friend and carton of beer secured him for the day.This guy is a wizz when it comes to TIG welding we cut out the area and replaced it with steel after a grind and think coat of spray putty all is well.The other side is just as bad,we'll have a go at it next week.The spring spacers seem to work well, in the photo she has a $100 worth of gas in the tank and she dosn't sit to bad .I took her for a 120 K trip just to try it out to see if they moved but all is well .Has anyone had the rear bumpers re-chromed and repaired In Austrailia? do chromers able to fix rust and take out dents ?.It seems daft to not recondition it before instalation.  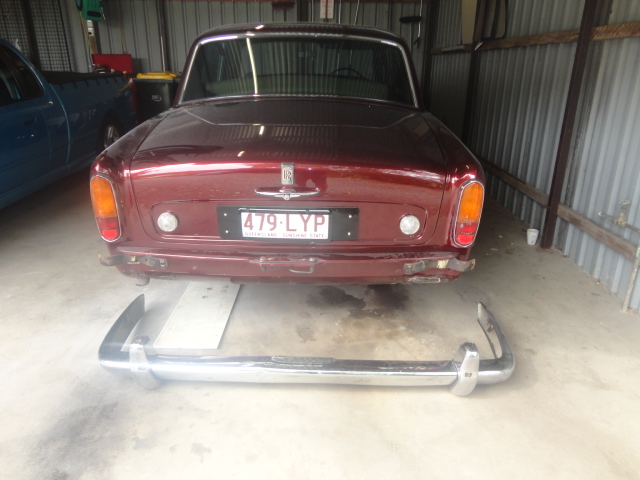  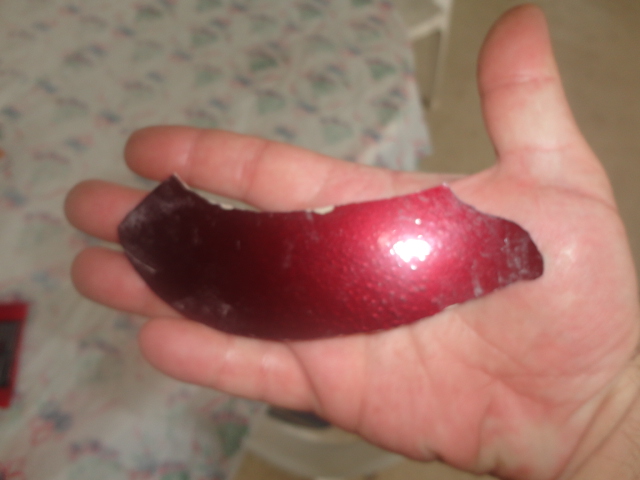 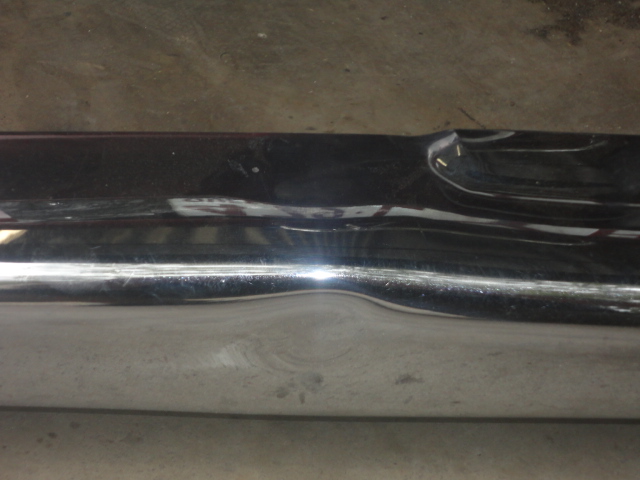 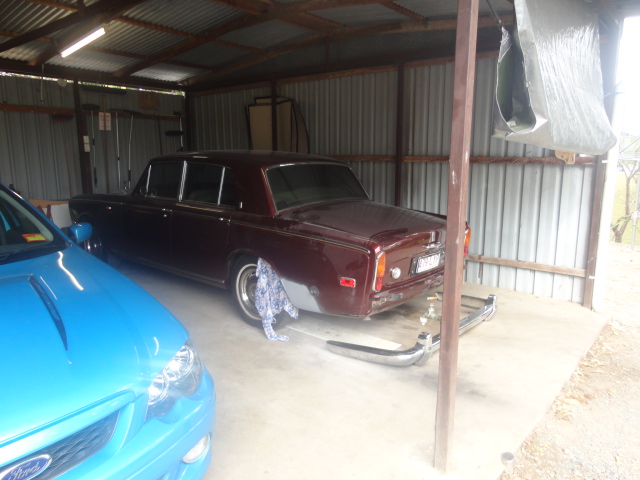 | ||
Robert Howlett Frequent User Username: bobhowlett Post Number: 51 Registered: 9-2010 |
Ops what happend here?. this post is all over the place.. cheers Rob Admin note: When posting images users must ensure that there are two newlines between images, otherwise the images wander off far to the right, which makes the entire thread wide and difficult to read. The previous post has been repaired to reflect this. | ||
Robert Howlett Frequent User Username: bobhowlett Post Number: 52 Registered: 9-2010 |
ohh ok many thanks . cheers rob | ||
David Gore Moderator Username: david_gore Post Number: 1138 Registered: 4-2003 |
Robert, A good panel-beater will be able to remove the rust and remove most dents from the bar sections and over-riders. Remember the dents cannot be "bodged" with filler before electroplating as the entire surface has to be electrically conductive for the plating to occur. Be careful when getting quotes for rechroming the bumper bars; the best method is "tri-plating" which involves a 3 stage process of Copper plating, Nickel plating then Chromium plating with hand -finishing each layer of plating before the next coating is applied. The cost of hand-finishing is up to you depending what standard of final finish you are prepared to accept. Most electroplaters will claim this process is obsolete and try to convince you a two-stage plating process is equally as good - they speak with forked tongue. Tri-plating is more expensive due to the EPA requirements for disposing of spent electrolytes due to their heavy metal content however it gives a better looking and more durable finish. The best sources of information about good electroplaters are local Harley Davidson motor bike restorers and hot-rod clubs not forgetting the respected R-R/B restoration specialists as well. | ||
Robert Howlett Frequent User Username: bobhowlett Post Number: 53 Registered: 9-2010 |
Thanks for the info David.. I'll get on it straight away. cheers rob | ||
Peter Talbot Prolific User Username: squerryes Post Number: 150 Registered: 7-2010 |
Robert David is quite right in saying that rust pits and dents can't be "bodged" as the entire surface has to be electrically conductive for plating to be effected - thought a bit on this: There are 2 possible ways round this problem: Note that for each the surface MUST be absolutely back to clean metal as if there is any remaining rust at the bottom or sides of pits you are wasting your time - I would suggest extensive blasting with a fine grade silicon carbide grit as a final preparation step. 1. Use an electically conductive filler - these are loaded with either a high percentage metallic (preferably silver) component or a high percentage carbon nanotubes component. 2. Use a regular filler then spray with an electrically conductive paint/laquer - this option will give a much cheaper and probably better final finish than 1. above. I'd agree with David that tri-plating is best but would suggest that you get the item/s to a really fine finish before plating and insist on a slow plating rate for each metal with frequent rotations (electroplaters do tend to want to wind up the plating rate as it cuts down plating bath time and find frequent rotations a pain). A slow plating rate along with rotations should result in a fine plate deposition needing little hand finishing between coatings. Peter | ||
Robert Howlett Frequent User Username: bobhowlett Post Number: 54 Registered: 9-2010 |
Thank you gentalmen for the information..Yes this is a learning skill all by itself.How may people would get stuff re-chromed?.People don't generally have things long enough to rust or corrode, a fascinating subgect all by its self.I youtubed a car being "I guess you would call it being painted in chrome.Modern science is wonderfull. cheers rob | ||
Jan Forrest Grand Master Username: got_one Post Number: 391 Registered: 1-2008 |
I may have previously mentioned that I used to work for an electroplating operation back in the 70's. Although putatively employed as a driver there wasn't enough work to take up all my working hours so I was often dragooned into one of the plating shops. I've seen the results of trying to rush a plating job on largeish components. The coverage can complete, but the finish can easily be less than perfect with a distinctly frosty appearance. What most people don't realise is that even a 'perfect' chrome plated finish can still be porous to water ingress. That's why it's just as important to wax polish the chrome as the paint! Just as a poor wood substrate can look even worse after lacquering, so a chromed finish will be unacceptable if the original surface doesn't have a perfect mirror finish before the application of the plating material as expected after. | ||
Robert Howlett Frequent User Username: bobhowlett Post Number: 55 Registered: 9-2010 |
Well shes all good again ... I'd be happy driving the Boss ute around with a patch.but the Rolls no-way".she dosen't leave the driveway un-till she is fully dressed..sounds stupid I know,but thats how I feel about this car.I guess most would agree. cheers rob 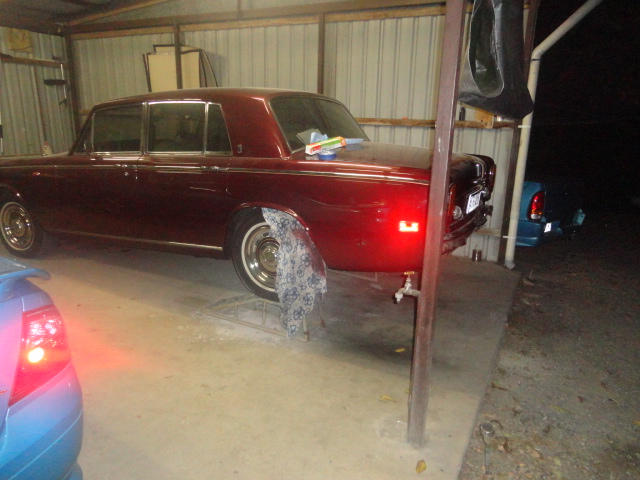 | ||
richard george yeaman Frequent User Username: richyrich Post Number: 58 Registered: 4-2012 |
Hi Rod. Looks great. Take some hammer aiming lessons. Cheers. Richard. | ||
Hubert Kelly Experienced User Username: h_kelly Post Number: 37 Registered: 3-2012 |
Hi Robert, fabulous paint job. HK | ||
Robert Howlett Frequent User Username: bobhowlett Post Number: 56 Registered: 9-2010 |
thank you for the kind comments I do hope this car which was pretty rough might become what a Rolls shoule be .. many thanks. cheers Rob | ||
richard george yeaman Frequent User Username: richyrich Post Number: 60 Registered: 4-2012 |
Well i got it done last week, I used Jans method and fitted two pring assistors per spring hard work but well worth the effort bingo!!! no more saggy bottom. Cheers. Richard. | ||
Robert Howlett Frequent User Username: bobhowlett Post Number: 57 Registered: 9-2010 |
Hi Richard,Hubert... I'm glad it all worked out.Yeh Its sure hard work Phew,..many a cold Ale when the jobs done.. cheers Rob |