| Author | Message | |||
Alan H Olden Experienced User Username: alan_olden Post Number: 17 Registered: 5-2009 |
Hi All I am in the process of re chroming the brightwork on my James Young Bentley S1. I have removed all the main components; however the electroplater requires all the grille vanes be removed from the main grille assembly prior to re chroming. Has anyone undertaken this task - remove all the grille vane rivets and re assemble?. Whilst sourcing a quality complete secondhand unit ex UK is feasible, the lowest cost option could be the disassembly / re assembly? -if I can manage the realignment properly. Any suggestions welcome thank you A | |||
Carl Heydon Prolific User Username: car Post Number: 103 Registered: 2-2004 |
I thought the vanes were stainless? | |||
David Gore Moderator Username: david_gore Post Number: 2160 Registered: 4-2003 |
Carl, So do I - the early shells and vanes were Nickel Silver which was replaced in the 1930's with "Staybite" stainless steel [type 302] first marketed by the Firth Brown Steel from Sheffield. | |||
Christian S. Hansen Grand Master Username: enquiring_mind Post Number: 352 Registered: 4-2015 |
If you do a disassembly, consider numbering the vanes so that they go back in the precise same locations. It is also possible that at some point in the past the stainless or nickle silver has been chrome overplated. Until now I have never given it a thought, but my recollection is that my Silver Dawn may also have chrome vanes, as there is a small spot at the inside edge of one vane, about the size of a pea, where it "looks" like the "plating" is missing. Such would not be the appearance were the vanes either stainless, or nickle, so bottom line is that in some cases and for whatever reason, original or not, vanes may be found to be plated, and thus eventually, as Alan has found, need to be replated, which brings him back to the original question...how to disassemble and then reassemble, and in the case that it is found to be necessary. | |||
Carl Heydon Prolific User Username: car Post Number: 104 Registered: 2-2004 |
Being a Bentley, the shell is chrome plated brass. The stainless vane assembly should just unbolt as a unit and is then easier to polish. | |||
David Gore Moderator Username: david_gore Post Number: 2162 Registered: 4-2003 |
As far as I am aware, laboratory electroplating a metal [not stainless steel] with stainless steel is possible but not feasible commercially as the plate has to be a homogeneous composite of Iron, Nickel and Chromium to resist corrosion and remain adhered to the base metal. As far as Christian's Silver Dawn vane goes, I suspect the "plate" abnormality is possibly due to a localised corrosion site from an adherent acidic deposit. Further to removing and replacing the vanes, this will be a difficult proposition depending on whether the vanes have been riveted, soldered or welded in position. If soldered, heat distortion would be a major concern when melting the soldered joint when removing and replacing the vanes. If spot welded, the welds most likely would have to be drilled out to remove the vanes and welding/rivets/resoldering/adhesive bonding used to replace the vanes in position - all methods would be likely to require time-consuming and difficult rectification to restore the original pristine appearance. In this case, having new radiator components made might well be a less expensive option otherwise leave the radiator "as is" and accept the visual differences as "patina of age" commensurate with use of the vehicle during its life. | |||
Christian S. Hansen Grand Master Username: enquiring_mind Post Number: 354 Registered: 4-2015 |
David... Thank you for the positive observation regarding the blemish on my vane. I trust that you are probably correct. I really never gave it much though other than when it burned itself into my eyes every time I washed the baby. I will now take a closer look in the hope that it may indeed buff out with the appropriate tool. | |||
christopher carnley Unregistered guest Posted From: 86.176.214.122 |
Yes, I have done 3 or 4 R Type and S1, and you have to dismantle the parts as the chrome salts do not deposit metal around inner corners. You have to drill lots of tiny rivets out and great care is required. You will find that all the parts are stamped R and L with the number of the vane from the centre. Right of course is the drivers side (UK) or on the left if looking from the front. I reassembled all mine using very short POP rivets from about 3/32" up,but if you have a fly press you may use very short brass rivets if you can find any. (Message approved by david_gore) | |||
Alan H Olden Experienced User Username: alan_olden Post Number: 18 Registered: 5-2009 |
All - that is most helpful guidance - Thanks. Having had the unit unbolted on the bench now I will have a go at some manual polishing / buffing first. Rectification by disassembly may not be worth the effort given its complexity and risk if a decent polish fixes the majority of blemishes etc. | |||
David Gore Moderator Username: david_gore Post Number: 2169 Registered: 4-2003 |
Alan, If you can put some images up of the blemishes, I may be able to help with some advice on methods and materials for restoring the items. If you are using buffing mops and polishing compound, you need to be extremely careful with mop selection and application pressure to avoid localised heating of the base metal with consequent distortion problems. | |||
Chris Browne Prolific User Username: chrisb Post Number: 263 Registered: 2-2010 |
I, too, thought that the vanes were stainless steel but on our 1958 Cloud 1, the vanes are brass which has been chrome plated as the brass is visible through the plating in small areas where the plating has been over polished. Kind regards, Chris | |||
Alan H Olden Experienced User Username: alan_olden Post Number: 19 Registered: 5-2009 |
Firstly apologies for the delayed response - have been away / offline . I have attached a photograph below that illustrates the current finish on the grille vanes. Some surface discolouration is evident and your are right any tools that cause surface heating will create more of a problem. My approach has been to start by hand.
| |||
David Gore Moderator Username: david_gore Post Number: 2258 Registered: 4-2003 |
Alan, The material coating the bottom of the vanes appears to be a build-up of calcium from evaporation of "hard water" initially deposited on the vanes. Are you aware of the car having been in locations where "hard water" was part of the environment? If they are Calcium deposits, removing them without affecting the stainless steel is a quick and easy procedure. However, one look is worth a thousand words and my interpretation of your image may not be correct. | |||
Alan H Olden Experienced User Username: alan_olden Post Number: 20 Registered: 5-2009 |
David, - not sure of the full history though most of the past decade car has been undercover. Could easily have been stored outside in earlier times? Anyway I have found a chrome polish and started to buff up the vanes - slowly. The tarnish is coming off - centre vane. Carefully. Will post a picture when complete
| |||
Alan H Olden Experienced User Username: alan_olden Post Number: 21 Registered: 5-2009 |
As per above, i have been able to get the finish up to a high standard by hand polishing and using a chrome polish - . Fortunately no overheating and discolouration. Not back to 'new' but very very much improved now - image quality somewhat reduced to fit onto site. Chassis No B488AN 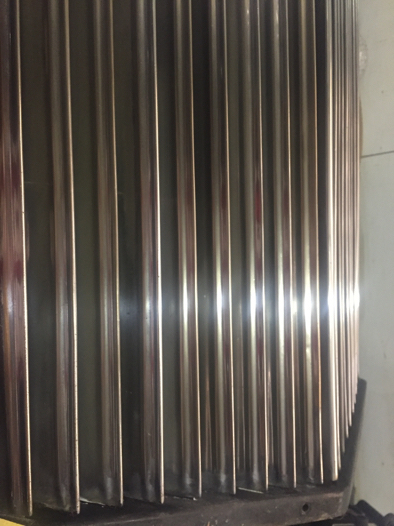 | |||
Paul Yorke Grand Master Username: paul_yorke Post Number: 1688 Registered: 6-2006 |
Looking good  Stainless of great quality is such a pleasure and so rewarding to polish. It will improve with each (laborious) round of polishing. Stainless of great quality is such a pleasure and so rewarding to polish. It will improve with each (laborious) round of polishing. As a youngster a chrome shop owner told me to wipe the new chrone with engine oil and leave it to soak in. It fills any microscopic holes. Works with aged chrome after cleaning to. Leave it for as long as you can then wipe it off and then wax it. I've done it, but never tested it. | |||
David Gore Moderator Username: david_gore Post Number: 2322 Registered: 4-2003 |
Alan, Congratulations on your patience and dedication to doing things properly - the end result is a tribute to you. Paul, The oil treatment is OK for a plated finish as it has microscopic pores and filling the pores will reduce any tendency for corrosion in an aggressive environment. However, for stainless steel, the reverse applies. Stainless steel requires access to oxygen in the air to form a very thin layer of Chromium Oxide on the metal surface and it is this film that provides the characteristic stainless steel resistance to corrosion. Using oil or any other coating can stop the formation of this protective layer and lead to corrosion from a process known as differential aeration. The best maintenance technique technique for stainless steel is to avoid the creation of surface deposits on the surface by regular washing with water and mild detergent. If you get a discolouration due to water stain, this is best removed by a water, detergent and whiting paste which is applied, allowed to dry and polished off with a clean cheesecloth pad. If you can buy a paste product sold in Australia as "Gumption" in the UK, this is my product of choice for cleaning stainless steel as it is easy to apply and doesn't scratch the surface which is essential for mirror-finished surfaces. This product is made by Clorox and reported sold in the UK in a liquid spray pack but not the paste. It can be purchased on-line through Ebay. Be wary of similar products containing pumice instead of whiting as these WILL scratch the stainless steel surface. I do not recommend using residual polishes on stainless steel as they prevent the natural oxidation essential for maintaining the metal's corrosion resistance 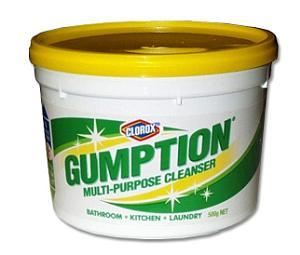 I cannot recommend Gumption highy enough for cleaning all stainless steel surfaces. |